Introdução

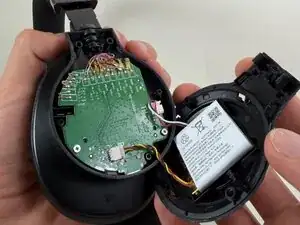
The JBL Live 660NC headphones (also known as JBL Live 660 NC or JBL Live 660NCBT) may require a motherboard replacement if you attempted to repair it's battery, drivers, or charging port. This guide will teach you on how to properly replace the motherboard in case of a short in the motherboard, lifecycle ending, or improper care. Always be careful when performing any step in this guide, as the motherboard is a fragile part of any electronic device.

Check out this guide to safely desolder components before proceeding.

  1. B5HuACXNCsFyqYeU
    B5HuACXNCsFyqYeU
    IPJAF2FKMZ6OdAse
    tneCbGYBypLqJVMn
    • The battery is located in the left earcup. All steps in this guide must be performed on the left earcup.

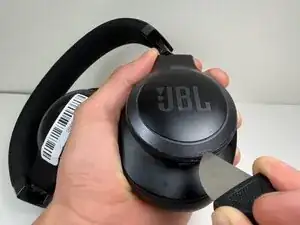
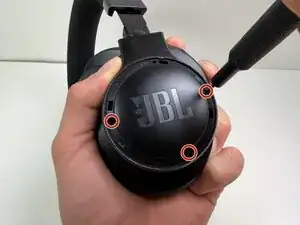
    • Use a Jimmy or spudger to pry the bezel around the JBL plate.

    • Gently slide the tool around the edges to loosen the clips.
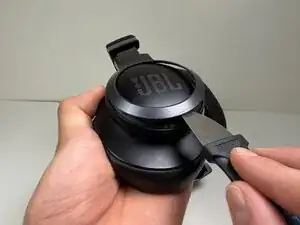
    • Lift the bezel off.

  2. uFthSdKDXHPkXT2j
    • Remove the three 5 mm screws with a Phillips #00 screwdriver.

  3. RExKTp4tOOXwIGYp
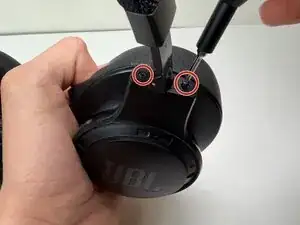
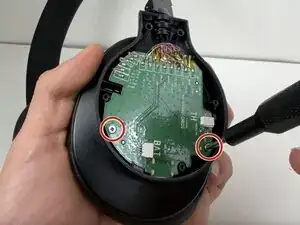
    • Use a Tri-point Y0 screwdriver to remove the two 5 mm screws at the base of the headband where it connects to the earcup.

  4. vW5wZceCQoJXvlBV
    vW5wZceCQoJXvlBV
    Rv3yAXSItBsVVUBh
    NHauO6FNGmbOaLsr
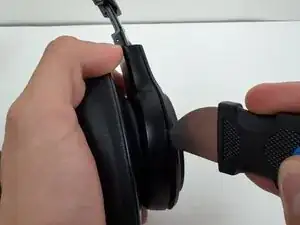
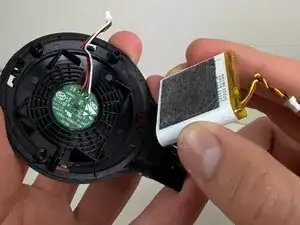
    • Use a nylon spudger or Jimmy to pry the earcup cover.

    • Gently slide the tool around the edges to loosen the clips holding the cover in place.
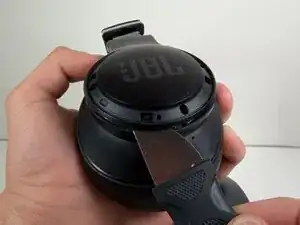
    • Lift the cover off.

    • Don't pull the cover off. The cover is still connected to the headphones by the battery cable.

    • Avoid using metal tools near the battery and other internal components Puncturing or shorting the battery can cause a fire or injury. Use a plastic or nylon opening tool instead.

  5. 32G5KPERLOfNd5Hq
    32G5KPERLOfNd5Hq
    A6Ru2NOCWLqKoqq5
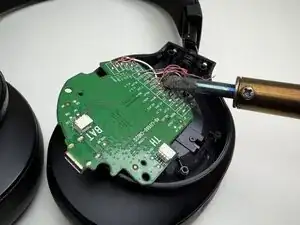
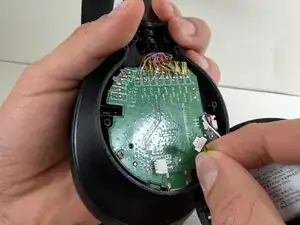
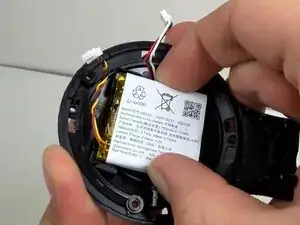
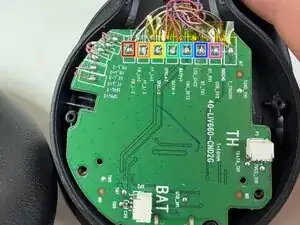
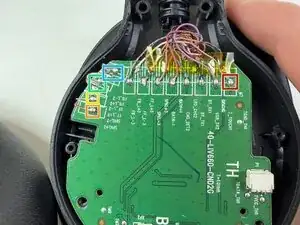
    • Use a spudger to push the connector labeled BAT from the socket on the motherboard to disconnect the battery cable

    • Don’t pull on the wires—this can damage the connector and the device.

  6. lFnFB3TZCZT2Ge3V
    lFnFB3TZCZT2Ge3V
    ECd3ptV441sABusO
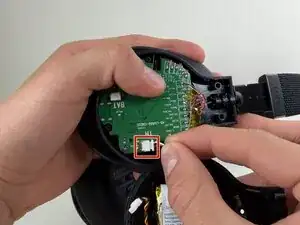
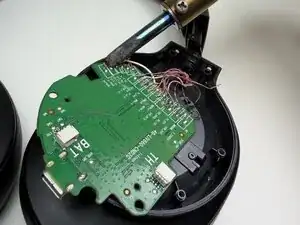
    • Use the tip of the spudger to push the plastic locking tab away from the socket labeled TH—it should only move about 1–2 mm.

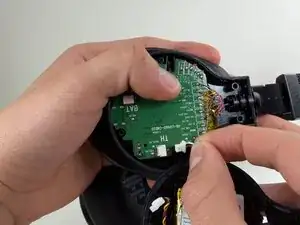
    • Carefully remove the cable connector from the socket on the board.

    • Avoid pulling on the wires, and don’t twist or bend them.

  7. OUiMiVFv1KLnuVCP
    OUiMiVFv1KLnuVCP
    CTwwGmXreF1F6CWi
    • Remove the battery from the inside cover.

    • If the battery looks swollen, don't attempt to remove it. Check out the What to Do With a Swollen Battery guide for additional information and instructions.

  8. bsAbLKSXRkrPbmuC
    • Remove the two 5 mm screws with a Phillips #00 screwdriver.

  9. OqjRT6fWijtZ1ers
    • Take a clear photo of the wire connections before desoldering. This will help you remember where each wire belongs when you install the new motherboard.

    • Gold and blue wire

    • Golden Wire

    • Mandarin Wire

    • Red Wire

    • Blue Wire

    • Black Wire

    • Pink Wire

  10. Njp6UJqlaHLgPI1Y
    • Take a clear photo of the wire connections before desoldering. This will help you remember where each wire belongs when you install the new motherboard.

    • Cooper wire

    • Red wire

    • Gold wire

    • White wire

    • Black wire

  11. 2dGtVG4wZS2QQVI3
    2dGtVG4wZS2QQVI3
    n6SpH5XJkeXyioRB
    • Use a soldering iron to carefully desolder and remove each wire from the motherboard.

    • If you’re not familiar with desoldering, refer to the How to Solder and Desolder Connections guide for instructions.

    • The soldering iron gets very hot. Handle it carefully to avoid burns or damage to the components.

  12. LwNRnUyjUwdNKoS6
    • Remove the motherboard from the headphones.

Conclusão

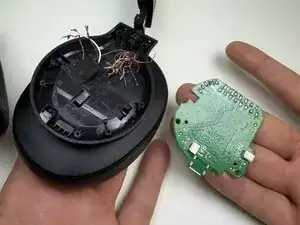
To reassemble your device, follow these instructions in reverse order. Take your e-waste to an R2 or e-Stewards certified recycler.

Alexander Diaz

Membro desde: 01/10/25

221 Reputação

0 comentários