
Introdução
Siga as dicas deste guia se você não souber com certeza como aplicar tiras adesivas cortadas sob medida em seu dispositivo. O adesivo pode ser para uma tela, tampa traseira, bateria etc. Leia o guia completo antes de aplicar quaisquer adesivos.
Se o guia de reparo do dispositivo contiver instruções específicas para o uso de adesivos, essas instruções terão preferência.
Para smartphones da linha Samsung Galaxy S, vá para este guia.
Para iPhones, vá para este guia.
Para iPads, vá para este guia.
Se estiver usando adesivos normais da tesa, vá para este guia.
Ferramentas
-
-
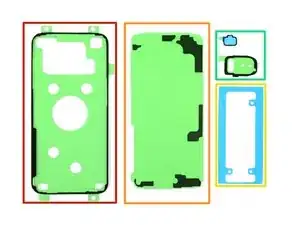
Olhe para suas tiras de adesivo pré-cortado e analise para que são usadas.
-
Adesivos para tela ou tampa traseira — geralmente têm a forma do dispositivo
-
Adesivos de suporte da tampa traseira — esses correspondem aos contornos de componentes que se encontram instalados sob pressão na tampa traseira
-
Adesivos para baterias — normalmente eles têm borda retangular no formato aproximado da bateria do smartphone
-
Adesivos de componentes — eles possuem bordas delineadas para servir em vários componentes, tais como câmeras e sensores de impressão digital, para os quais foram concebidos
-
-
-
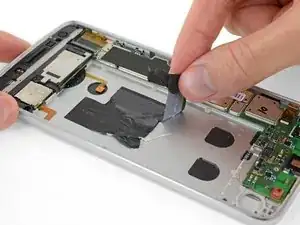
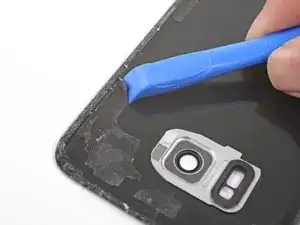
Remova pedaços maiores de adesivos com os dedos, a espátula, a ferramenta de abertura de plásticoo ou pinças.
-
Use solvente de cola ou álcool isopropílico de alta concentração (>90%) para remover resíduos de superfícies metálicas. Esfregue em um sentido com um pano que não deixe fios ou um filtro de café até todos os restos de adesivo desaparecerem.
-
-
-
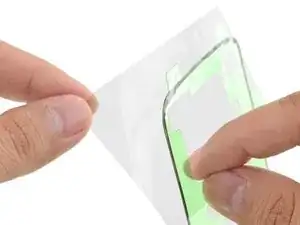
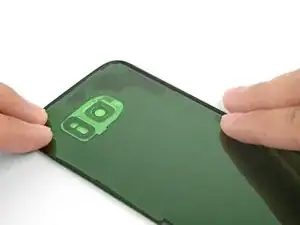
Antes de começar a descascar a película de proteção, procure a superfície à qual o lado incolor deverá aderir.
-
Para facilitar a aplicação do adesivo, você pode deixar a tira alinhada na posição certa no smartphone e, então, virar para baixo uma ponta, a fim de fixar a tira em sua posição. Isso lhe permitirá descascar as películas de proteção e descobrir o adesivo sem perder o alinhamento.
-
Quando você tiver uma boa ideia de como a tira adesiva deve ser colada na superfície, descasque a película de proteção incolor.
-
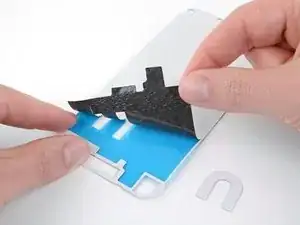
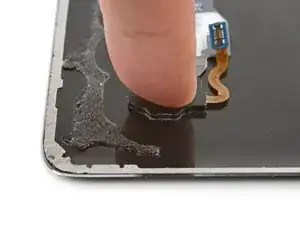
Descasque cuidadosamente a parte central de ambas as camadas, a branca (de papel) e a preta (de adesivo), começando pelo recorte em U (caso presente).
-
Descasque e remova a película de proteção de papel, descobrindo por baixo desta o adesivo.
-
-
-
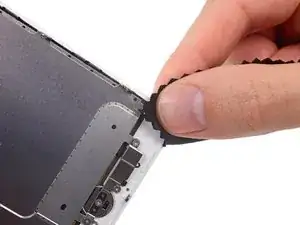
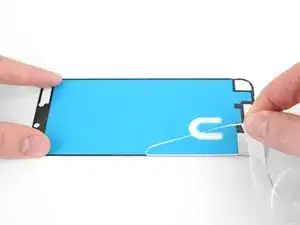
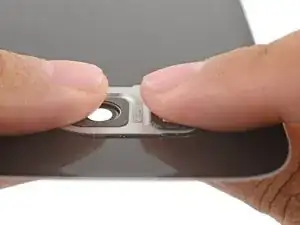
Segura a tira descoberta por suas abas e alinhe cuidadosamente uma longa ponta do adesivo à ponta da tampa traseira.
-
Coloque o adesivo sobre a superfície e pressione-o firmemente contra a superfície usando os seus dedos.
-
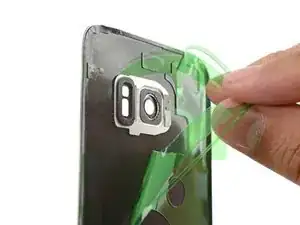
Descasque e remova a película de proteção colorida da faixa adesiva para descobrir o adesivo aplicado.
-
-
-
Pressione a outra superfície firmemente contra o adesivo exposto por 20 a 30 segundos.
-
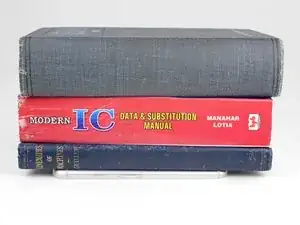
Se você estiver colando adesivo numa tela ou numa tampa traseira, empilhe alguns livros sobre o smartphone por algumas horas para reforçar a união adesiva.
-
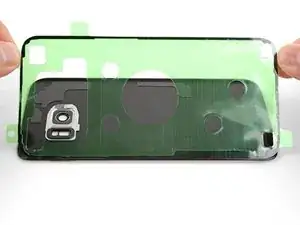
Quando aplicado de forma certa, o adesivo deve funcionar seguramente por um longo tempo.
O reparo não recupera a resistência à água do dispositivo. Tenha cuidado para não expor o dispositivo a líquidos.

9 comentários
Diese Anleitung sollte im Akku-Tausch Tutorial verlinkt sein und auch in der Produktbeschreibung. Ich habe diesen Artikel erst gefunden, nachdem ich die Rückseite schon befestigt hatte (zum Glück richtig).
Although obvious to anyone who has used this type of strip, I didn't realize it until my first experience gluing a screen into my phone: the adhesive is ONLY the black goo attached to the strips. Once you peel off the clear side, place the strip and then peel off the coloured side, all that's left is the black goo, hopefully exactly where it needs to be. Mine could be carefully re-aligned with tweezers as necessary before setting the screen into place.
Chris -
What's the popular recommendation regarding how long to leave weight on these pre-cut adhesive strips?
It merely says 'a few hours'?
Is it okay to check on it or is it like opening the oven door?
Eldon -
It's okay to check, and 2 hours is usualy plenty enough.
If you're installing a screen, you might need to cut out a hole on the backing so that you can attach the first side, and attach the screen ribbon connector through the hole before removing the second backing.
Asela Gunawardana -
I don't understand how one-sided adhesive is supposed to make the screen stick on. It needs to be double-sided adhesive, not one-sided. One side has to stick to the back of the screen and one side has to stick to the frame. This display adhesive I have is one-sided, unless I'm doing something wrong.
Google Pixel 3a Display Adhesive - Genuine
Tim Davenport -
I've got one for a Pixel 4a here, but the same general scheme should apply: They are double sided adhesive. One sticky side sticks to the clear plastic film and the other sticky side sticks to the colored plastic film. However, the packaging of them should have been better. They were just loosely thrown into the box and some of them came off their supporting film, sticking to the packaging and each other.
Art -