Introdução

  1. hkSGmHZLDDpJoskA
    • Open the battery cover and remove the AA battery.

  2. UDU2Aj21jikAJHZb
    UDU2Aj21jikAJHZb
    eHjxUauxM2F4f2Px
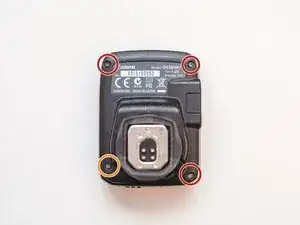
    • Remove the three long screws from the top-left, top-right, and bottom-right corners.

    • Remove the short screw from the bottom-left corner.

  3. 6VS1vx2MbE2oRoXA
    6VS1vx2MbE2oRoXA
    t1KnTQMXql3os2aT
    • Pull the two halves of the device apart, but don't try to separate them entirely yet. Cables connect the two pieces.

    • Remove the battery cover from its hole.

    • Disconnect the sliding connector.

    • Remove four screws.

    • Desolder the ground pin. The hot shoe can now be removed.

  4. yCrF5a1GUkDPjyr1
    yCrF5a1GUkDPjyr1
    ZFevHjBjhKECvJBw
    142JJKjJLMC4pQwl
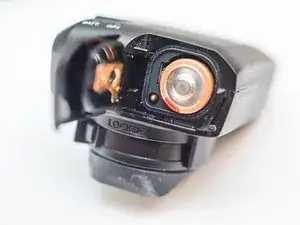
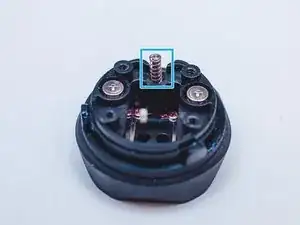
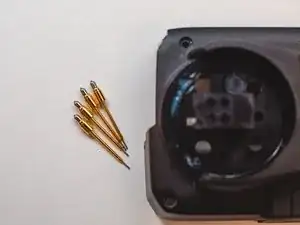
    • Remove the lock pin with the spring by unscrewing the screw.

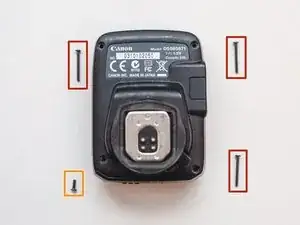
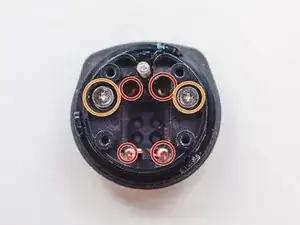
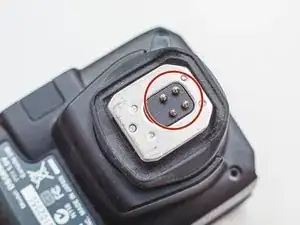
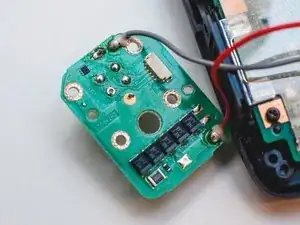
    • Remove the four screws with smaller heads from the bottom, then remove the hot shoe and the metal shield.

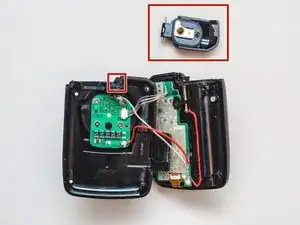
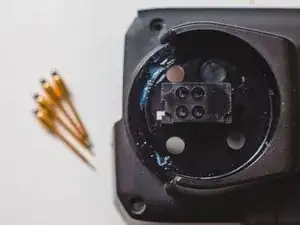
    • Remove the screws with bigger heads that have springs attached.

    • Be gentle when you take out the screws. Do not strip the screws.

  5. XgLNh2ChysiLLClG
    XgLNh2ChysiLLClG
    l5XNNaqwTSAlnaKV
    • Next remove pins.

    • Desolid four pins

    • Remove PCB.

  6. a1bKhy5wHHTayQSM
    a1bKhy5wHHTayQSM
    JZHaMPsp1BReZb1r
    yrGktJbWPhW11IAI
    • Remove PCB

    • Remove pins from case

Arsen

Membro desde: 14/01/20

145 Reputação

2 comentários

Volgens mij is stap 5 te vroeg afgebeeld. Ik moet de schroefjes van de metalen voet aandraaien, maar kan dat als alleen de rode groundpin is losgesoldeerd?

Louis Dederen -

Hi mate @louisdederen

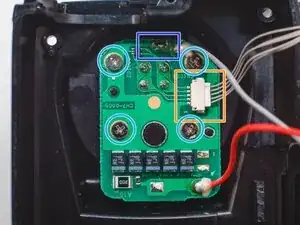
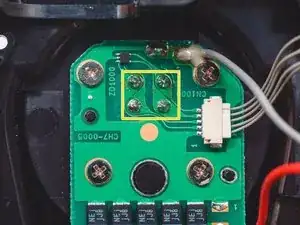
For removing hot shoe part you should desolder gnd pin and unscrew 4 screws over PCB, pins you may to remove in case if you want to remove PCB from housing

Arsen -