Introdução

  1. G3lZHQ5QO6S4OCxK
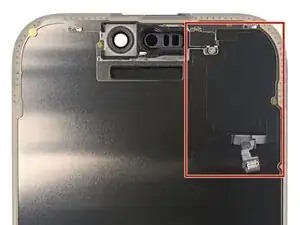
    • The ambient light sensor is located behind the screen, next to the cut‑out for the Face ID sensors.

    • Check if the replacement screen comes with one installed. If it does, click here to skip the next twelve steps.

  2. MSAFPVUtdZEOgBgp
    MSAFPVUtdZEOgBgp
    gMTcZufkooKHd2eh
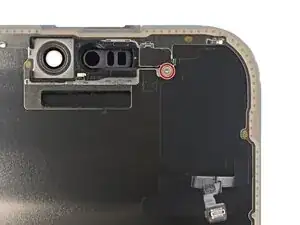
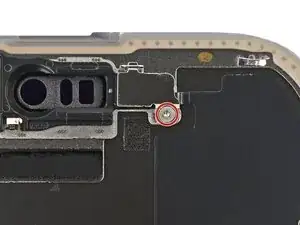
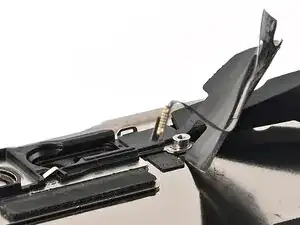
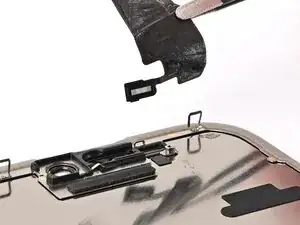
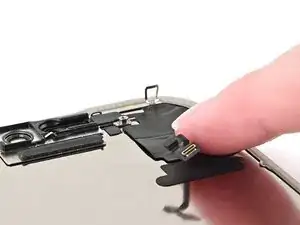
    • Use a tri‑point Y000 driver to remove the 1 mm‑long screw securing the bracket on the ambient light sensor.

    This is not a Phillips head screw, but another Y000.

    Dustin Hanson -

  3. VZYJcl2bxOUVbUAj
    VZYJcl2bxOUVbUAj
    QPuJjBjRtLqwKsnV
    • Use a pair of tweezers or your fingers to lift and remove the ambient light sensor bracket.

  4. ZIYU5uGFjTTI6dIe
    • Use a hair dryer, heat gun, or iOpener to soften the adhesive under the ambient light sensor and ambient light sensor cable.

  5. ZOBUHIyIiuhf5wkV
    ZOBUHIyIiuhf5wkV
    eDGX4KnG6W4aPRo1
    5AwePfbxRWfIRwPr
    • Be careful and work slowly—the cable is extremely delicate, especially near the sensor. Don't try to lift the sensor itself yet.

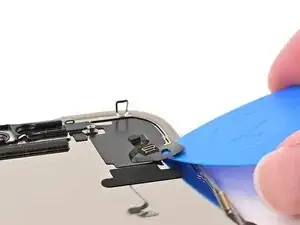
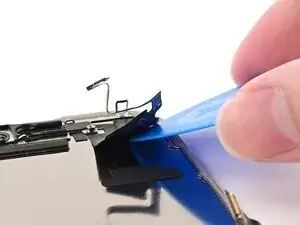
    • Slowly slide an opening pick under the ambient light sensor cable, starting under the connector at the bottom and working upwards until the cable is free from the screen.

    • If the adhesive doesn't peel up easily, apply more heat.

  6. ygTD3EcTVC1FNuP2
  7. VKsrjMEAOiLZOmCE
    VKsrjMEAOiLZOmCE
    EBmWCBFHqGhmqYTU
    tKKSQOBdeKrj4KOH
    • Work slowly to avoid tearing the thin cable attached to the ambient light sensor. If it feels stubborn, apply more heat instead of using more force.

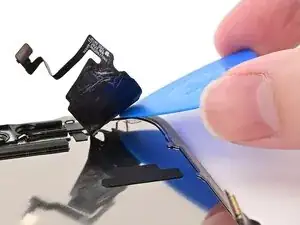
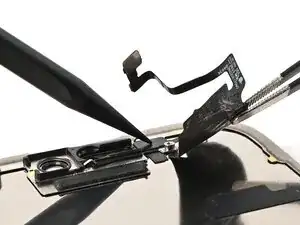
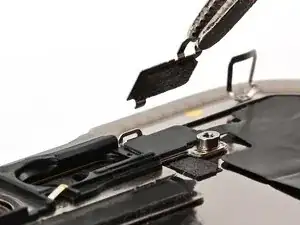
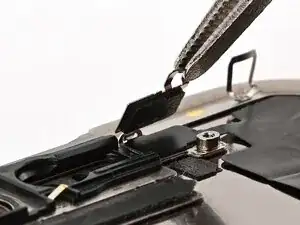
    • Use the flat end of a spudger to slowly pry up the ambient light sensor from the side with the protruding cable.

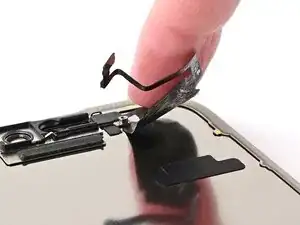
    • Remove the ambient light sensor.

  8. 54skDeDwke6IWZHV
    • Use tweezers to reposition any adhesive that may have covered the ambient light sensor during removal. The adhesive should form a border around the raised rectangle.

    • If the adhesive was damaged or stayed with the old screen, replace it with a 1 mm wide strip of thin, double-sided tape along its top border.

  9. pklatwsnxYKENaiU
    pklatwsnxYKENaiU
    teiZHcZCsaJI15XA
    • Align the ambient light sensor with its recess in the back of the screen.

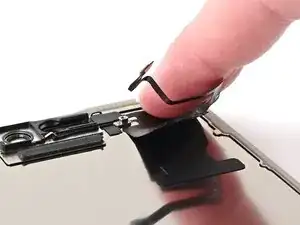
    • Use a spudger or your finger to press the ambient light sensor into its recess.

  10. pMr6QkkcqeFmUARI
    • Use a hair dryer, heat gun, or iOpener to soften the adhesive under the ambient light sensor and its cable. It only needs to be warm—not hot.

  11. MTGDIUXG3SBVkM3S
    MTGDIUXG3SBVkM3S
    IQfJ2oB4cLxJagt3
    eKbtNeOnJbsmodf6
    • Use your finger to press down the ambient light sensor cable.

    • If the ambient light sensor cable isn't sticking, apply a few small pieces of thin, double‑sided tape, like Tesa tape, to the back of the sensor cable.

  12. JcEVbOJIgBxKqvgM
    JcEVbOJIgBxKqvgM
    6EAvSlCG2TBOOLpL
    ESJU4yHDU53UrJbZ
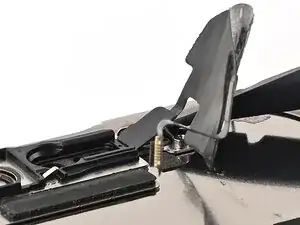
    • Use tweezers or your fingers to hook the ambient light sensor bracket over the back of the sensor and set it into place.

  13. tTTrTsykvPSqmOQp
    • Use a tri‑point Y000 driver to install the 1 mm‑long screw securing the bracket on the ambient light sensor.

    Same as my comment above, the screw is a Y000.

    Dustin Hanson -

    Thank you, the relevant steps have been updated.

    Nick Schultz -

Nick Schultz

Membro desde: 24/03/24

45909 Reputação

0 comentários