Introdução
Use este guia para substituir o conjunto do botão home.
Observe que somente conjuntos do botão home originais do telefone serão capazes de usar o sensor de impressão digital Touch ID . Ao instalar um botão home novo, você só restaura as funções normais do botão home, e não os recursos do Touch ID.
Você também pode usar este guia para substituir as seguintes peças:
-
-
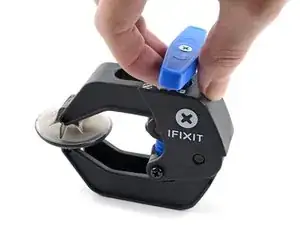
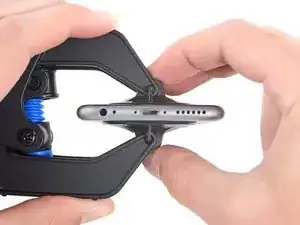
Puxe a pega azul para trás para destravar os braços do Anti-Clamp.
-
Deslize os braços pela borda esquerda ou direita do seu iPhone.
-
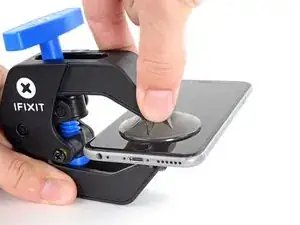
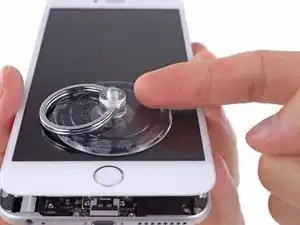
Posicione as ventosas próximo à borda inferior do iPhone, diretamente acima do botão home - uma pela dianteira e a outra pela traseira.
-
Aperte as ventosas uma contra a outra para aplicar sucção na área desejada.
-
-
-
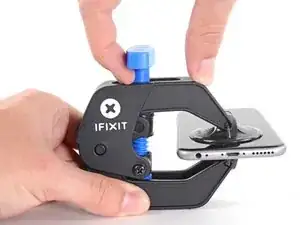
Puxe a pega azul para a frente para travar os braços.
-
Gire a pega 360 graus no sentido horário até que as ventosas comecem a se esticar.
-
Insira uma palheta de abertura sob a tela quando o Anti-Clamp tiver formado um vão grande o suficiente.
-
Pule as próximas três etapas.
-
-
-
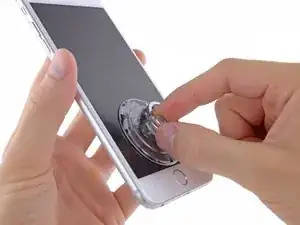
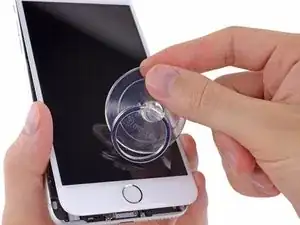
Caso você não tenha uma iSclack, use somente uma ventosa de sucção para levantar o painel dianteiro:
-
Pressione uma ventosa de sucção contra a tela, na área diretamente acima do botão home.
-
-
-
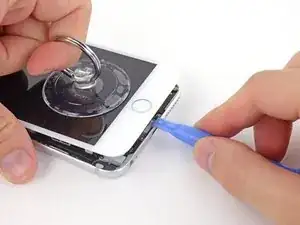
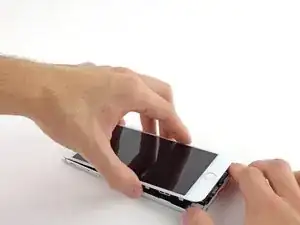
Enquanto pressiona o iPhone para baixo com uma mão, puxe a ventosa de sucção para cima, de modo a separar suavemente o conjunto painel dianteiro da estrutura traseira do dispositivo.
-
Usando uma ferramenta de abertura de plástico, comece a mover vagarosamente a estrutura traseira do dispositivo para baixo enquanto continua puxando para cima o conjunto do display com a ventosa, até separá-los um do outro.
-
-
-
Puxe o bico de plástico para liberar o vácuo da ventosa.
-
Remova a ventosa de sucção do conjunto do display.
-
-
-
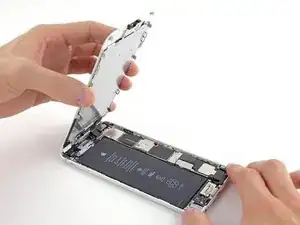
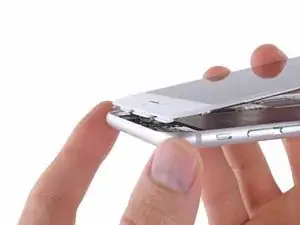
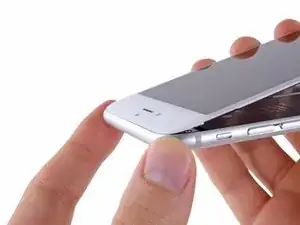
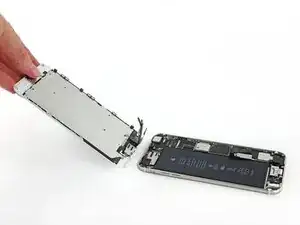
Usando a parte superior do telefone como uma dobradiça, puxe a extremidade do botão home do conjunto do painel dianteiro para fora da estrutura traseira.
-
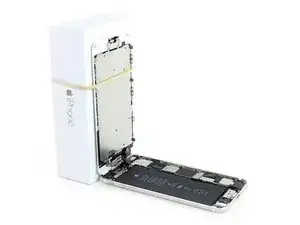
Abra o display até um ângulo de cerca de 90º e o apoie em algo para sustentá-lo enquanto você executa o trabalho no telefone.
-
Engate uma faixa de elástico para fixar seguramente o display enquanto você trabalha. Isso previne uma tensão indevida nos cabos do display.
-
-
-
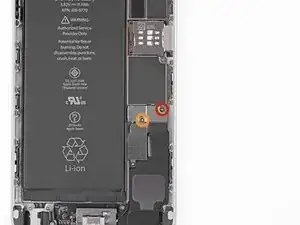
Remova os seguintes parafusos Phillips do tipo #00 do suporte do conector da bateria:
-
Um parafuso tipo #00 de 2,3 mm
-
Um parafuso tipo #00 de 3,1 mm
-
-
-
Use uma ferramenta de abertura de plástico para desprender cuidadosamente o conector da bateria do seu soquete na placa lógica.
-
-
-
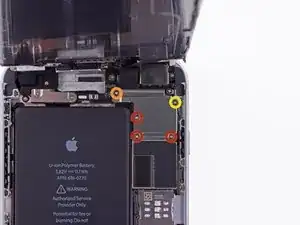
Enquanto mantém o painel dianteiro aberto num ângulo de cerca de 90º, remova os seguintes parafusos que seguram o suporte para o cabo do conjunto painel dianteiro:
-
Três parafusos tipo #00 de 1,2 mm
-
Um parafuso Phillips tipo #00 de 1,5 mm
-
Um parafuso Phillips tipo #00 de 2,9 mm
-
-
-
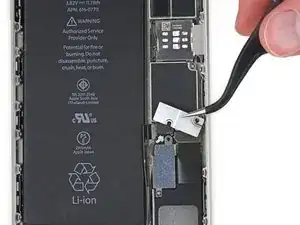
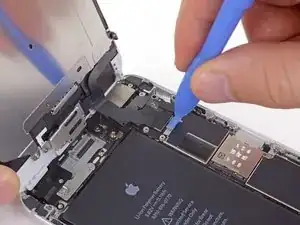
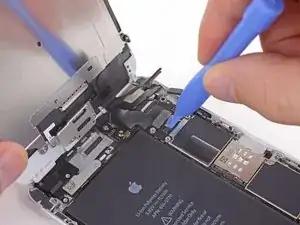
Enquanto ainda segura o painel dianteiro, use uma ferramenta de abertura de plástico para desconectar o conector do cabo da câmera frontal e do alto-falante auricular.
-
-
-
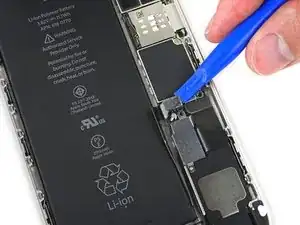
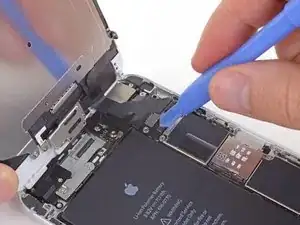
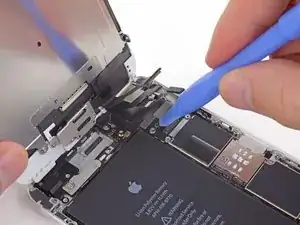
Use uma ferramenta de abertura de plástico para desconectar o conector do cabo do botão home.
-
-
-
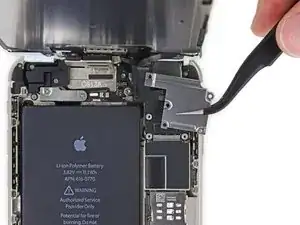
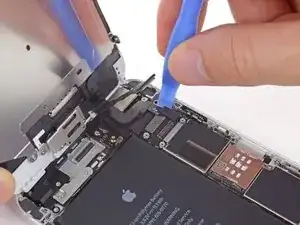
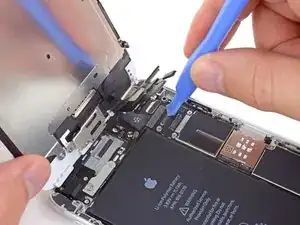
Use uma ferramenta de abertura de plástico para desconectar o conector do cabo de dados do display.
-
-
-
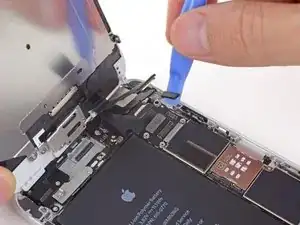
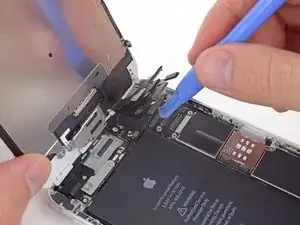
Finalmente, use uma ferramenta de abertura de plástico para desconectar o conector do cabo do digitalizador.
-
-
-
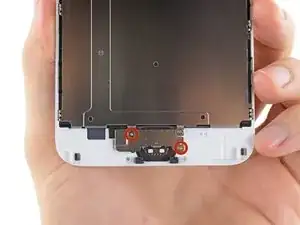
Remova os dois parafusos Phillips de 1,8 mm que seguram o suporte do botão home no painel dianteiro.
-
-
-
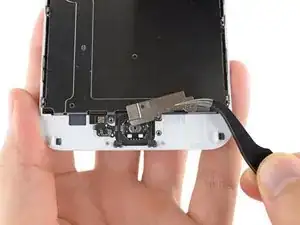
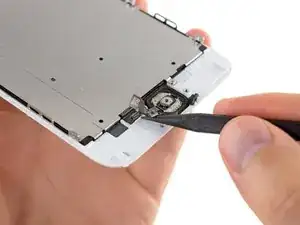
Use a ponta fina de uma espátula para desconectar o conector do botão home de seu soquete localizado ao cabo do botão home.
-
-
-
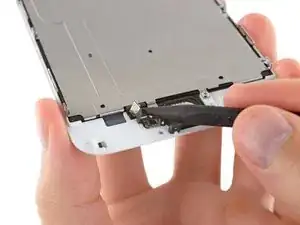
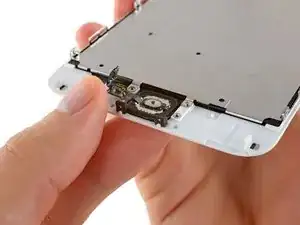
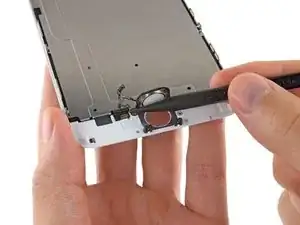
Cuidadosamente, force a ponta fina de uma espátula por baixo do cabo do conector do botão home.
-
Lentamente, desloque a espátula ao longo do cabo do conector do botão home para separá-lo do material adesivo que o segura no conjunto painel dianteiro.
-
-
-
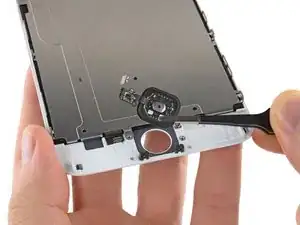
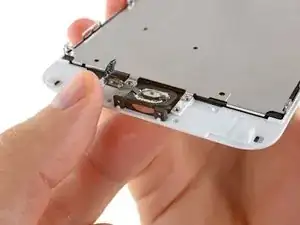
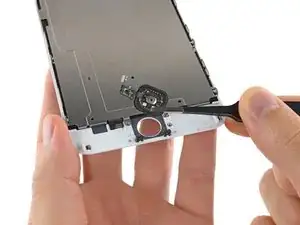
Usando a ponta do dedo, pressione cuidadosamente para cima, mas não remova, o botão home do lado oposto para liberar uma borda da vedação do botão home do painel dianteiro.
-
-
-
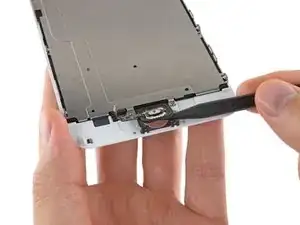
Cuidadosamente, corra a ponta fina de uma espátula por baixo do contorno do botão home para separá-lo do conjunto painel dianteiro.
-


Para montar novamente seu dispositivo, siga estas instruções na ordem inversa.

24 comentários
My iphone was screen broken and i change it with a original complete iphone screen, the home button works fine but the touch id dont work. I change the home button to the one that i have in the broken screen and still the touch id dont work. What can i do to fix the touch id?
replace the flex cable which connects touch ID cable with mother board
Hi guys, I replaced my front assembly and I'm having the opposite issue with my home button: The TouchID is working fine, but the home button being pressed is not working. I've tried re-seating the cable a few times. I'm normally pretty good at these kinds of things but I'm assuming I may have somehow crimped one of the ribbon cables.
My question: If something is damaged, is it more likely the cable on the back of the heat-sink that is damaged, or the home button ribbon cable itself? I realize that I will lose TouchID if its the latter, I just want to know what my options are. I'm having trouble searching the issue because everyone else has the issue where the TouchID doesn't work (for obvious reasons) but mine is working just fine.
Thanks for any advice.
Hi everyone, I replaced the home button on my cell phone iphone 6+, the home button functionality works just fine, however the biometrics fingerprint reader does not work anymore. Any suggestions? Thank you
Unfortunately, as stated in the introduction to this guide, that outcome is normal. For security reasons, the fingerprint sensor is coded to your phone's logic board at the factory. If you replace the button, you'll lose the fingerprint sensor function. Only Apple has the capability to pair new Touch ID sensors to existing phones. As far as I know, there are only two ways around this: (1) replace both your home button and logic board with a factory-paired home button and logic board harvested from another phone, or (2) pay Apple for an out-of-warranty repair (meaning you ship your phone to them and they give you a refurb in return).
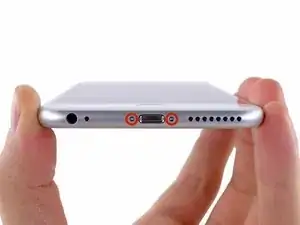
Pentalobe P2
Enea Del Lama -
I prefer to remove the SIM card as the very first step since it's safer to do so while the phone is fully assembled.
estebanfallasf -
I stripped one of the two screws - at a dead stop.
Margaret Patterson -
Before you even start: get the iOpener or hairdryer out. You’ll need it
GPZ -
If a lightning connector won’t provide a charge or needs to be wiggled carefully to provide a charge, power off the device, then try using precision tweezers to scrape the innermost wall of the lightning jack in a pinching motion to check for lint buildup. Pocket lint or other debris can accumulate inside the jack, compacting each time a cable is inserted. This can prevent a lightning cable from seating fully. Clearing the lint may restore functionality without replacing the part.
Andrew Dolan -
A few hints:
* heating up the phone works great. I used a heating pad that you put in the microwave to heat sports injuries.
* also, I made a sheet to help you keep track of the screws as you remove them. Print out the page, then place double sided tape below each color-coded listing of screws, and stick the screws to the tape as you disassemble. This helps prevent losing the screws and keeps track of what screws are what for easier reassembly. https://drive.google.com/file/d/1pLSvKvB...
Paul Faul -
Additional hints, for anyone who needs them:
* stick the screws to the tape in the same positions as they are shown in the guide. This will make it easier to identify them during reassembly.
* if the screws get mixed together, the ‘mm’ (millimetre, millimeter) measurements given in the guide can be used to identify them. Compare the lengths of the threaded shafts to each other to determine which screw is which.
Friendly Advice -