
Introdução
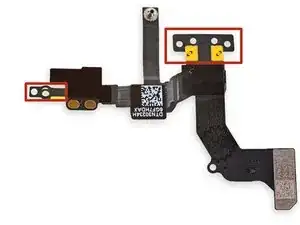
A câmera frontal e o microfone traseiro estão instalados em um só cabo e precisam ser substituídos juntamente. Use este guia para remover este conjunto.
Você também pode usar este guia para substituir o suporte da câmera frontal.
-
-
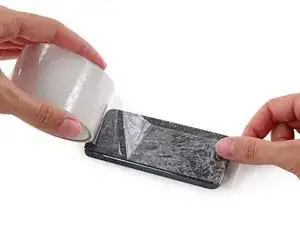
Coloque tiras sobrepostas de fita adesiva transparente sobre a tela do iPhone até que toda a superfície fique coberta.
-
-
-
Desligue o seu iPhone antes de começar a desmontagem.
-
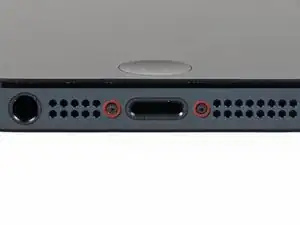
Remova os parafusos pentalobe de 3,6 mm próximos ao conector Lightning.
-
-
-
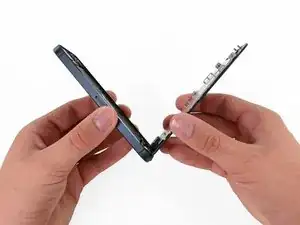
Independente da ferramenta que você use, você precisa puxar para cima com segurança o visor inteiro.
-
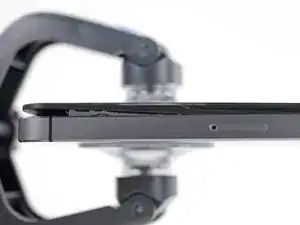
Se o vidro começar a se separar do plástico, como mostra a primeira figura, passe uma ferramenta de abertura de plástico por entre a moldura de plástico e o corpo metálico do fone para liberar os clipes metálicos da estrutura.
-
-
-
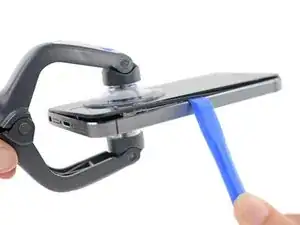
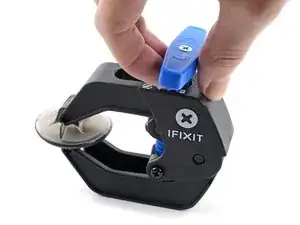
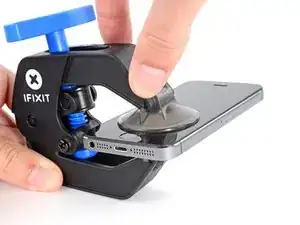
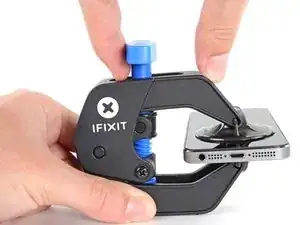
Puxe a pega azul para trás para destravar os braços do Anti-Clamp.
-
Deslize os braços pela borda esquerda ou direita do seu iPhone.
-
Posicione as ventosas próximo à borda inferior do iPhone, diretamente acima do botão home, - uma pela dianteira e a outra pela traseira.
-
Aperte as ventosas uma contra a outra para aplicar sucção na área desejada.
-
-
-
Puxe a pega azul para a frente para travar os braços.
-
Gire a pega 360 graus no sentido horário até que as ventosas comecem a se esticar.
-
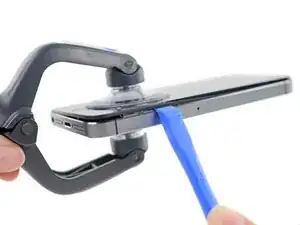
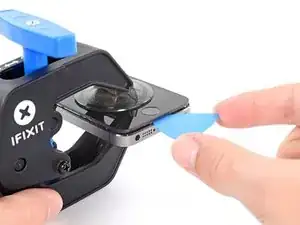
Insira uma palheta de abertura sob a tela quando o Anti-Clamp tiver formado um vão grande o suficiente.
-
Pule as próximas duas etapas.
-
-
-
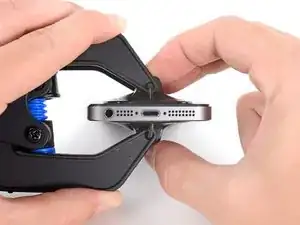
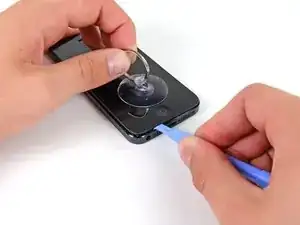
Enquanto segura o iPhone com uma mão, puxe para cima pela ventosa de sucção para separar ligeiramente o conjunto do painel dianteiro da estrutura traseira.
-
Com uma ferramenta de abertura de plástico, comece a fazer alavanca para baixo na estrutura traseira, afastando-a da tela, enquanto puxa para cima com a ventosa de sucção.
-
-
-
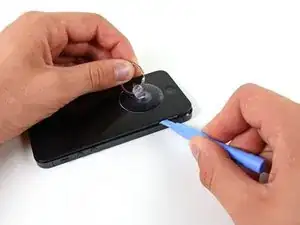
Continue a liberar as laterais do conjunto painel dianteiro, desprendendo os clipes ao longo dos lados esquerdo e direito.
-
-
-
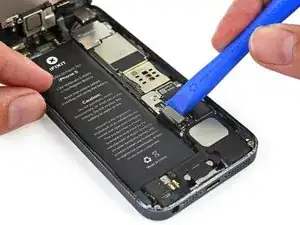
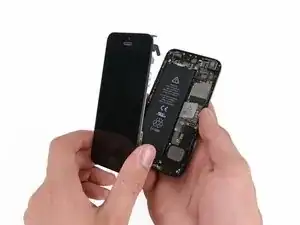
Uma vez soltos os clipes na parte inferior e nas laterais do conjunto do painel dianteiro, puxe a parte inferior do conjunto, afastando-o da estrutura traseira.
-
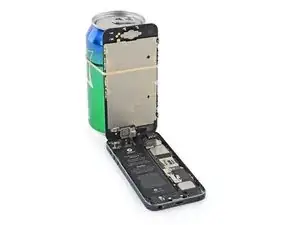
Abra o visor a um ângulo de 90º e apoie-o em algo para deixá-lo de pé enquanto você executa os trabalhos no fone.
-
Engate uma fita de borracha para manter o visor no lugar com segurança enquanto executa os trabalhos. Isso evita que os cabos do visor sejam submetidos a uma tensão imprópria.
-
-
-
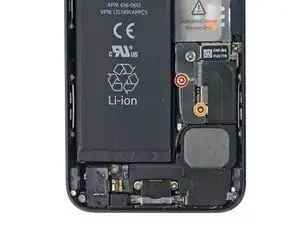
Remova os seguintes dois parafusos que fixam o suporte metálico do conector da bateria à placa lógica:
-
um parafuso Philips de 1,8 mm
-
um parafuso Philips de 1,6 mm
-
-
-
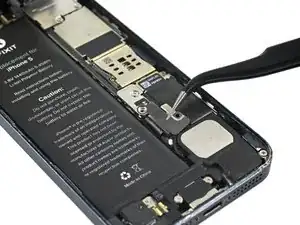
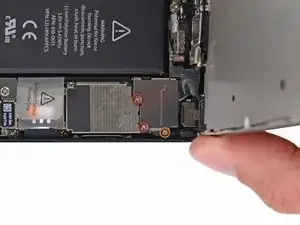
Com uma ferramenta de abertura de plástico, erga com cuidado o conector da bateria de seu soquete na placa lógica.
-
Tenha muito cuidado para erguer somente o conector da bateria e não o soquete na placa lógica. Se você fizer alavanca no soquete da placa lógica ou na placa inteira, pode ser que você destrua o soquete ou danifique componentes adjacentes na placa.
-
-
-
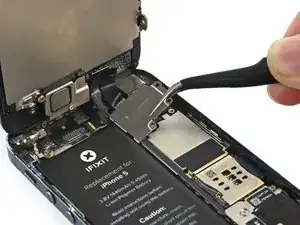
Remova os seguintes parafusos que fixam o suporte de cabos do conjunto do painel dianteiro na placa lógica.
-
dois parafusos Phillips de 1,2 mm
-
um parafuso Phillips de 1,6 mm
-
-
-
Erga o suporte do cabo do visor em direção à bateria para desengatá-lo e remova-o do iPhone.
-
-
-
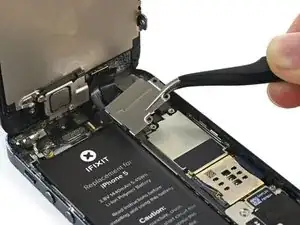
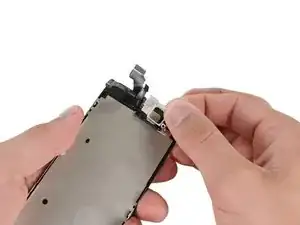
Com uma ferramenta de abertura de plástico ou uma unha, desconecte os três cabos do conjunto do painel dianteiro:
-
Cabo da câmera frontal e dos sensores
-
Cabo da tela LCD
-
Cabo do digitalizador
-
-
-
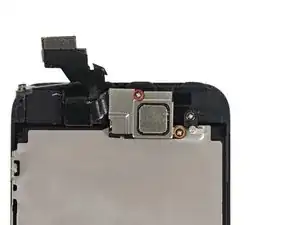
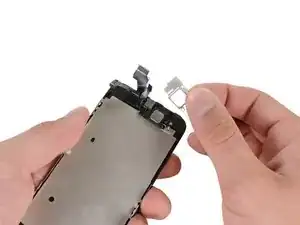
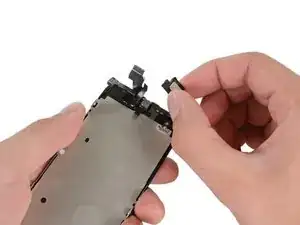
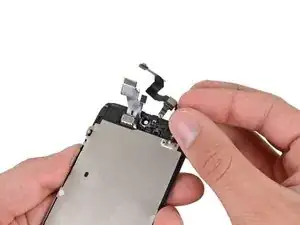
Remova dois parafusos que fixam o suporte da câmera frontal ao conjunto do display.
-
Um parafuso Philips 4,1 mm
-
Um parafuso Philips 2,2 mm
-
-
-
Existe um pequeno espaçador preto de plástico debaixo do suporte metálico no parafuso de cima. O parafuso de cima atravessa primeiro o suporte metálico e, então, o espaçador de plástico.
-
-
-
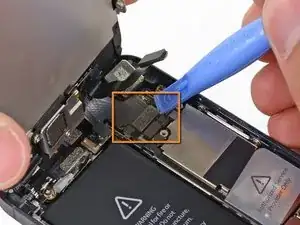
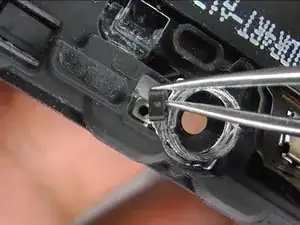
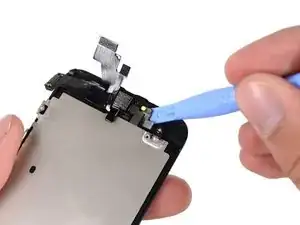
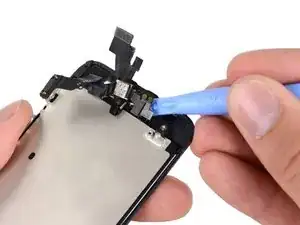
Começando pelo lado de baixo dos contatos do alto-falante auricular, use uma ferramenta de abertura de plástico ou a ponta de uma espátula para liberar o cabo da câmera frontal do conjunto do display.
-


Para montar novamente seu dispositivo, siga estas instruções na ordem inversa.

11 comentários
Image #1
EditStep 14
There is a small, black plastic spacer underneath the metal bracket at the upper screw. The upper screw goes I need buy where I get this item lost
Hi, I have replaced the cable two times with no luck (camera and auto brightness work fine but not the proximity sensor. I ended up changing the complete screen assembly and still the same (camera and autobrightess, but no proximity sensor). Also, it's not software related, I have tried everything: Hard reset, recovery, configuration as new phone, etc.
This looks like there's something wrong in the main board?
did you find any solution?
I did this repair with a new cable bought from ifixit. I had previously replaced my earpiece speaker but didn't get my sound back. After replacing the cable though I have sound! But it appears that the dimming sensor might be faulty on the new cable, and I don't know if the internal screws could handle another opening.
A litte disappointed that I paid $25 to fix one thing but have another break.
Anyone else have this issue and any ideas?
Well at least I can hear through my earpiece again.
Having completed this repair using the rear camera part from Ifixit I have to comment that the camera is noticeably lower quality. Its not huge - You don't notice it looking at the photos scaled down to fit but viewing one for one there is significant detail lost. My staff member has an Iphone 5 bough at exactly the same time as mine so I was able to take a photo side by side on his and mine after my repair and when you view 1 for 1 pixel in product boxes on mine the text was just a colored blur where on his although you couldn't read the text it was more obviously text. Overall though its still better than having a camera that wouldn't focus at all and being that Apple seem to refuse to supply genuine spare parts (Which there has to be a low against??? - Imagine if a car manufacturer did that) its still good buying one from someone who gives good support. At the end of the day its a phone camera not an SLR and its still better than the older Iphone 4 camera.
matt -
The majority of product manufacturers are not required to provide parts, and apple will fix items under the various warranties it offers. Car manufacturers on the other hand are required to make parts available by law. It is part of the regulation of their industry. They get a lot of protection for their business model, but have some obligations too. It's why the EV1 was pulled, they didn't want to have to make the parts, and why there are so many Delorian parts.
William Leeper -
This is a great guide. However, I'm having a hard time popping the screen back into place. Everything works but I'm afraid of putting too much pressure least I crack it again. Any advice?
amciotola -
To avoid broken screens during reassembling:
Put the hooks of the screen in the right place in the housing, then close it loose, don't press it. Turn your phone upside down with the screen on a very flat surface (e.g. table). Now press the housing on the screen -> no more risk for braking the screen because of inhomogeneous force applied on the glass!
mondbewohner -
I hope folks read this comment before proceeding to attempt a Sleep/Wake button repair on the iPhone 5! Apple has an iPhone 5 Sleep/Wake button replacement program, free, for iPhone 5 devices manufactured through March 2013. See program details at https://www.apple.com/support/iphone5-sl.... Don't do this yourself if you don't need to. It's a difficult repair.
Mark Luscher -
I was willing to add the following important remark on top of this guide but, strangely, it has been refused! Here it is:
---
*Check if your Iphone 5 is eligible to the Apple special program for a free battery replacement (devices sold between September 2012 and January 2013, within a limited serial number range).
* If not, watch the video and use this guide [video|https://www.youtube.com/watch?v=6ogE8USs...]
---
And thus, as my Iphone 5 was eligible, I went to the Apple store of Le Louvre in Paris and the battery has been changed for free instead of 65 euros. Thanks to Mark!
revher -
Hi every one i drop my iphone5s 16gb
I replace 10!new screen but cant back to live i see on the "logic board" where u conect the screen i se damage HOW CANT FIX THAT WHITOUT LOST MA DATA ??? Thaks for anny hellp!!!!!
aliroberto01 -
Steps 12-15 seem to be not necessary for battery replacement. They are not required to remove and replace the battery and they at least DOUBLE the amount of work. Most of the time spent on this process involved working with those tiny screws and maneuvering them in place and screwing them down. Steps 12-15 are three of the five screws that you work with inside.
Also, there should be a note at the beginning of Step 2 that if you bought the iFixit kit that you should go directly to Step 6.
Bob Hatcher -
please wear safety helmet too, integral helmet and cover mouth with an N95 facemask underneath, just in case the battery punctures, explodes, you knock your head back to the wall and slam it back forward hitting the screw in your eye and and inhaling toxic fumes! can never be too careful ;-)
ibisiki -