Introdução

Use este guia para substituir uma tela quebrada em seu Nokia G42 5G.

Este guia foi escrito para o conjunto de tela do Nokia G42 5G genuíno. O conjunto consiste na tela e na estrutura intermediária juntas em uma só peça. Certifique-se de que você possui a peça certa antes de começar este reparo.

Observação: este procedimento requer que você transfira peças internas de seu fone para o conjunto novo.

Para a sua segurança, desligue o seu fone e deixe a bateria descarregar até menos de 25% antes de começar este procedimento. Isso reduz o risco de incêndio se a bateria for danificada acidentalmente durante o reparo. If your battery looks puffy or swollen, take extra precautions.

  1. yYQ6qGyQNpqMLcoF
    yYQ6qGyQNpqMLcoF
    XNH2gbIeZ1RHHTHJ
    1BD21FnNeEjKwZ1a
    • Desligue o seu fone e desplugue todos os cabos.

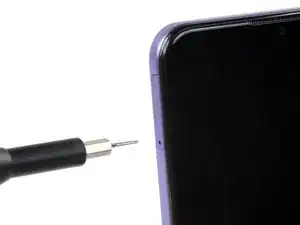
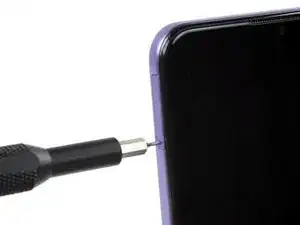
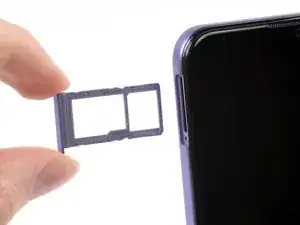
    • Insira uma ferramenta de ejetar cartão SIM, uma ponta de chave ou um clipe de papel no pequeno furo junto à bandeja do cartão SIM, na borda esquerda superior do fone.

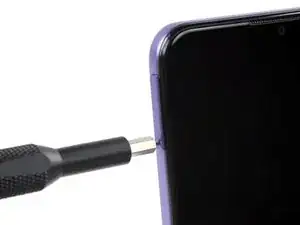
    • Pressione firmemente para ejetar a bandeja.

  2. k2rvJtswfCkP5XcD
    k2rvJtswfCkP5XcD
    puH6IMoSLvlHK1u2
    Xpk1DKxrhWWgSb15
    • Remova a bandeja do cartão SIM.

    • Ao instalar um cartão SIM ou um cartão microSD, certifique-se de que eles estão na orientação certa e repousando completamente rentes às bordas da bandeja antes de inserir a bandeja novamente no fone.

  3. DcfRScakK4xxeOHx
    DcfRScakK4xxeOHx
    yLyvFhejJWVloHys
    XYxm4Kww3dTymCFn
    • A tampa traseira está fixada em seu lugar por meio de clipes de plástico.

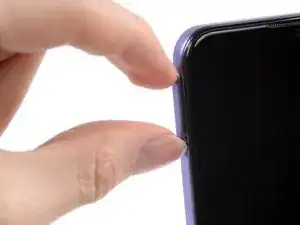
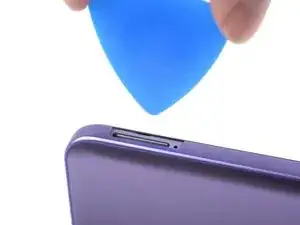
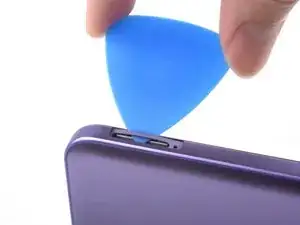
    • Insira uma palheta de abertura abaixo do pequeno entalhe da cavidade da bandeja do cartão SIM.

    With the phone flat, screen up, insert the pick into the slot horizontally, then rotate the pick to the upright position, as shown in the photo in step 4.

    robincm -

    With the phone laying flat on its back, insert the pick into the slot horizontally, then flip the pick upright, as per photo in step 4.

    robincm -

    Don't try to fully remove the back cover just yet, as it's still connected with a cable.

    Jørn Gunnar Skorgevik -

  4. VCxbKwUYJgkOIsOq
    VCxbKwUYJgkOIsOq
    jIuqFPM5oBLQUoXK
    Ok5rCKgiWAhNjv1A
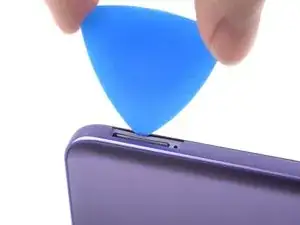
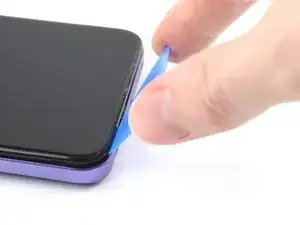
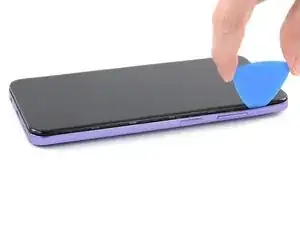
    • Posicione a palheta de abertura com um ângulo acentuado para baixo, entre a tampa traseira e o conjunto da tela.

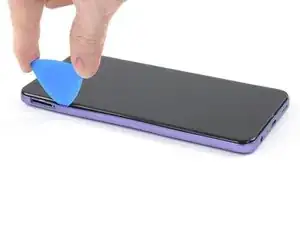
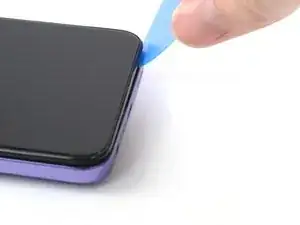
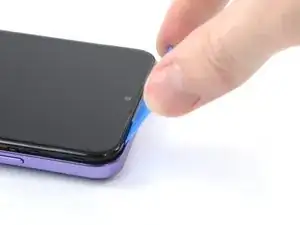
    • Puxe a palheta de abertura para baixo, fazendo-a deslizar ao longo da borda esquerda do fone para soltar os clipes de plástico.

  5. pBdsHuUO3RLSbJ6C
    pBdsHuUO3RLSbJ6C
    AlQtypblRfyUkIVN
    5t5wigJKiUOBiFCQ
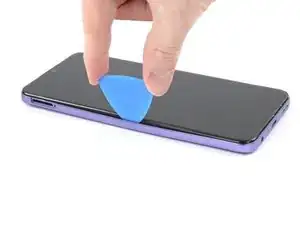
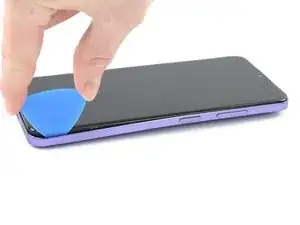
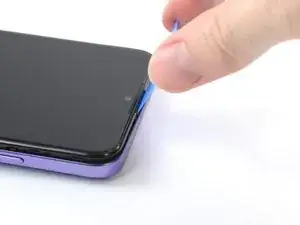
    • Vire a palheta de abertura no canto e continue puxando-a ao longo da parte inferior para soltar os clipes de plástico.

  6. KUVdsvTTbxKHwinN
    KUVdsvTTbxKHwinN
    aMguRVvUCQ1AZVGD
    jKGNCJYY4ElX6euH
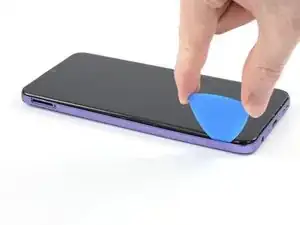
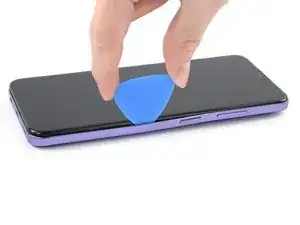
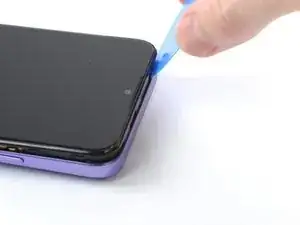
    • Puxe a palheta de abertura, fazendo-a deslizar ao longo da borda direita para continuar soltando os clipes de plástico.

    Fingerprint-cable is easily broken. Careful around that button.

    Jørn Gunnar Skorgevik -

    Broke off the volume button replacing the backpanel. Any recommendations on replacing the button part?

    Ewout S -

  7. U1rVXPHGUwQiiITP
    U1rVXPHGUwQiiITP
    fGt4ioXofJGeJsZL
    4BCJZNvBqdpqlX3E
    • Puxe a palheta de abertura, fazendo-a deslizar ao longo da borda superior para soltar os clipes de plástico restantes.

    • Ainda não tente remover totalmente a tampa traseira, pois ela ainda está conectada com um cabo.

  8. Vo1EJIRTFXRtnYPW
    Vo1EJIRTFXRtnYPW
    L4MdSHEM5X3kXSRr
    Atr4Cg31YOT6Hec4
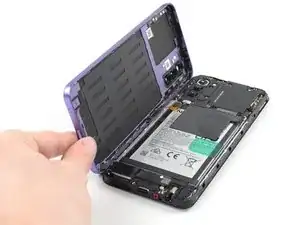
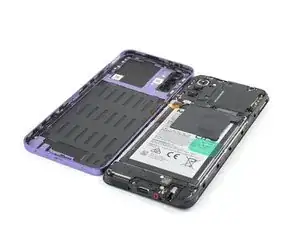
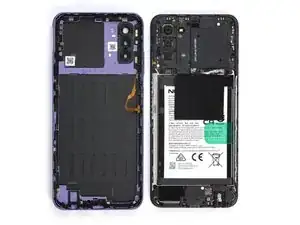
    • Com o fone deitado com a tela virada para baixo, eleve cuidadosamente a borda direita da tampa traseira, abrindo-a como um livro.

    • Tome cuidado para não esticar ou romper o cabo do leitor de impressão digital fixado durante este procedimento.

    • Deposite a tampa traseira logo ao lado do fone.

    Das ist nicht das Kabel für den Fingerabdrucksensor, sondern für den Ein-/Ausschalter und der Schalter hat sich bei mir gelöst und es hat mir einige Nerven gekostet das Maleur wieder zu beheben. Der Schalter ist nur sehr lose eingeclipst und muss dann zum Drehen und befestigen des Kabels am Motherboard mit dem Vorderteil gedreht werden.

    Holger La -

  9. yY5ZXQoNaXyRiPZ5
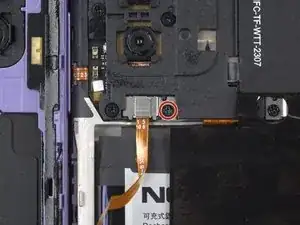
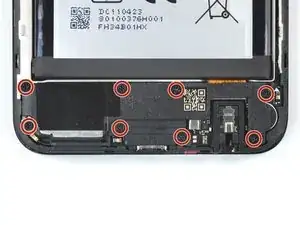
    • Com uma chave Phillips, remova o parafuso de 3,8 mm que está fixando o suporte do leitor de impressão digital.

  10. XnpfXQAqqVOjhkTn
    XnpfXQAqqVOjhkTn
    OP3IHr2ygLRRT1yA
    afSWqrK1dIwhgrab
    • Com uma pinça ou os seus dedos, remova o suporte do leitor de impressão digital.

    • Tome cuidado para não perfurar a bateria com ferramentas pontiagudas. Uma bateria perfurada ou enrugada pode liberar substâncias químicas perigosas ou causar incêndios.

    • Durante a remontagem, certifique-se de empurrar a ponta do suporte de volta ao seu alojamento, que fica abaixo da tampa da placa-mãe.

    The metal fits under the black plastic near the screw shown to the left of the photo. When re-assembling, insert it back under here first, then lower the right-hand side back into place.

    robincm -

  11. kCJZGIvNxNIYcW43
    kCJZGIvNxNIYcW43
    y1xFc4sxpolQIKVW
    yA3fRk4RswXB2b1I
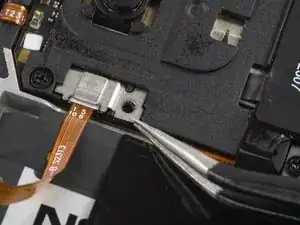
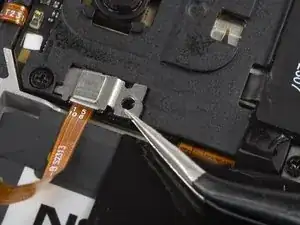
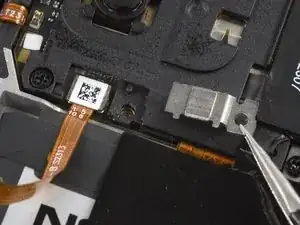
    • Use a ponta pontiaguda de uma espátula para desconectar o leitor de impressão digital fazendo alavanca no conector e liberando-o do seu soquete.

    • Para reconectar conectores de pressão de ajuste como este, alinhe cuidadosamente e pressione para baixo em um lado até ele fazer clique e ficar fixado, e então repita o procedimento no outro lado. Não pressione no centro. Se o conector estiver desalinhado, os pinos podem entortar e serem danificados.

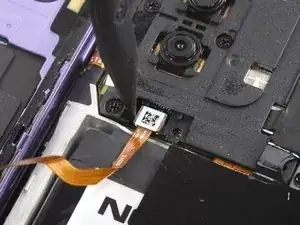
    • Remova a tampa traseira.

  12. N1qWPTJ1UnQUZKvR
    • Um adesivo branco poderá estar cobrindo um dos parafusos superiores. Perfure-o com a ponta de sua chave ou use uma pinça para removê-lo.

    • Com uma chave Phillips, remova os dez parafusos 3,8 mm que fixam a tampa da placa-mãe.

    There is a clip near the top left screw - when you re-assemble, pop this back into place first.

    robincm -

  13. w5IqZQGYTGZo3PUs
    w5IqZQGYTGZo3PUs
    xSOdSpYAEbjbr4ir
    jUUuEG4nSlYdnjb3
    • A tampa da placa-mãe é fixaca adicionalmente por clipes de plástico.

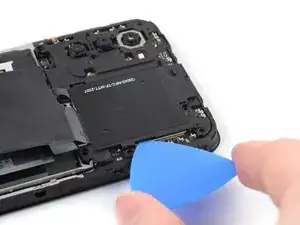
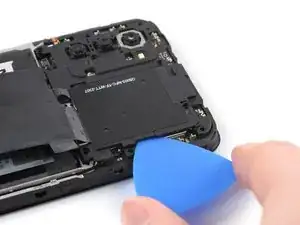
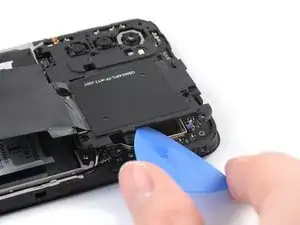
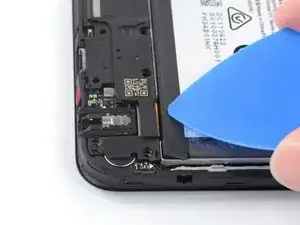
    • Insira uma palheta de abertura abaixo da borda direita da tampa da placa-mãe.

    • Vire a palheta de abertura para soltar os clipes de plástico.

  14. oCPGCYlL2vTt4JSI
    oCPGCYlL2vTt4JSI
    3IBiq3Z3ijgY1B1O
    vKZSWFmArHREskSu
    • Com uma pinça ou os seus dedos, remova a tampa da placa-mãe.

  15. FWt4E4QTDY3MotYi
    FWt4E4QTDY3MotYi
    AoghcSaAHaDCK33o
    • Com a ponta plana de uma espátula, desconecte o cabo da bateria fazendo alavanca no conector e liberando-o do seu soquete.

  16. 1cVe41XQLnBt2KSQ
    • Um adesivo branco pode estar cobrindo um dos parafusos superiores. Perfure com a ponta de sua chave ou com uma pinça para removê-lo.

    • Use uma chave Phillips para remover os oito parafusos de 3,8 mm que fixam o alto-falante.

  17. 6KSq316WiUu1SYGn
    6KSq316WiUu1SYGn
    Kveh6ZQOlqtUdVKP
    4EhVkKOaUAp4nCfI
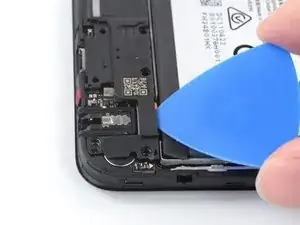
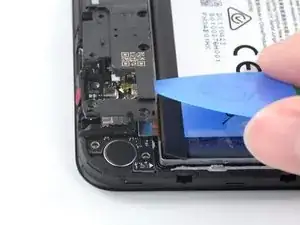
    • Insira uma palheta de abertura por baixo da borda direita superior do alto-falante.

    • Evite empurrar para baixo com um ângulo acentuado, senão você estará arriscando danificar o cabo plano de interconexão que passa por baixo.

    • Vire a palheta de abertura para soltar o alto-falante dos clipes de plástico que o fixam na posição.

  18. VGwPxZIXqgSaHlA5
    VGwPxZIXqgSaHlA5
    MBPR4rfLs6CXPNgm
    • Com uma pinça ou os seus dedos, remova o alto-falante.

  19. pjjrJn6aBXS6XtUs
    pjjrJn6aBXS6XtUs
    FgXSSEKRGoygCMET
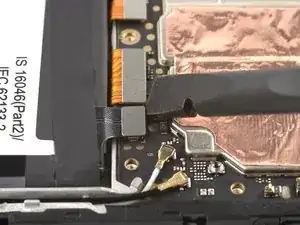
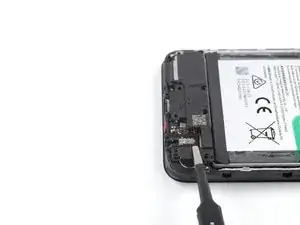
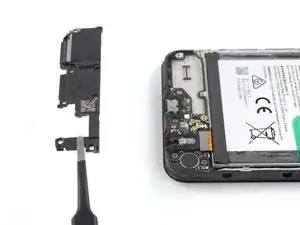
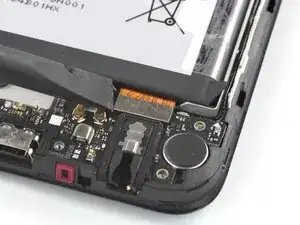
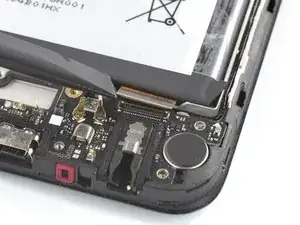
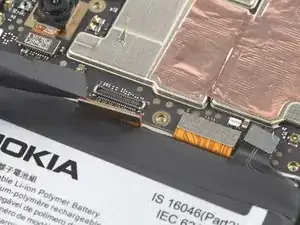
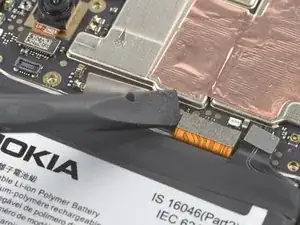
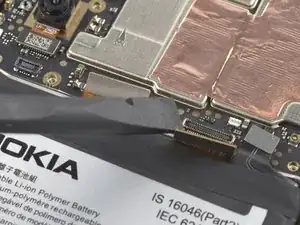
    • Com a ponta plana de uma espátula, desconecte o cabo de interconexão fazendo alavanca no conector e erguendo-o de seu soquete.

    Hello there, I have damaged the interconnect cable during the screen replacement process, do you offer replacement cables for sale?

    oliver gray -

    Hello Oliver, unfortunately we currently do not have interconnect replacement cables available in the iFixit store. In this case, please reach out to Nokia Phones support!

    Manuel Haeussermann -

  20. GWsOEUHZMhSOIUtO
    GWsOEUHZMhSOIUtO
    1pYOLjHveLquCXTg
    UISpQHiFAfVmEc34
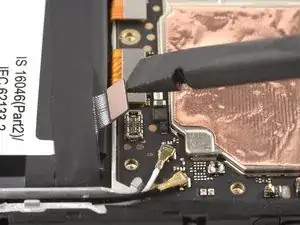
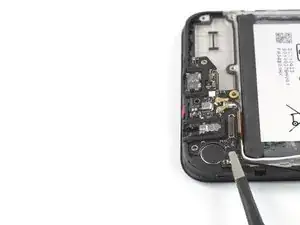
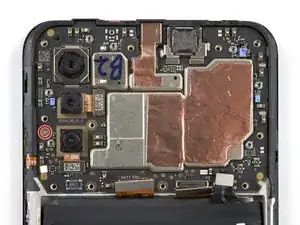
    • Com uma espátula, desconecte ambos os cabos da antena, fazendo alavanca nos seus conectores e erguendo-os dos soquetes na placa-mãe.

    easier to decouple using the pincet in my opinion

    eva -

  21. YSrMmXdJTvBdL2mg
    YSrMmXdJTvBdL2mg
    cTLMI6ciOYVoVJxc
    XstCMOGf1htfXxTq
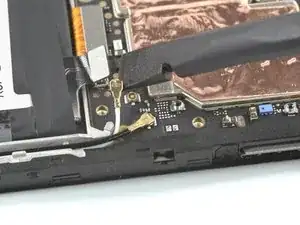
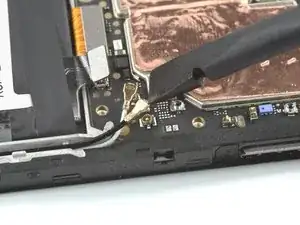
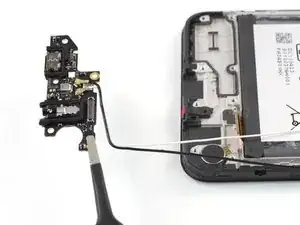
    • Com uma pinça ou os seus dedos, erga os cabos da antena para fora do seu recesso na moldura.

    • Durante a remontagem, conecte o cabo branco da antena à placa-mãe antes de conectar o cabo preto da antena. Então, retorne os cabos da antena ao seu recesso.

  22. WroemjUOPFxgrb4n
    WroemjUOPFxgrb4n
    6PFD1lxsWtKJR5kE
    S2ftAU1hXCUppbY1
    • O conjunto da porta de recarga está fixada por um adesivo fraco.

    • Insira a ponta plana de uma espátula abaixo da borda direita superior do conjunto da porta de recarga.

    • Vire para cima o conjunto da porta de recarga até que você consiga agarrá-lo com os seus dedos.

  23. QfXgp1coGxfFJquF
    QfXgp1coGxfFJquF
    Glnxvs5x6kwxNQNt
    • Com uma pinça ou os seus dedos, remova o conjunto da porta de recarga.

    Seemed to help to also pry the board up from the end by the screw hole near the antenna cables. Then it popped out.

    robincm -

    CAUTION ther is a tiny sticky pad underneath this board that the guide does not knowledge which resulted in unexpected resistance and subsequently BROKE this board for me. PLEASE BE CAREFUL.

    iTS RIGHT NEXT TO THE INTERCONNECT CABLE

    Adam Toolin -

    Hi Adam,

    I'm sorry about hearing the issue you had during your repair. The adhesive you mention is being acknowledged in the previous step, see the first bullet point: "The charging port assembly is held in place with mild adhesive". Based on your feedback, I feel like this could be pointed out even more clearly, so thank you for your input.

    Manuel Haeussermann -

  24. G4BVcCePWhyhXecD
    G4BVcCePWhyhXecD
    2ILD6FpdHFH6sXRW
    OddJMPtbLRhmAUjG
    • O motor de vibração está fixado por um adesivo fraco.

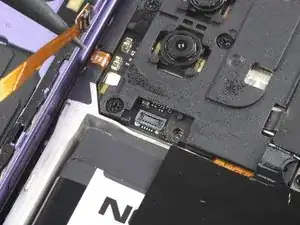
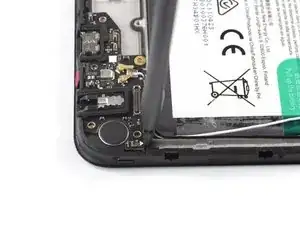
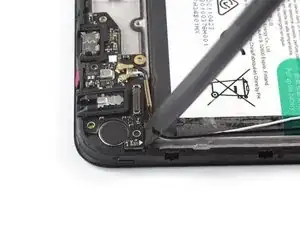
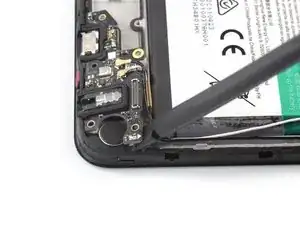
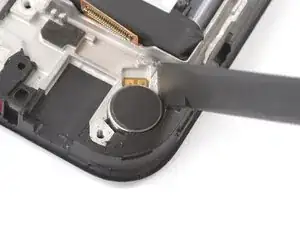
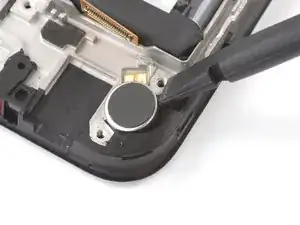
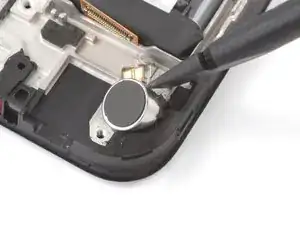
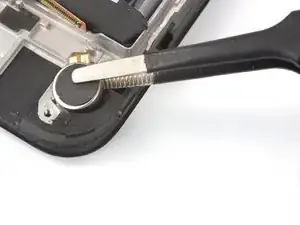
    • Insira a ponta plana de uma espátula no pequeno recesso no lado direito superior do motor de vibração.

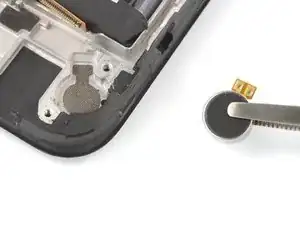
    • Vire a espátula para dar alavanca no motor de vibração e desfazer o adesivo que o segura por baixo.

    • Durante a remontagem, você pode reusar o adesivo velho, se ele ainda estiver funcional. Se não, substitua-o por um adesivo customizado novo, como a fita Tesa.

    I could not insert the flat end of the spudger into the small recess to remove the vibration motor. In the end I used a very small flat screwdriver to lift it up.

    Gijsbert Wiesenekker -

    I used some sturdy tweezers to pull it up, you could also use needle-nosed pliers. As Gijsbert said, prying does not work.

    robincm -

    J'ai du utiliser une lame fine la spatule ne rentre pas

    hawai_ Léo -

  25. tbTWSqYYdbTfrsJf
    tbTWSqYYdbTfrsJf
    3PNOOljlTkvtIaN2
    • Com uma pinça ou os seus dedos, remova o motor de vibração.

  26. SJJQTvFonmwVsOWL
    SJJQTvFonmwVsOWL
    QRCSSq3UVvFnVKJd
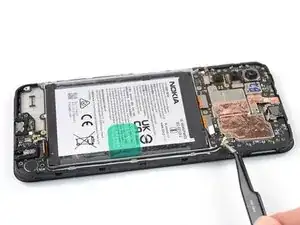
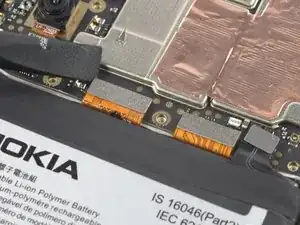
    • Com a ponta plana de uma espátula, desconecte o cabo da tela fazendo alavanca no conector e liberando-o de seu soquete.

    Upon re-assembly the display cable of the new assembly was somewhat longer than the old assembly, I could not reconnect it because there was a little bit too much strain on the cable while bending it. I had to remove the battery again (fortunately I had not applied pressure yet to glue it in place), so I recommend to install the battery after attaching the display cable.

    Gijsbert Wiesenekker -

  27. tniqw6RgLJUURBKm
    tniqw6RgLJUURBKm
    UG1LvgQqeSmqASHj
    • Com a ponta plana de uma espátula, desconecte o cabo de interconexão dando alavanca no conector e liberando-o de seu soquete.

  28. lw1ufiRxC6jJVAsJ
    lw1ufiRxC6jJVAsJ
    Za1jlkEcJXWNjnXK
    • Com uma chave Phillips, remova o único parafuso de 2,8 mm que segura a placa-mãe.

    2.5 mm-long screw instead of 2.8 mm-long screw.

    Loaurrine -

    please do not use red circles when the board is green. I actually missed the screw almost.

    Andre Rudolph -

  29. NTYapyDKWhSph1gk
    NTYapyDKWhSph1gk
    bQRHtk6MNCWNI54d
    sxRQnGVhMQio6cbT
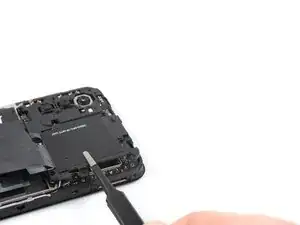
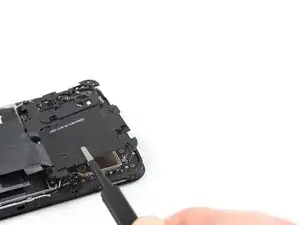
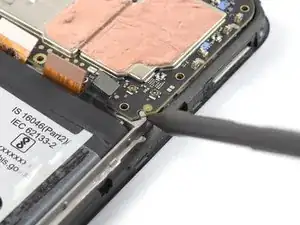
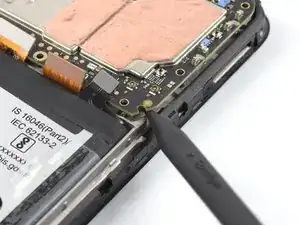
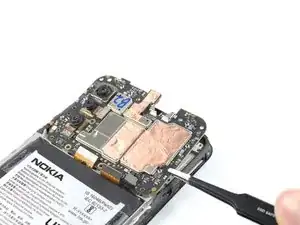
    • Insita a ponta pontiaguda de uma espátula por baixo do canto direito inferior da placa-mãe.

    • Erga a placa-mãe até que você consiga agarrá-la com os seus dedos.

    There is a clip near the top right screw that the motherboard fits under. When re-assembling, make sure you fit this corner in under the clip first, or the motherboard sits on top of it and the screw ill not engage with the threads in the hole - the motherboard will sit proud by about 1mm.

    robincm -

  30. rn6RYggF3UUMCiBG
    rn6RYggF3UUMCiBG
    n3rfKNd1yBec4f1C
    WJy55qj3H6OHctCu
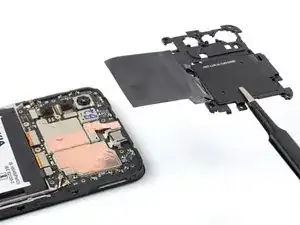
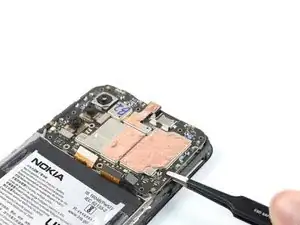
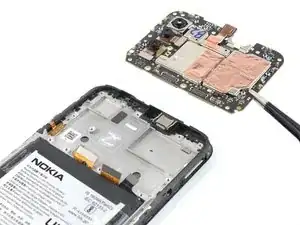
    • Segure a placa-mãe pela borda direita usando uma pinça ou os seus dedos.

    • Remova a placa-mãe.

    • Durante a remontagem, aplique pequenas doses de pasta térmica nas áreas marcadas no novo conjunto de tela. Siga este guia para preparar a placa-mãe e aplicar a pasta.

  31. YiUsN5ReZ3FaFpGV
    YiUsN5ReZ3FaFpGV
    CXRUCKO4T3xBhBdV
    t2DZBJY6C1T5svJH
    • O alto-falante auricular está fixado à moldura com um adesivo fraco.

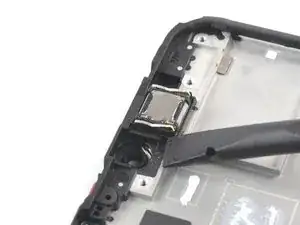
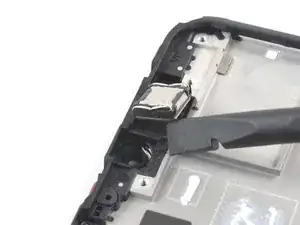
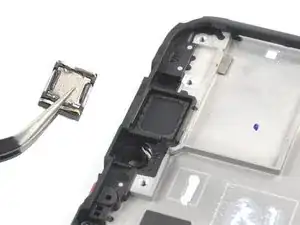
    • Insira a ponta plana de uma espátula por baixo do canto esquerdo do alto-falante auricular e faça alavanca para removê-lo do seu recesso.

    • Remova o alto-falante auricular.

    • Durante a remontagem, certifique-se que as molas de contato douradas no alto-falante auricular estejam viradas para cima e mais próximas da borda inferior.

  32. pqbS6XR1lIroUTYC
    pqbS6XR1lIroUTYC
    uPkjJqRs4UCMMrQw
    • Tenha cuidado extra para não perfurar, empenar ou deformar a bateria durante os próximos passos. Uma bateria danificada pode liberar substâncias químicas perigosas e causar incêndios.

    • Com os seus dedos, puxe as duas abas adesivas nas extremidades da bateria.

    Please see also step 26: Upon re-assembly the display cable of the new assembly was somewhat longer than the old assembly, I could not reconnect it because there was a little bit too much strain on the cable while bending it. I had to remove the battery again (fortunately I had not applied pressure yet to glue it in place), so I recommend to re-install the battery after attaching the display cable.

    Gijsbert Wiesenekker -

  33. 1BToPv6TGHtSDP1D
    1BToPv6TGHtSDP1D
    mkiTZaxHW1xLRWpy
    IHqiLDVSlxfWLTIt
    • A bateria instalada no Nokia G42 5G está fixada à moldura por um adesivo. Abas de puxar são fornecidas para separar o adesivo e remover a bateria.

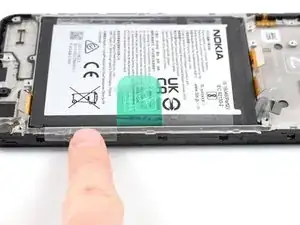
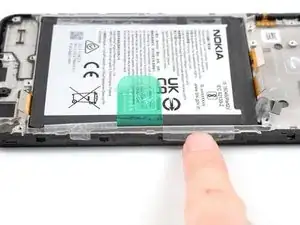
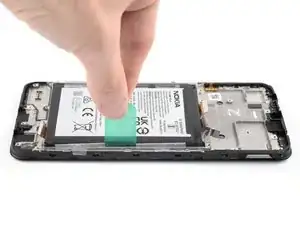
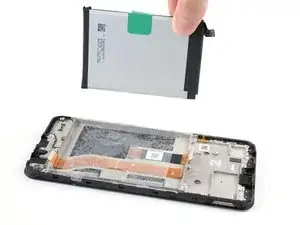
    • Use your fingers to peel the center green pull tab off of the battery.

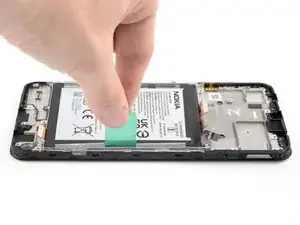
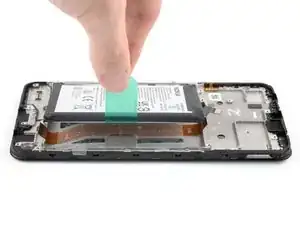
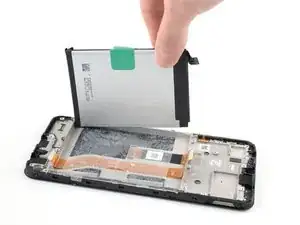
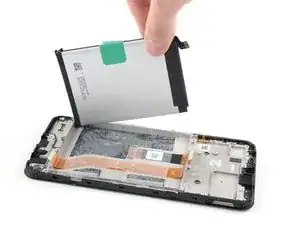
    • Using one hand to hold the phone steady, use your other hand to slowly and steadily lift the center green pull tab up to separate the adhesive securing the battery underneath.

    • Se a aba verde rasgar, use em vez dela as abas transparentes nas extremidades.

    • Se você tiver dificuldades com um adesivo de bateria resistente, você pode entrar em contato por telefone com a assistência técnica da Nokia.

    Also in my case the green tape and the outer clear tabs ripped. I was able to detach the battery slowly inserting the plastic screwdriver-point contained in the Fix Kit tools starting from the top left side and inserting it with a minimum of leverage effect. You can try from the right side also.

    Gaetano C -

  34. SkIHd5XSyxPAo2Pe
    SkIHd5XSyxPAo2Pe
    g1J34LmkpusyiEFX
    mNGPjceTtGO1csao
    • Destaque a bateria da película adesiva e remova-la.

    • Não reinstale uma bateria danificada ou deformada, pois isso acarreta um risco de segurança potencial. Substitua-a por uma bateria nova.

  35. iWrdXDqjVxMWsxRm
    iWrdXDqjVxMWsxRm
    luYglGaxAQRyRejC
    AZNfSbhiJOKSKLBX
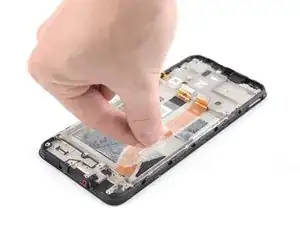
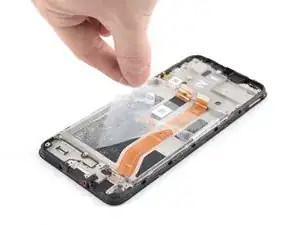
    • Agarre a borda direita inferior da película adesiva restante.

    • Puxe a película em direção à parte superior do fone com força constante para removê-la.

    • Para reinstalar a bateria no conjunto de tela novo:

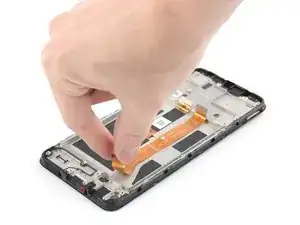
    • Reaplique a película adesiva na bateria.

    • Alinhe a parte inferior da bateria (a borda sem adesivo) com a borda inferior do recesso.

    • Abaixe e pressione firmemente a bateria, para ela se fixar na posição.

  36. WOA2ruIFDNWkkOtR
    WOA2ruIFDNWkkOtR
    kBPpgDGPKOxVnVbQ
    IwhAa13UTyMVCmQF
    • O cabo de interconexão está colado levemente na moldura.

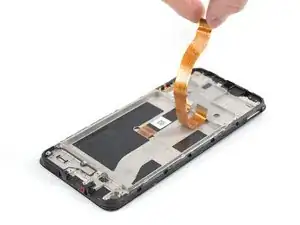
    • Segure a parte inferior do cabo de interconexão e puxe-o em direção à parte superior do fone para removê-lo.

    Please see also step 26: re-install the battery after you have reconnected the interconnect cable to the motherboard.

    Gijsbert Wiesenekker -

  37. WEtDtJ3xPmrqIAnH
    • Somente resta o conjunto de tela.

    • Compare o seu novo conjunto de reposição com a peça original. Pode ser que você precise transferir componentes remoanescentes ou remover suportes adesivos da nova peça antes de instalá-la.

    • Caso você esteja reusando a sua bateria original, inspecione-a cuidadosamente para ver se encontra quaisquer sinais de dano físico. Se ela estiver empenada, enrugada, deformada ou arranhada, substitua-a por uma bateria nova. A instalação de uma bateria danificada corresponde a um perigo de segurança.

    After replacing the screen myself, the phone stopped receiving the network. I had to throw it away and buy a new phone. Waste of money for screen

    Igor Komarov -

    Hello Igor, sorry to hear that you experienced issues following your repair. It sounds like the issue might have been caused by the antenna cable being damaged or disconnected. In these cases, we recommend physically reseating the connectors of the antenna cable on both motherboard and daughterboard as well as checking the cable and connectors for signs of damage. If this doesn't help, you can contact Nokia's phones support to get further support.

    Manuel Haeussermann -

    This worked like a charm! It wasn’t too frustrating and my phone is as good as new!

    Jacqueline Taylor -

    how can i remove the assemble, i broke my screen and cant find a guide on how to remove and replace the screen

    foolish i -

    Hi there! The replacement part in this case is the screen assembly, so not just the screen but the midframe and buttons. Therefore, the repair consists in moving the components to the new screen assembly without removing / replacing the screen itself. Hope this helps!

    Manuel Haeussermann -

    I ordered a screen + frame kit off Amazon but the new frame does not come with the power and volume buttons connector attached. Your guide does not show how to remove this part from the old frame and place it on a new one. Is this possible or should I buy a screen-only kit and attempt to attach it to the old frame?

    Daniel Gold -

    Hi Daniel! The genuine replacement part available in the iFixit Store should include pre-installed buttons. Transferring the buttons is pretty finnicky and not generally recommended, but definitely possible. The buttons are held in place by adhesive that can potentially be reused for the new frame. Doing a screen-only repair would require a different procedure and application of heat and suction to remove the old screen.

    Manuel Haeussermann -

    Indeed, had the same issue. The buttons are mildly glued, so you can gently pull them off. Used a needle for it, there are small indents you can use.

    jos -

    Controleer of er ook een Power en volume knop flex kabel op (de zijkant) zit! Want die zit niet altijd standaard op de nieuwe schermmodule.

    Wijsneus -

    You should include instructions for reassembly, as the current instructions can lead to errors and confusion. For example, I had to open the phone again to apply the thermal paste. Also, since I needed to replace the battery that I had pinched while trying to remove it from the screen, I did not realize that I needed to replace the adhesive pads. In any case, I had a lot of trouble removing the battery, so I probably would not have changed it even if I had known.

    Gaetano C -

Conclusão

****Para a remontagem de seu dispositivo, siga os passos acima na ordem inversa.***

Leve o seu lixo eletrônico para um ponto de recolha ou uma recicladora certificada.

O reparo não está indo conforme o planejado? Tente soluções de problemas básicas, ou peça ajuda na nossa comunidade de Respostas.

Manuel Haeussermann

Membro desde: 13/07/22

23923 Reputação

46 comentários

followed all your rules and snapped the inside of my phone thank you

Lee Slater -

Hi Lee, sorry to hear that you experienced issues during your repair. Could you provide me with additional information about which step / action caused this? If you assume the repair is not salvageable, please contact Nokia's phones support to get further support.

Manuel Haeussermann -

Pretty straightforward. Followed instructions to the letter - everything went back together fine.

Matthew Dove -

I followed the Instructions and it worked perfectly. Ready in under 1h.

Martin Scholer -

Unacceptable..., screen assembly parts are out of stock.

Could you make it more friendly to users?

Wang, Shou-Cheng -

Hi Wang, Shou-Cheng,

Good news: screen assembly parts are back in stock again! Additionally, we offer a notification option so you'll get an info email as soon when the item is restocked. Hope this helps!

Manuel Haeussermann -

Bought replacement screen and was sent just screen with digitizer no frame like all repair shown no frame so sat to replace now its in bit and uable to complete it

Chris Bryant -

Hi Chris Bryant,

Unfortunately, we weren't able to match your information with an order. Did you buy the replacement part from iFixit? If so, please contact our customer support (eustore@ifixit.com for EU orders or support@ifixit.com for Non-EU orders), so we can help you get the issue sorted out! Thanks!

Manuel Haeussermann -

The disassembly was fine, but the instructions for reassembly (i..e. NONE) were disappointing. Some guidance on how to align and re-connect the interconnect cable would have been helpful. I now have a phone with a beautiful new screen, but I can't use it because there is no sound and I can't charge it. I'm assuming because the interconnector was damaged in all my attempts to line it up. Of course, you can't buy this cable.... so now I get to throw away the phone AND the new screen

Caroline -

Hi Caroline,

sorry to hear about your problems during reassembly. We will add a reassembly note for the interconnect cable based on your feedback. Have you checked whether the cable connecting to the charging port assembly is seated properly? Please also note our basic troubleshooting information. If you assume the repair is not salvageable or in order to get guidance on a replacement interconnect cable, please reach out to Nokia phones support.

Manuel Haeussermann -

Just exactly the same thing happened to me. I was so excited about fixing my phone, everything was so easy and clear until the moment of re-connecting the interconnect cable. I was struggling few hours and then I realised that the speaker doesn't work and the phone is not charging. Caroline, did you manage to do something with it?

How and where can I buy this cable?

Monika Marchlińska -

Hi Monika Marchlińska,

I'm sorry that you encountered a problem with the interconnect cable during your repair. We've added reassembly notes to the guide to help with the realignment. If you assume the repair is not salvageable or you want to inquire regarding a replacement interconnect cable, please reach out to HMD support.

Manuel Haeussermann -

I reached HMD support, who told me to contact eustore@ifixit.com which I did, but they told me to post on the forum and noone replied. Is there any opportunity that the interconnect cable will be for sell? Just like other parts?

Monika Marchlińska -

Hi Monika Marchlińska,

Sorry that you've been routed around on this issue. I've forwarded it internally to try and find a solution for the situation.

Manuel Haeussermann -

Manuel Haeussermann did you find any solution? If I could just buy the interconnect cable, that would be great

Monika Marchlińska -

Hi Monika Marchlińska, Unfortunately, it does seem like the solution to this is still in the works, but I'll ask again. Please apologize the delayed response.

Manuel Haeussermann -

This repair kit is still out of stock... :(

toffvs -

Hi toffvs,

Screen assembly parts are back in stock again, with Fix Kits following shortly! Additionally, we offer a notification option so you'll get an info email as soon when the item is restocked. Hope this helps!

Manuel Haeussermann -

More steps than I initially thought there would be when I bought the phone, but generally quite straight forward. I had to adjust the interconnect ribbon after installation (removing the battery, again). Maybe the step of replacing the battery could be done a little later, when the ribbon cables are set? I think it could be done nearly at the end of re-installation.

Kyle Eyvindson -

Hi Kyle Eyvindson, thanks for the feedback! We've added reassembly notes to the guide to make realigning the interconnect cable more straightforward.

Manuel Haeussermann -

What a complete waste of time. followed the steps new screen didn't work. followed the troubleshooting and replaced the broken screen and phone works. tried the new screen a second time and no joy. So put phone back together with the old broken screen. Love the idea that the Nokia can be fixed. Shame the quality control on the replacment screens is poor.

pd1 -

Hi pd1,

I'm sorry to hear that you encountered issues during your repair. Considering that your replacement part might be non-functioning, please get in contact with our customer support (eustore@ifixit.com for EU orders or support@ifixit.com for Non-EU orders), so we can help you get the issue sorted out! If you assume the repair is not salvageable, please contact HMD support to receive further support.

Manuel Haeussermann -

Took me about an hour, have added a few comments to the instructions. Phone seems to be working fine.

robincm -

Hi robincm,

Happy to hear about the successful repair and thank you for your input!

Manuel Haeussermann -

Hi, after assembly I have my screen full of horizontal white stripes, any idea how to troubleshoot?

Dino Silva -

Hi Dino,
It's difficult to assess remotely, but it may be an issue with the cable or the connector. You might try reseating the display connector to see if anything changes as well as check the cable for damages. Please also check our general troubleshooting info. If you assume the repair is not salvageable, please contact HMD support to receive further support. If you assume that the display or the display cable is defective, contact iFixit customer support (eustore@ifixit.com for EU orders or support@ifixit.com for Non-EU orders), so we can help you get the issue sorted out!

Manuel Haeussermann -

I have the same issue, screen full of parallel white lines, I have opened the phone again checked if any damage to the screen cable which I could not appreciate, I reconnected it, reassembled everything but the issue is still there.

Isasi -

Hi Isasi,

I'm sorry you encountered this issue during your repair. Considering you've reconnected the cable and inspected it for damage, the cause might be a defective replacement part. Please contact iFixit customer support (eustore@ifixit.com for EU orders or support@ifixit.com for Non-EU orders), so we can help you sort it out!

Manuel Haeussermann -

telefoon in en uit elkaar gehaald, scherm vervangen met de instructies en wat geduld allemaal gelukt maar nu werkt mijn microfoon niet meer tijdens het bellen of opnemen van een video... kunnen jullie me helpen?

eva -

Hi eva,

I'm sorry to hear that you encountered issues during your repair. Based on your description, I assume every other function is working properly? If so, it might point to an issue with the earpiece speaker, it might face the wrong direction or the pins might not make contact with the motherboard. See Step 31 for information on the reassembly of the earpiece speaker. Please also see our general troubleshooting guidance.

Manuel Haeussermann -

Thanks to the guide and the iFixit replacement part, I managed to complete this in an hour or so. First time I'd bought a screen without a frame; don't make my mistake! Definitely get the frame version from here. I've got one screw left as well - hopefully nothing too important...

Was pleasantly suprised the screen and frame came with extra battery adhesive and a tube of thermal paste too, which was handy.

Black Coffee -

He seguido la guía en castellano y es muy útil. Yo soy un usuario que no suelo montar ni desmontar dispositivos electrónicos y he conseguido que funcionara perfectamente. Eso sí el proceso es algo complejo y requiere de mucha paciencia e insistencia. La traducción está muy bien hecha. ¡Muchas gracias he ahorrado tiempo y dinero en la reparación de mi pantalla y he aprendido algo sobre como funciona un smartphone!

César (Mota) -

I was expecting instruction on how to replace the screen but the instructions seem to stop before this critical step.. It would also be helpful to have a reassembly guide!

Happy Bunny -

Hi Happy Bunny,

As noted in the introduction, this guide is written for the genuine Nokia G42 5G screen assembly. The screen assembly consists of the screen and midframe together as one part. A replacement of just the screen would require a different procedure and tools.

Manuel Haeussermann -

I've managed to mess up when reattaching the charging port ribbon cable to the charging port. It won't click into place, so I think I must've bent some of the pins. I can see you can buy the charging port assembly fairly easily, but am unsure if it's the cable that's damaged or the connector in the board.

Does anyone know where I can get a g42 charging port ribbon cable replacement from? Or if a replacement from another Nokia phone will work? I can see they are replacements for other models on eBay.

Thanks!

Black Coffee -

Out of stock, Please IFiixit

Stefan -

Hi Stefan, Nokia G42 5G Screen Fix Kits are now back in stock! Sorry for the wait time!

Manuel Haeussermann -

I bought this phone because it was repairable, with a good partnership between HMD and iFixit. At least, I thought so...

It is unacceptable that spare parts are out of stock and that no availability date is mentioned. I am registered on the list to be notified when it will be back in stock but there is no indication whether I will have to wait 1 day, 1 week, 1 month or 1 year before being able to repair my device.

I am somewhat disappointed by this nevertheless great initiative that is iFixit.

JMA -

Hi JMA, Nokia G42 5G Screen Fix Kits are now back in stock! Sorry for the wait time!

Manuel Haeussermann -

The push buttons for on/off and volume are not adressed in this description. Please add

E.P. Stals -

Yes, I have the same problem. Unable to source a frame with these already installed.

Julie Caldwell -

Worked very well.

All steps is very accurate and well explained.

Just be precise and keep alle items in order of disassembly.

That makes it easy to assemble.

A magnetic board with squares is a great help.

5 stars for the guide.

Regards

Jens

jens -

Hi there, any idea when this fix kit (Item # IF318-010-2) is back in stock. I signed up for the email notification, but just curious how long I might be waiting. Also does the screen in the kit come with the mid-frame as I don't want to make the same mistake as mentioned in the comment below?

Thanks to the guide and the iFixit replacement part, I managed to complete this in an hour or so. First time I'd bought a screen without a frame; don't make my mistake! Definitely get the frame version from here. I've got one screw left as well - hopefully nothing too important...

Was pleasantly surprised the screen and frame came with extra battery adhesive and a tube of thermal paste too, which was handy.

Black Coffee - Aug 1, 2024

Martin -

A couple of hours to refit, had to fit buttons and the battery was a job to remove. Was worried that the I hadn't seated all the connecters properly but on powering up everything works fine- great guide (and useful comments)!

bernie murphy -

Tore the fingerprint sensor cable replacing the screen. I can't find a replacement. Is there another Nokia model with the same part?

Julie Caldwell -