Introdução
If your cartridge reader is not working on your original Nintendo 3DS model, use this guide to replace the cartridge reader (also known as a Game reader).
The cartridge reader, when working, sends the game info from the reader to the main system, which allows gameplay by the user on the 3DS.
Before attempting to use this guide to repair the 3DS, inspect the inside of the cartridge reader or the outside of the game cartridge for any built-up debris that may cause reading problems. Dust buildup can cause issues, but it can be resolved by using a dust blower or a small brush to clear it out.
Before beginning, ensure that your device is powered off and disconnected from all external power sources.
Recommended skills: should have a good understanding of soldering, as the cartridge reader needs to be soldered to the motherboard.
Once completed, you will be able to get back to enjoying playing your games on the go!
-
-
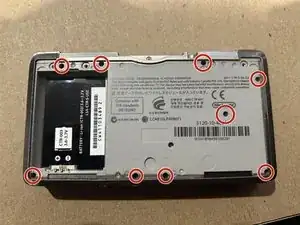
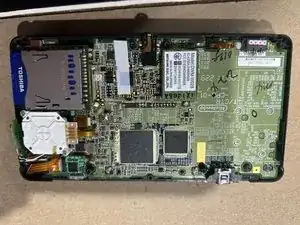
Use a JIS #00 screwdriver to remove all 10 screws to access the third layer and the motherboard of the 3DS.
-
-
-
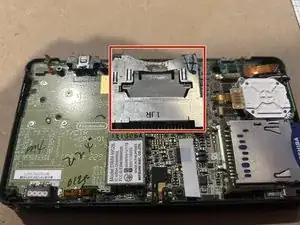
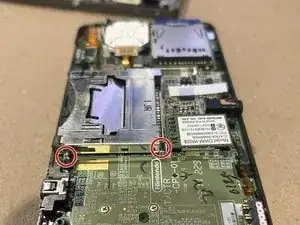
To remove the cartridge reader look for 4 solder joints, 2 on each side of the reader (see image).
-
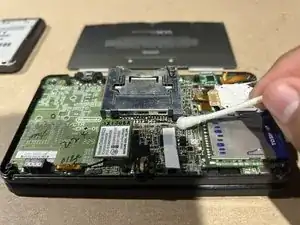
Apply heat to them with a soldering iron to melt the solder and take out the reader.
-
Use a spudger to lift the reader out of the board as you apply heat.
-
You can apply some solder flux or even some new solder wire to form an alloy between the old and new metals, this would ease the task.
-
-
-
Align the new reader with the solder points
-
Use a soldering iron to connect it to the motherboard.
-


To reassemble your device, follow these instructions in reverse order. Take your e-waste to an R2 or e-Stewards certified recycler.

Um comentário
It might help to utilize a prerequisite guide up until the actual replacement of the cartridge slot. The IR board replacement is short and similar in step number in this regard.
Russ9876 -