Introdução

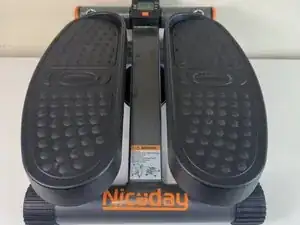
This guide walks you through replacing the tension cable on a Niceday Stair Stepper. Over time, the cable can loosen from regular use, reducing the resistance needed to push and pull the pedals and potentially preventing the machine from functioning. This guide is designed to be simple and approachable, allowing anyone to complete the repair without calling a professional or discarding the machine.

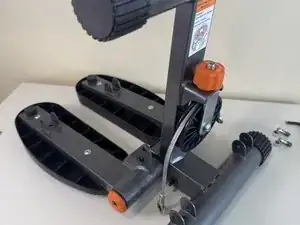
Although the stepper is compact, it can still cause injury or damage to surrounding furniture. Before you begin, make sure you have enough space to work. If you’re using a table or floor, place cardboard underneath to protect the surface.
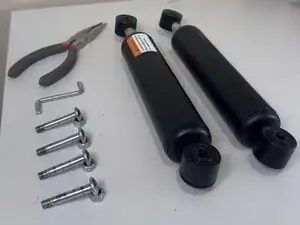
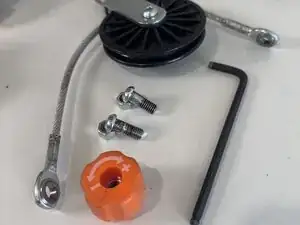
  1. xJgpPOioqjE1kWDO
    xJgpPOioqjE1kWDO
    GJYqJdTNDhUBmbJM
    • Flip the machine up and locate the hydraulic cylinder.

  2. GLMoII4iQRRFMiVE
    • Locate 4 M6 x 45mm Allen Bolt.

  3. bHRhWueAcXrO1IH6
    bHRhWueAcXrO1IH6
    jQBRj3WYL2PQxKwg
    GF3p6VNyCoXUMgPE
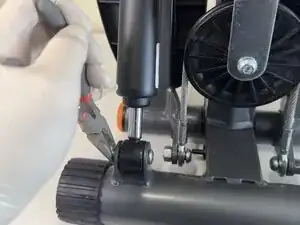
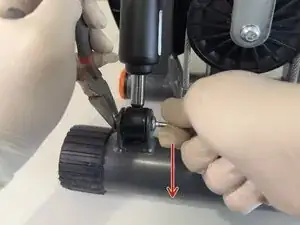
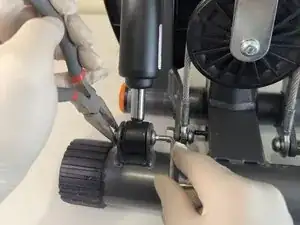
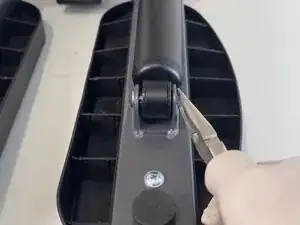
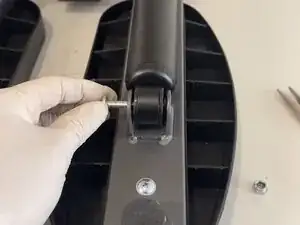
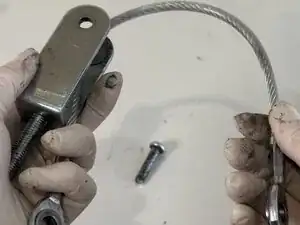
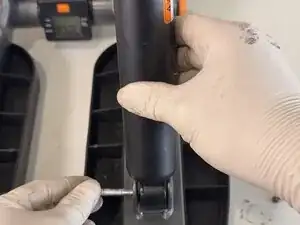
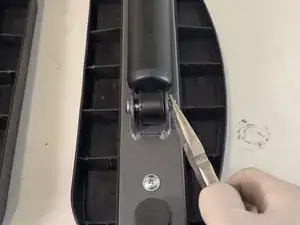
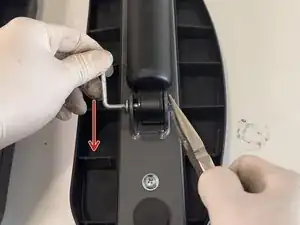
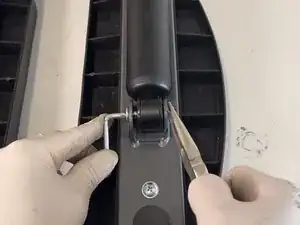
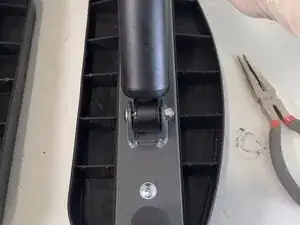
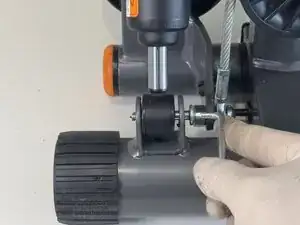
    • One hand uses needle-nose pliers to hold the nut securely in place, while the other hand uses a 5mm hex key to unscrew the screw(counter-clockwise).

  4. q2DFJ5EMOydbt11p
    q2DFJ5EMOydbt11p
    KIEhedIVpH5C4JRq
    BYUTABmvLIquyWPj
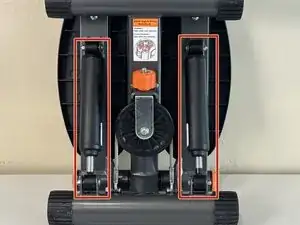
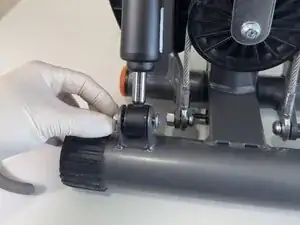
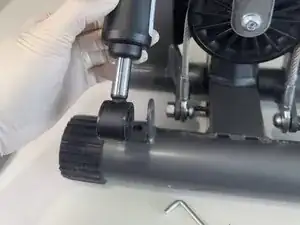
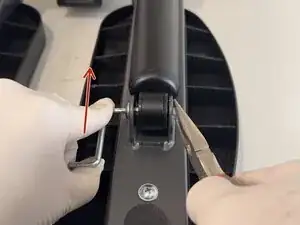
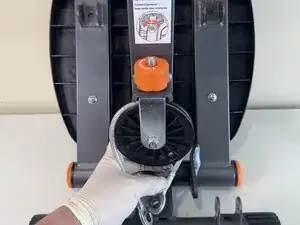
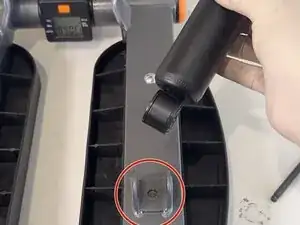
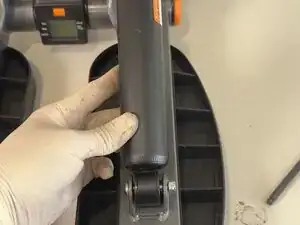
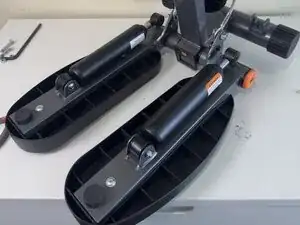
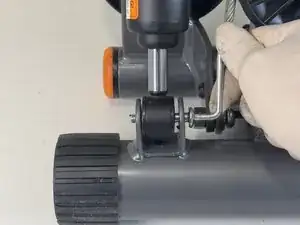
    • Remove this side of hydraulic cylinder and the M6 x 45mm Allen Bolt screw.

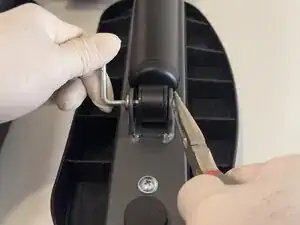
    • Repeat the process for the other side.

  5. qCKXyk1IlcMZBsvV
    qCKXyk1IlcMZBsvV
    OeWxaviRRGw6QpOf
    KoCLhdTpwsoXORMT
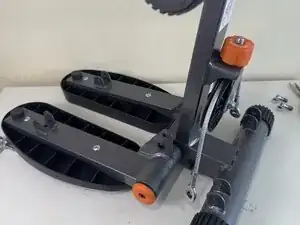
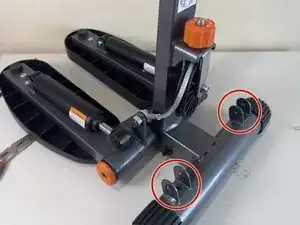
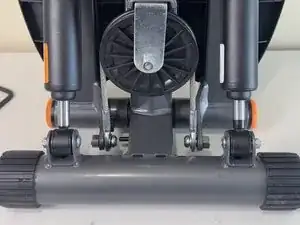
    • Rotate the machine 180 degrees.

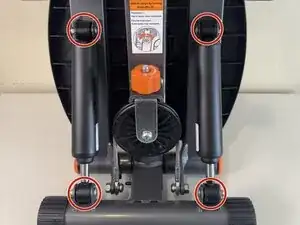
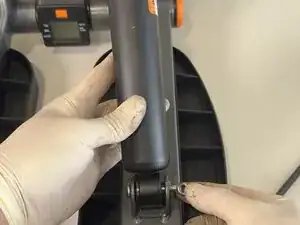
    • Use the 5mm hex key and needle-nose pliers to open the remaining 2 M6 x 45mm Allen Bolt from under both pedals.

  6. UuyiIV6kSIedyQ1U
    UuyiIV6kSIedyQ1U
    ErlEEatQ5AXruGxW
    hxfcaYn2QOM6tFkI
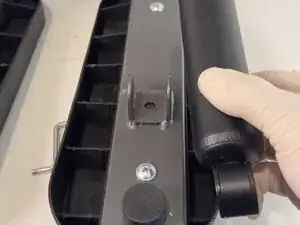
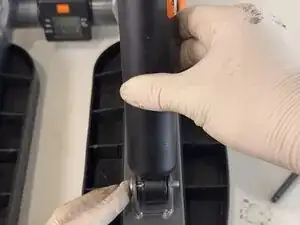
    • When the screw loosens, use your hand to remove the M6 x 45mm Allen bolt and take out the hydraulic cylinder under each pedal.

  7. Ho3ESZyy4KyCS6Xe
    Ho3ESZyy4KyCS6Xe
    CCZTCXXDOQtFgeOP
    • The mini stair stepper will now resemble the image provided.

    • Separate 4 M6 x 45mm Allen Bolt and hydraulic cylinder in a designated area.

  8. BDHisJtZZQ3wbIfy
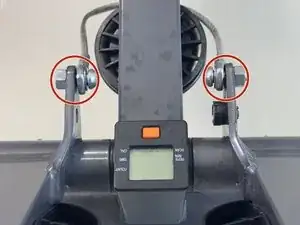
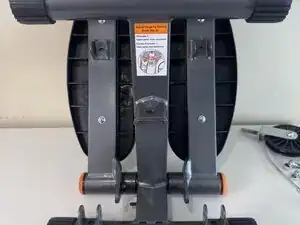
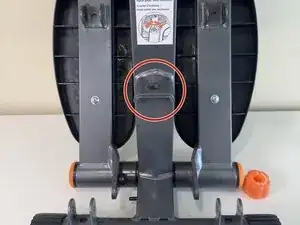
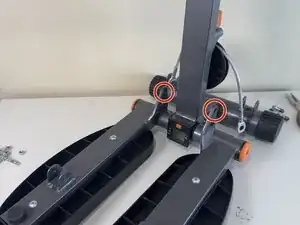
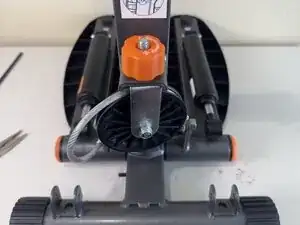
    • Turn the machine so that the display is facing you.

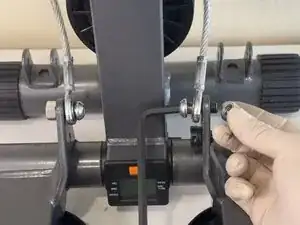
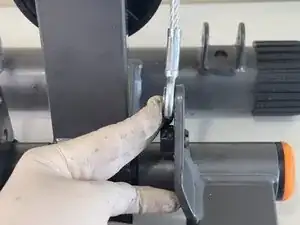
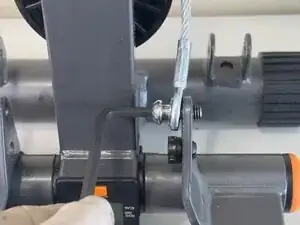
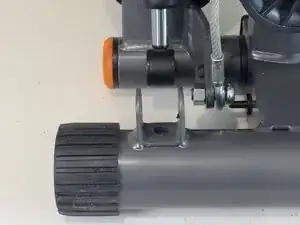
    • Locate the 2 M8 x 16mm Allen Bolts that connect to the tension cable.

  9. g4ARh4JKc1wLk1vS
    g4ARh4JKc1wLk1vS
    qdibIytwoo1vx4ev
    p3bafYNXfDyEOgAJ
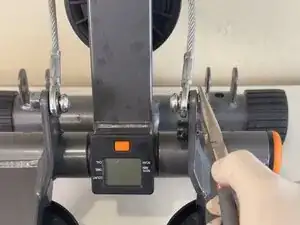
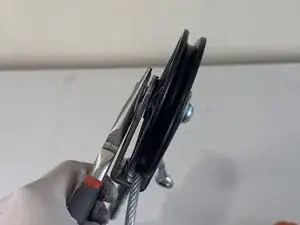
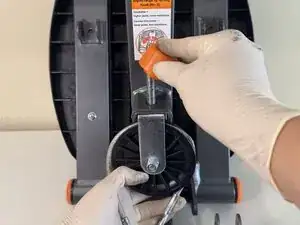
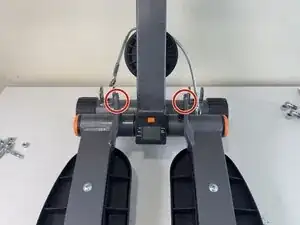
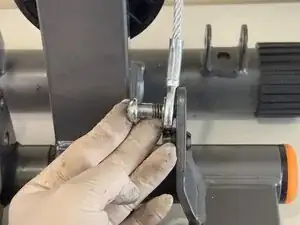
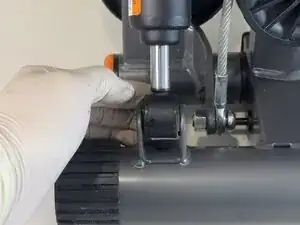
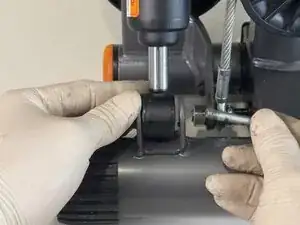
    • With one hand, hold the nut using needle-nose pliers and with the other hand use a 6mm hex key to open the bolt (clockwise).

  10. 4Xk56X2WEpwRPeJI
    4Xk56X2WEpwRPeJI
    3xckLjLqlokqtRar
    Brl3h4BYTWK1tlyF
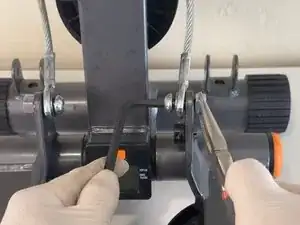
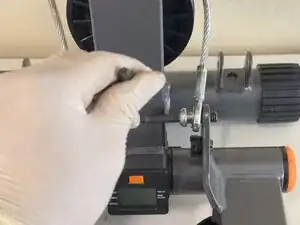
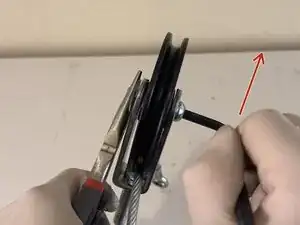
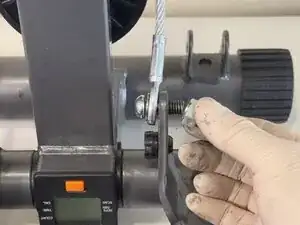
    • Remove the nut first.

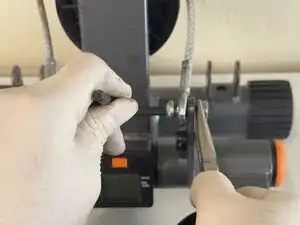
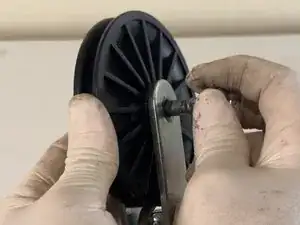
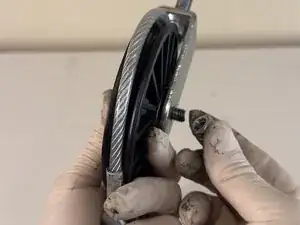
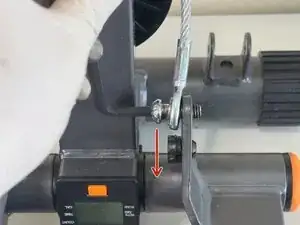
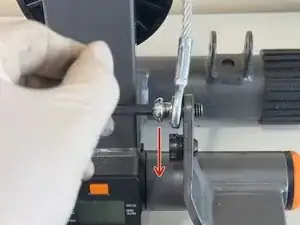
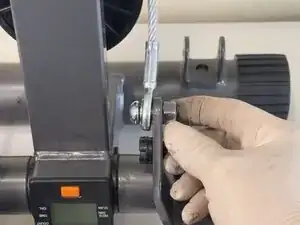
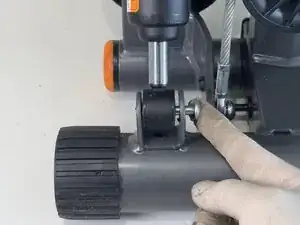
    • Keep turning the bolt until it’s completely out.

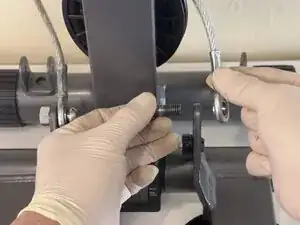
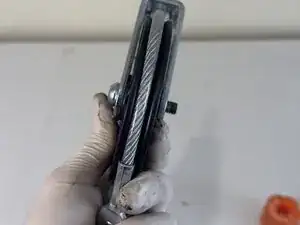
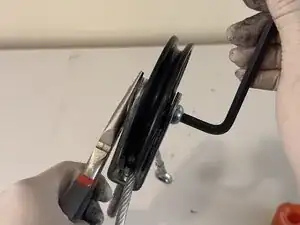
    • Take out the cable on this side of the pedal.

    • Repeat the process for the other side of the pedal.

  11. RSAmHXZ2l6aDHOWA
    RSAmHXZ2l6aDHOWA
    oGL2VQaIOs1iQb5l
    J2PdIHBdMxguPxf1
    • Turn the machine around and locate the orange cap.

  12. iYW2WDAdR2uOoNQc
    iYW2WDAdR2uOoNQc
    jkgkKwk5uROtmjWW
    Q4gACHDe5KlrnZDX
    • Use your hands to unscrew the orange cap and remove it.

  13. UiFVUfJ1xgWrWuMi
    UiFVUfJ1xgWrWuMi
    YxMwrGTHTGVw5JTC
    • The machine will resemble the image provided.

    • Separate the tension cable, orange cap, wheel and 2 M8 x 16mm Allen Bolt.

  14. vsZB5fnq51DqjmDQ
    vsZB5fnq51DqjmDQ
    IsfIeUwsR42YNtd5
    nS1mSTapH2YkyYop
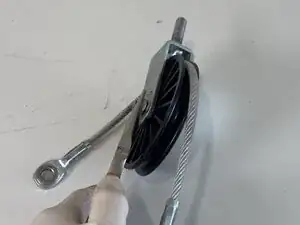
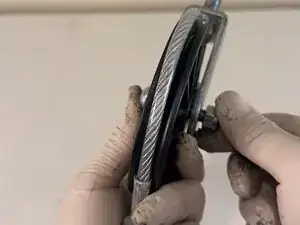
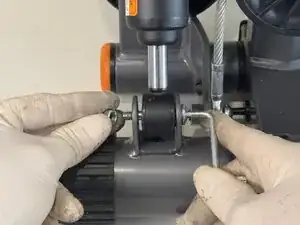
    • Use needle-nose pliers to hold the nut still, and with your other hand, use a 6 mm hex key to loosen the bolt.

    • When you have the hold of the wheel in your hands, you can lift it off the ground to make it easier to open.

  15. SHudOwavsFj3wgRh
    SHudOwavsFj3wgRh
    hPSfUHX2IijZZaOH
    MdQTZorZUkd5lfNg
    • Remove the nut and the wheel from the tension cable.

  16. hPFEkRpxfhkPIGvr
    • Separate the bolts from the hydraulic cylinder.

    • This will make it easier to reassemble.

  17. INkBlNrs4ISDvEAw
    INkBlNrs4ISDvEAw
    L1cRFABMkNwa6BnR
    • Wrap the new tension cable around the wheel.

  18. tPXNZgxZBhShnaTn
    tPXNZgxZBhShnaTn
    EBCysBYXlWyDHrce
    VVi1AS13FfrhT6d2
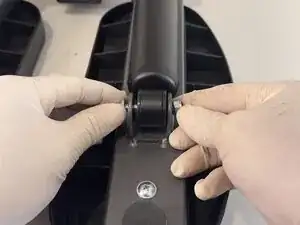
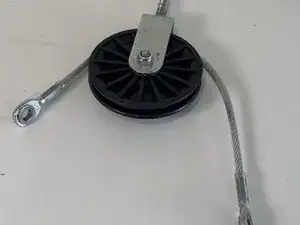
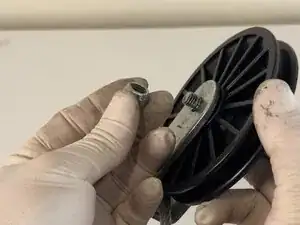
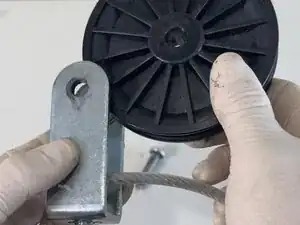
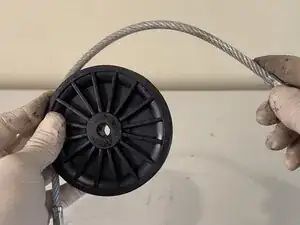
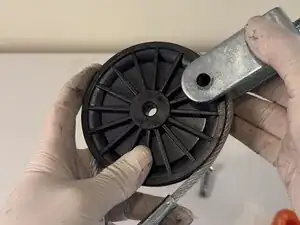
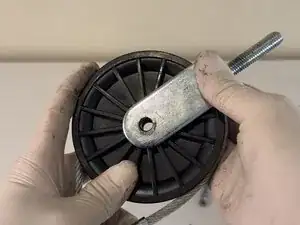
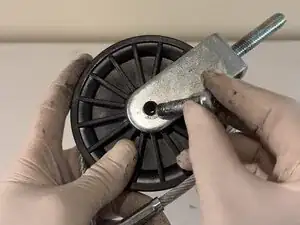
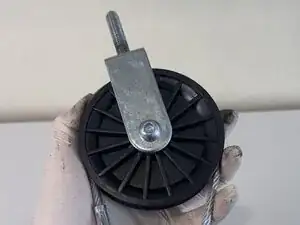
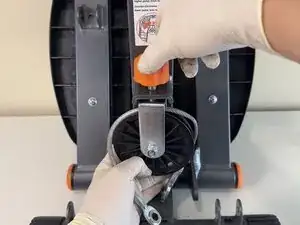
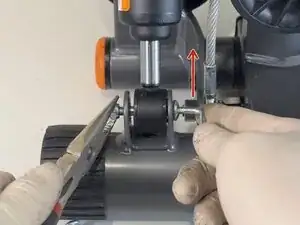
    • Put the hanging metal into the wheel and put the M8 x 16mm Allen Bolt through the middle of it.

  19. SKeGWA1fZVHZEJ1h
    SKeGWA1fZVHZEJ1h
    eiS6nfGywxGqGQAQ
    vUdK4IvPJLGDrC1s
    • Put the nut in to secure it.

  20. UnHlVEqkmZiMgvsR
    UnHlVEqkmZiMgvsR
    kuGAEaqZKZpxc3NR
    uTdBjyeQxj1JMYTA
    • Secure the screws tightly (clockwise) using the same method and 6mm hex key.

  21. bTZvQRFEgnRtX6Aj
    bTZvQRFEgnRtX6Aj
    RXGatKXRLyRIYnnW
    6OgKCkKPTw14NWYa
    • Put the wheel back into the machine.

  22. vFKTbABSbgpRSg13
    vFKTbABSbgpRSg13
    gVRNvwjmDk3XWiEK
    jIQhceT6VNIVkcvo
    • Put the orange cap back on.

    • You don’t need to secure it very tightly because the orange cap adjusts to the strength you need to apply to the pedal during workouts.

  23. FZILtor6V6sI3gCP
    FZILtor6V6sI3gCP
    dMoGkcGKFpswJORy
    kSXorvOe4sQsWXpP
    • Turn the machine around and locate two point that will connect the tension cable.

  24. LCD4DUtqHXJyPhqq
    LCD4DUtqHXJyPhqq
    Ki3Zpu6AvKC3uV4E
    • Align the tension cable with the hole and insert the M8 x 16mm Allen Bolt through it.

  25. ZKyYXGSimX2fAwhe
    ZKyYXGSimX2fAwhe
    5Wej3mVl1TovnPJI
    en43ecouaTiRQYOw
    • Use 6mm hex key to secure the bolt.

  26. sqAtsKylYUeuPiSH
    sqAtsKylYUeuPiSH
    SvBXXBueCa1UC2nV
    • Secure the M8 x 16mm Allen Bolt with the nut.

  27. hjAIWgAi24fXjsyW
    • Repeat the same for the other side.

  28. j5eFBo3kDfnUfZyv
    j5eFBo3kDfnUfZyv
    pJ5geQFegU1b4AaH
    2FYoSpQOSAYASEWO
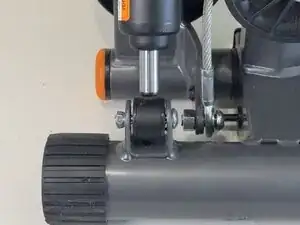
    • Align the hydraulic cylinder onto the hole on the pedal (the side that doesn’t extend) and insert a M6 x 45mm Allen Bolt through the hole.

  29. VnOBW6XHght5CYBc
    VnOBW6XHght5CYBc
    JmacYQKqyUWN24BD
    OoySuuUT5YfBc1CH
    • Secure the M6 x 45mm Allen Bolt with the nut.

  30. NfRbM6EPlXNkAljO
    NfRbM6EPlXNkAljO
    oXYtTJMcWw6ihrEw
    CVSNoNw4ouaqTIXd
    • Using the same method, tighten the M6 x 45mm Allen Bolt(counter-clockwise) with 5mm hex key.

  31. gKXJfdxbDJIrLH5P
    • Repeat the same for the other side.

  32. OIcI2dLYixiOBZJE
    OIcI2dLYixiOBZJE
    YbVeEDDJ1dxplURh
    ilWUMUoeiMGyGCQV
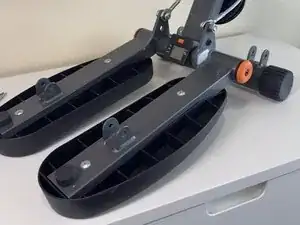
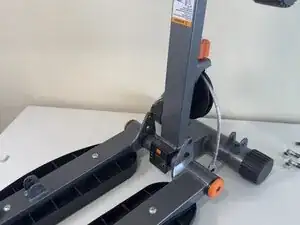
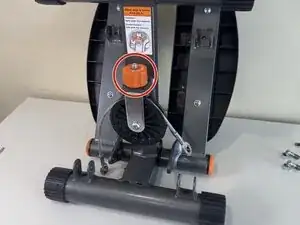
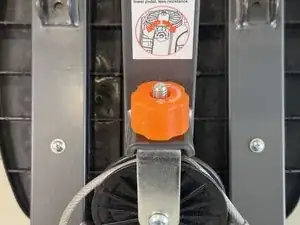
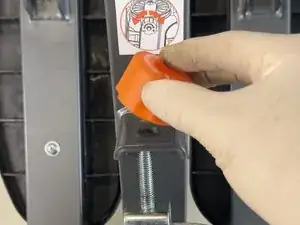
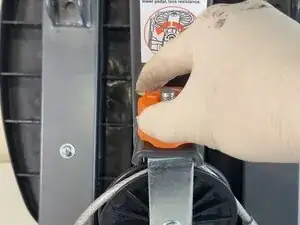
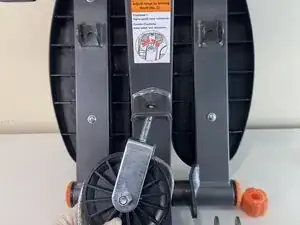
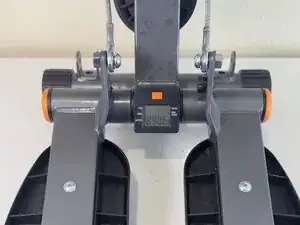
    • Rotate the machine so that the orange cap is facing you.

    • Align the frame that connects to the hydraulic cylinder.

  33. WMQl5PiPNFGVXQ5L
    WMQl5PiPNFGVXQ5L
    iBZYAIqPmUSDLeUe
    uOYX1HXAo4aLTlpp
    • Insert a M6 x 45mm Allen Bolt through it.

  34. EC1cR21fdfKSf3tG
    EC1cR21fdfKSf3tG
    SgQlKrNZS1uFVZrV
    ZyaMgWjuTWQEmKNe
    • Use a 5mm hex key to tighten it.

  35. ENI2AWeRhiNuuiEB
    ENI2AWeRhiNuuiEB
    ecDYWwnkjPTYOESE
    YH6ftKu6jV1jFvp4
    • Secure the M6 x 45mm Allen Bolt with a nut. Tighten the bolt using the same method.

  36. xLkQQVGPyKWLsqT6
    xLkQQVGPyKWLsqT6
    vaR1lUAYkbC2fJQ3
    kRfkobFJDbWXoTm1
    • Repeat the same for the other side.

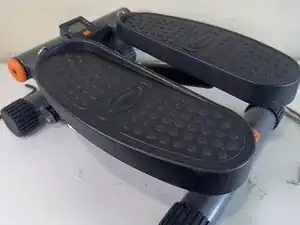
    • You did a great job! You just replace a tension cable on the mini stair stepper.

Conclusão

To reassemble your device, follow these instructions in reverse order.

Khanh Le

Membro desde: 25/09/25

709 Reputação

0 comentários