Introdução
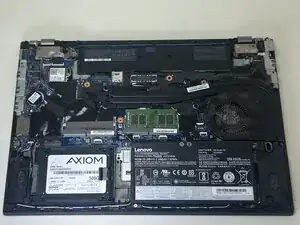
The ThinkPad P51s includes two DDR4 SO-DIMM RAM slots, allowing the memory to be upgraded or replaced as performance needs change. Over time, faulty or improperly seated RAM can cause symptoms such as random shutdowns, failure to boot, continuous beeping on startup, freezes under load, or the laptop not detecting the full installed memory. Users often upgrade the RAM to improve multitasking, workstation workloads, or virtualization performance.
Before beginning this repair, shut down the laptop completely and disconnect it from the AC adapter. Lenovo recommends removing the external battery first to prevent power from reaching the motherboard. Handle RAM modules only by the edges and avoid touching the gold contacts to prevent electrostatic damage. Mixing memory of different speeds or capacities can also reduce performance or prevent the system from posting, so confirm compatibility before installation.
This guide will walk you through safely accessing and replacing the RAM modules using standard tools. Take your time when removing the bottom cover.
Ferramentas
-
-
Slide both locking latches outward using your thumbs.
-
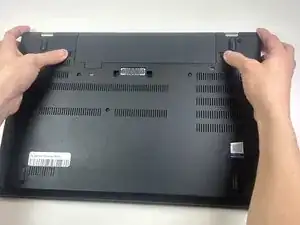
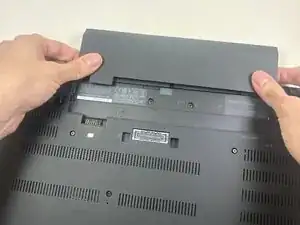
Keep the right latch held in the unlocked position with your right thumb. With your left hand, pushed the battery out of its placement from the slot.
-
Once it detaches, use both hands to slide the battery out.
-
-
-
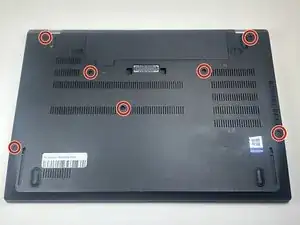
Use a Phillips #00 screwdriver to loosen all seven captive screws that secure the lower case.
-
-
-
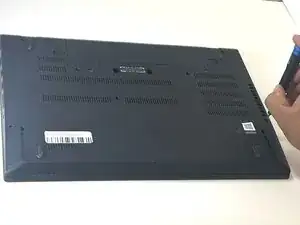
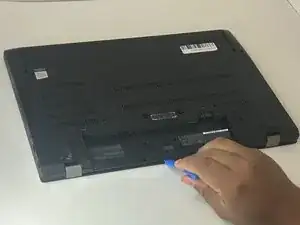
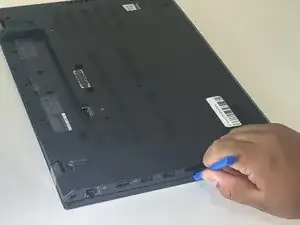
Insert an iFixit opening tool into the gap along one edge of the laptop.
-
Gently slide it around the perimeter to release the clips.
-
Lift the bottom cover off once all clips are released.
-
-
-
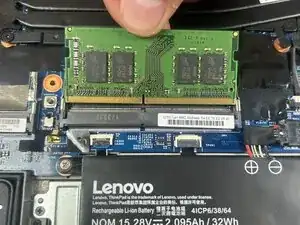
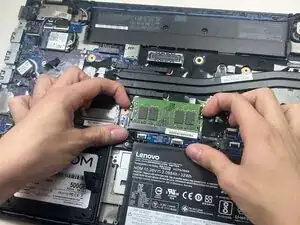
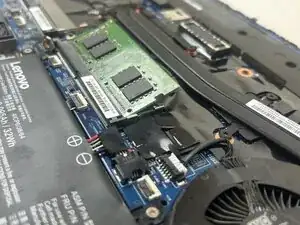
Push the two metal retaining clips on each side of the RAM module outward.
-
Hold the edges of the RAM card and gently slide it out from the slot.
-


To reassemble your device, follow these instructions in reverse order.
Take your e-waste to an R2 or e-Stewards certified recycler.