Introdução

  1. fqubWSv1RDEiduwf
    fqubWSv1RDEiduwf
    ZtBk2GAgtVDdVpgb
    GRnYIbPaLMuZgq3d
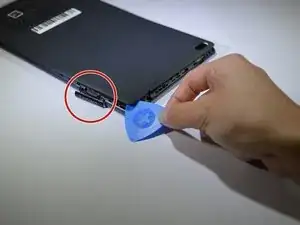
    • Start at the microSD slot. This is the easiest entry point.

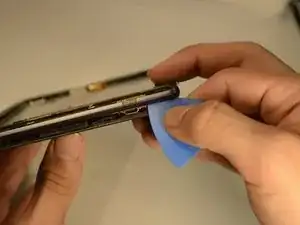
    • Use the opening pick gently to slide underneath the back cover of the tablet.

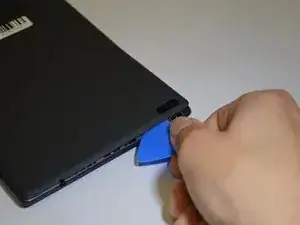
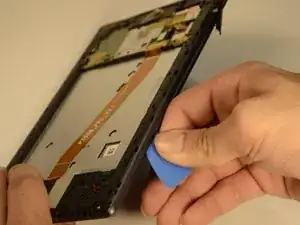
    • Slide the opening pick around the entire edge of the tablet. Don't force it and work slowly to release all clips.

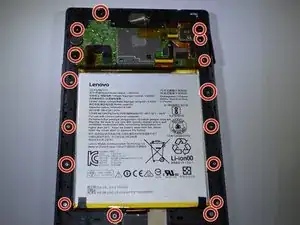
    • Once all clips are loose, lift and remove the back cover.

  2. 2Ylntyp6rDVq5TEB
    2Ylntyp6rDVq5TEB
    aU1ELmay3XRMOyPV
    RUBvPexUx34XTgVa
    • Remove the 8 Phillips #000 screws holding the plastic shield.

    • Important: One screw is hidden under the blue "S" sticker.

    • Remove any tape holding the plate shield.

    • Use precision tweezers or your fingers to remove the plate.

  3. qHQlsdF2jHEIvAC4
    qHQlsdF2jHEIvAC4
    GVRQ3JxqkNuGIWy6
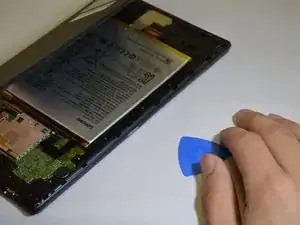
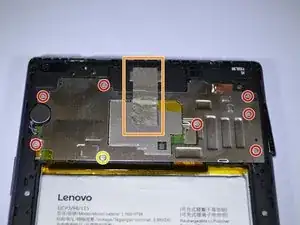
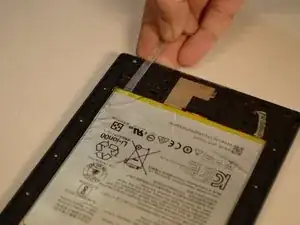
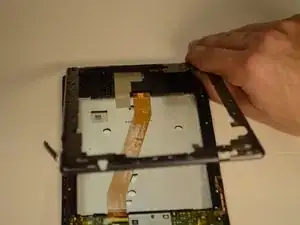
    • Peel back the yellow protective tape over the battery connector.

    • Use a spudger or plastic opening tool to remove the battery's ribbon cable from the motherboard.

  4. 4MO6MMJ46JmxDgp6
    4MO6MMJ46JmxDgp6
    5nAIHZqe6FuwuNgt
    FAT3CjAhHjevJYu2
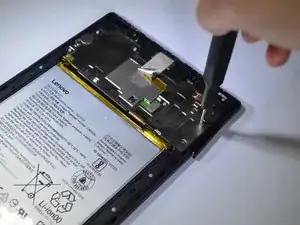
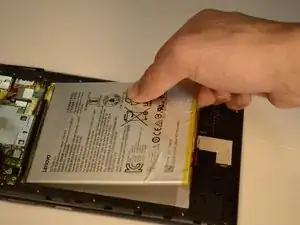
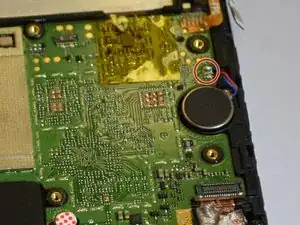
    • Locate the two stretch-release adhesive strips at the bottom of the battery.

    • Gently pull each strip slowly and straight out under the battery.

    • Don't pull upward, only pull horizontally away from the battery

    • The strips are longer than you think, so take your time

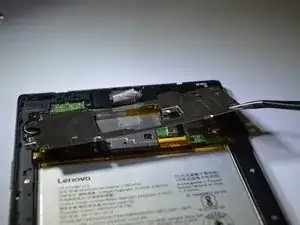
    • Once both strips are off, lift the battery from the frame.

    Hi

    What I want to ask is how did you get to the motherboard after step four. I couldn't see how you removed the upper protection plastic part.

    I couldn't get it out either!!!

    I wish you good work.

    vedatemre şahin -

    Be cautious when removing the adhesive strip. Pull it straight ( not up) from the battery a little bit at a time. It is longer than you'd think.

    Arthur Watson -

    Spot on instructions. Be sure to seat the battery connector very carefully and make sure it doesn't pop off. It look me several tries to seat it.

    Philip F -

  5. rKIqKlOfUBWlDmqP
    rKIqKlOfUBWlDmqP
    xVKhTMYCovEISLZd
    • Remove 16 screws from the midframe with Phillips #000 screwdriver [bit].

  6. kJeiBDBRojkpCKQK
    kJeiBDBRojkpCKQK
    3ZuguBKfylfUXvG4
    Zn4QV5QQmkQL2vus
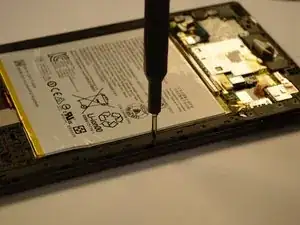
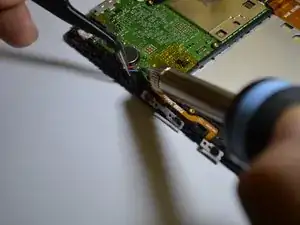
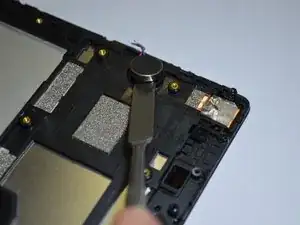
    • Using an opening pick, find a spot to lift the bracket around the tablet.

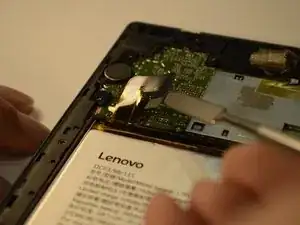
    • When the opening pick is inserted between the bracket and tablet, move the pick around the whole tablet to completely detach the bracket.

  7. Qg5EGkHXjB3BA2wO
    Qg5EGkHXjB3BA2wO
    bEoIDJyESUKdYeYn
    E4NJmb6bNIN2YVXv
    • Using the soldering iron can be very dangerous if not used carefully. Solder iron is very hot.

    • Desolder the blue and red wires from the motherboard.

    • Once wires are detached, use a metal spudger tool to lift the vibrator.

    • If the wire is not detaching from the tin, raise the heat on the soldering iron.

Conclusão

To reassemble your device, follow these instructions in reverse order.

Ivan Chavez

Membro desde: 06/02/19

809 Reputação

0 comentários