Introdução
If your Lenovo IdeaPad 3-15IML05 fails to hold a charge or won’t power when disconnected from its charger, use this guide to replace the battery.
Before beginning this guide, we suggest you review your power usage settings and battery health. For additional diagnostic help, check out the device’s troubleshooting page.
The lithium-ion battery stores and supplies power when the laptop is unplugged. Over time, the battery can degrade and lose its capacity (mAh). Replacing the battery could restore reliable performance and extend your laptop’s lifespan.
Working with lithium-ion batteries can be hazardous. A connected or swollen battery may catch fire if damaged. Before beginning this repair, discharge the battery below 25%, power off the laptop, and unplug all peripherals.
If you encounter a swollen battery, refer to this guide for disposal.
-
-
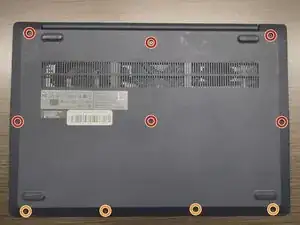
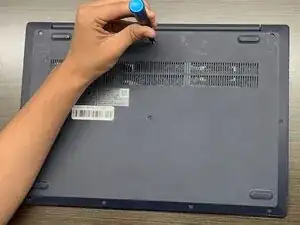
Use a Phillips #1 screwdriver to remove the following screws:
-
Six 7 mm screws
-
Four 4 mm screws
-
-
-
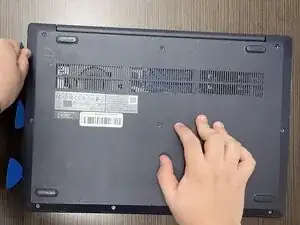
Insert an opening pick into the seam between the lower case and chassis.
-
Slide the pick around the entire perimeter until all of the plastic retaining clips release.
-
Remove the lower case.
-
-
-
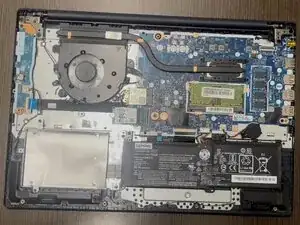
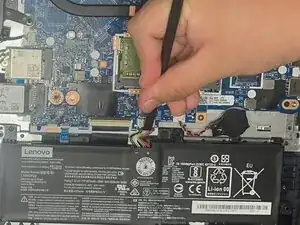
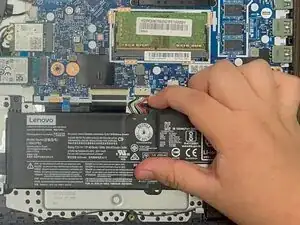
Use a plastic spudger or your fingernail to gently push the JST battery connector out of its socket.
-
-
-
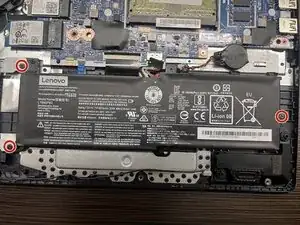
Use a Phillips #00 screwdriver to remove the three 5 mm screws securing the battery.
-
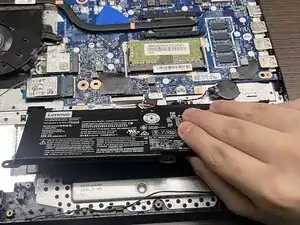
To remove the battery, slide it to the right and lift it away from the hard drive cover.
-
To reassemble your device, follow the above steps in reverse order.
For optimal performance, after completing this guide, calibrate your newly installed battery.
Take your e-waste to an R2 or e-Stewards certified recycler.
Repair didn’t go as planned? Try some basic troubleshooting or ask our Answers community for help.