Introdução
The JBL Live 660NC headphones (also known as JBL Live 660 NC or JBL Live 660NCBT) may need a charging port replacement if they stop charging, lose connection easily, or fail to turn on when plugged in. Before beginning this repair, you may want to visit the JBL Live 660NC Troubleshooting Page to make sure the issue isn’t caused by a simpler problem.
Over time, the charging port can wear out due to frequent use, debris buildup, or physical damage. Always power off your device, unplug all cables, and handle each component carefully to prevent further issues during the repair.
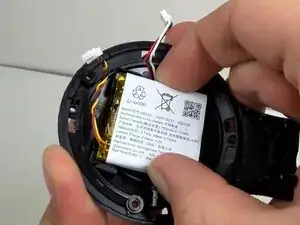
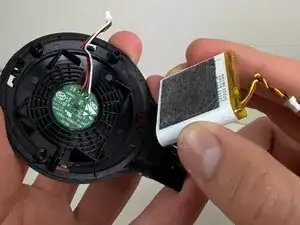
Note: You don't need to remove the battery as shown in Step 7, but be sure to disconnect the battery.
Check out this guide to safely desolder components before proceeding.
-
-
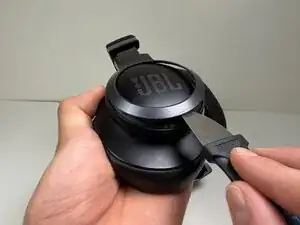
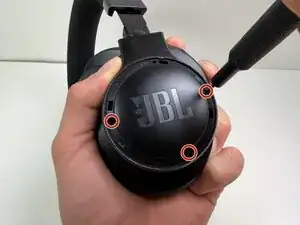
Use a Jimmy or spudger to pry the bezel around the JBL plate.
-
Gently slide the tool around the edges to loosen the clips.
-
Lift the bezel off.
-
-
-
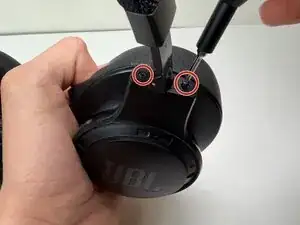
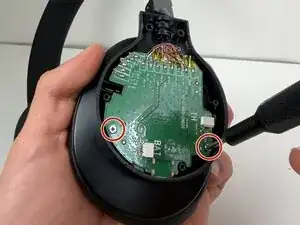
Use a Tri-point Y0 screwdriver to remove the two 5 mm screws at the base of the headband where it connects to the earcup.
-
-
-
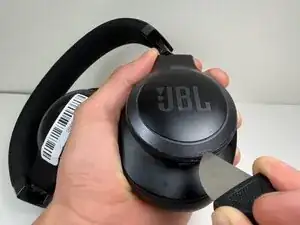
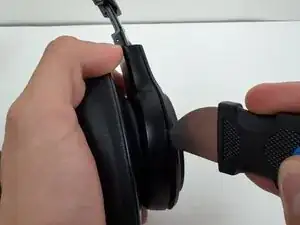
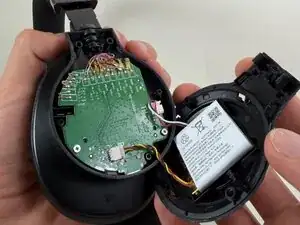
Use a nylon spudger or Jimmy to pry the earcup cover.
-
Gently slide the tool around the edges to loosen the clips holding the cover in place.
-
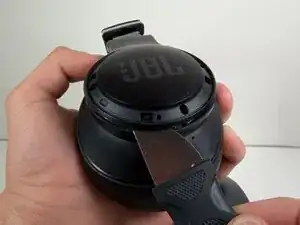
Lift the cover off.
-
-
-
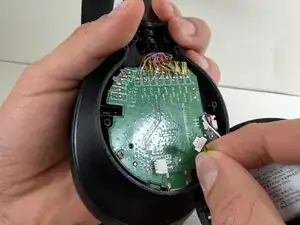
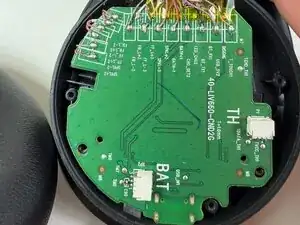
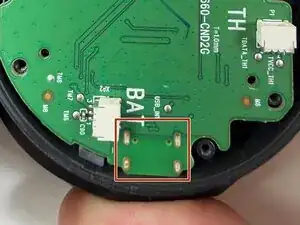
Use a spudger to push the connector labeled BAT from the socket on the motherboard to disconnect the battery cable
-
-
-
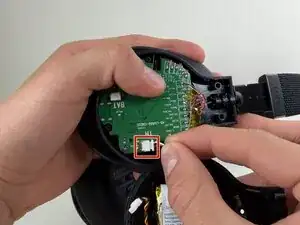
Use the tip of the spudger to push the plastic locking tab away from the socket labeled TH—it should only move about 1–2 mm.
-
Carefully remove the cable connector from the socket on the board.
-
-
-
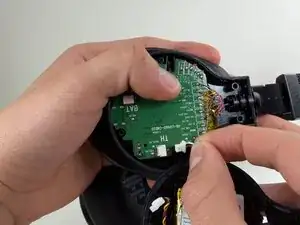
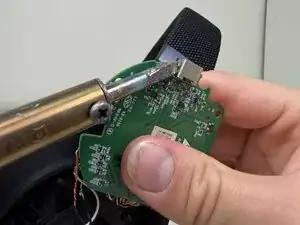
Lift the motherboard out of the ear cup to expose the charging port.
-
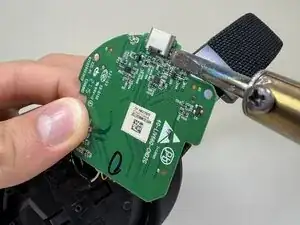
Flip the board over for access to the port solder joints.
-
Use a soldering iron to desolder and remove the old charging port.
-


To reassemble your device, follow these instructions in reverse order. Take your e-waste to an R2 or e-Stewards certified recycler.