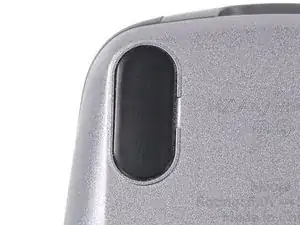
Introdução

Use this guide to open your Logitech MX Anywhere 3 mouse.

Open your mouse to clean its internals, troubleshoot mechanical problems, or replace a part.

  1. ibXKHNbiHOMFhbFs
    ibXKHNbiHOMFhbFs
    jUsBXeFx6SWgXKbA
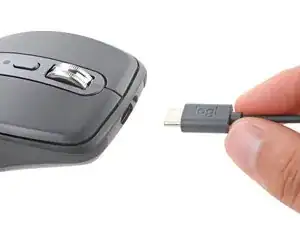
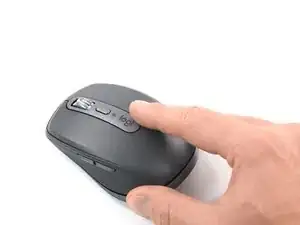
    • Slide the mouse's power switch to the OFF position and unplug any cables.

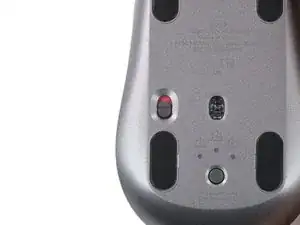
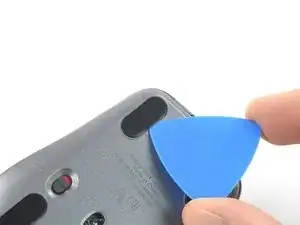
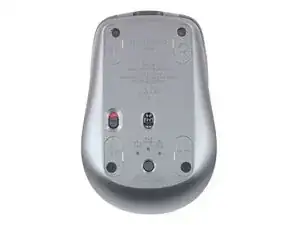
    • Flip the mouse over so the feet are facing up.

    • The unique shape of some mice can prevent them from laying flat. If you need to, lay your mouse on a soft towel to prevent wobble.

  2. RyUFDDkl3MVRCXKC
    • If you're planning to reuse your existing mouse feet, the adhesive needs to be thoroughly heated to cleanly remove them.

    • Heat an iOpener and lay it on the mouse feet for about two minutes to soften the adhesive.

    • Alternatively, you can use a hair dryer to soften the mouse feet adhesive.

    • When using a hair dryer, don't heat the feet for more than a couple seconds at a time—anything hotter than just warm to the touch risks melting or warping the plastic case.

  3. UAYxW4VMNHwsHtxo
    UAYxW4VMNHwsHtxo
    BykwlMZGBaun3VOW
    LlCwZeQAewKIs41n
    • While you wait for the adhesive to soften, note the following:

    • There are small gaps in the rims surrounding each foot. This is where to insert your tool when peeling up the feet.

  4. ScBiFTZdTAXiLrxP
    ScBiFTZdTAXiLrxP
    ERZDn6aI2XlU5aSV
    oGFMAv461mbmsdgI
    • Push the tip of an opening pick (or spudger) underneath the mouse foot, into the gap in the rim.

    • Go slowly, and make sure the pick slides underneath both the foot and its adhesive pad—these layers separate easily.

    • If you plan on reusing your mouse feet, be careful not to crease them or separate them from their adhesive pads.

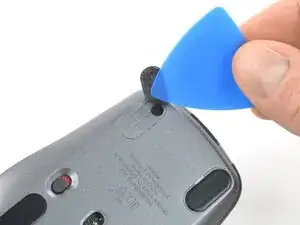
    • Slide your pick under the foot and lift to remove it.

    • Repeat the process to remove the three remaining mouse feet. If you're having trouble sliding the tool under a foot, reheat it and try again.

    • To install new mouse feet:

    • Use a pair of tweezers or a spudger to remove any large chunks of leftover adhesive. Thoroughly clean the bottom of the mouse with isopropyl alcohol and a lint-free of microfiber cloth. Allow the surface to dry completely.

    • Peel your new mouse feet off their adhesive liners and press them firmly into place.

    I would also suggest Tesa 61395 Tape as a replacement for the adhesive for the feet. It is extremely strong when applied.

    I use it on the back of a metal plate adhered to my phone for a magnet mount in my car. And is on a silicone case.

    Amazing tape and extremely thin.

    Paolo Alberto -

  5. fC2ugTfQ2kduQBGL
    fC2ugTfQ2kduQBGL
    YAiqfDIjQZhw3l5d
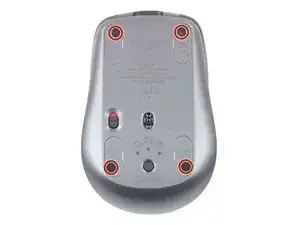
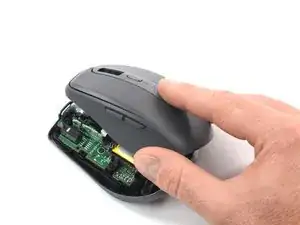
    • Use a Phillips screwdriver to remove the four 4.3 mm‑long screws securing the two halves of the mouse together.

  6. wO4ibQaTZKLTSDP4
    wO4ibQaTZKLTSDP4
    ZKIXYOHD1pHTcytE
    WdcNtSP4IXeVFcE3
    • Gently lift the top shell off the mouse up and flip it over the right edge.

    • Don't try to fully remove the top shell yet—a cable connects it to the lower half.

    Ok I'm standing

    Gd Fs -

  7. CYKBoIvUiL4AFxEu
    CYKBoIvUiL4AFxEu
    1KoQaOpwAPSyY4oI
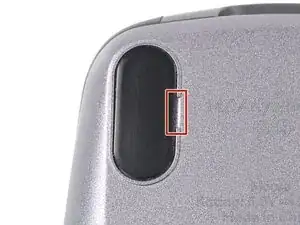
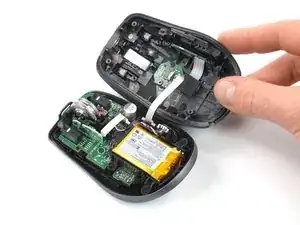
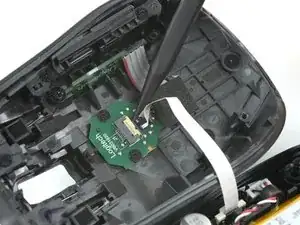
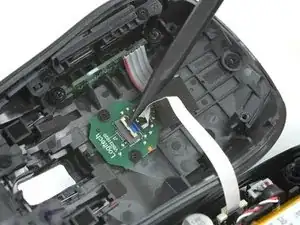
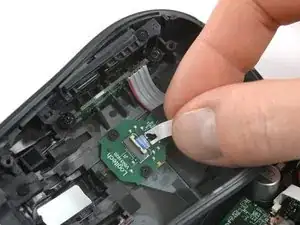
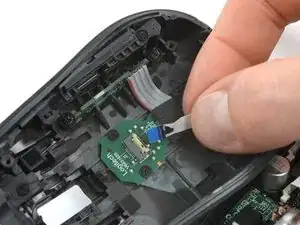
    • Use the point of a spudger or a clean fingernail to flip up the small, hinged locking flap on the interconnect cable ZIF connector (located on the underside of the top shell).

    I did this, but it was way easier to disconnect the other end of the cable by simply removing the cable with a clip (without glue)

    spam3d -

  8. BLQEBx6PipRG4eYj
    BLQEBx6PipRG4eYj
    No3DhXlSGUjo4PdW
    • There may be a small piece of adhesive securing the interconnect cable to the board on the top shell, right where the cable goes into its socket.

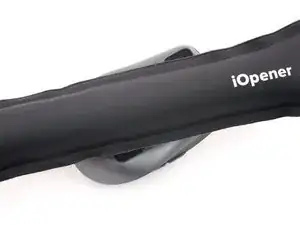
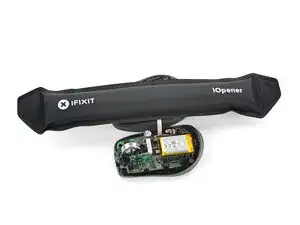
    • Apply a heated iOpener to the board on the underside of the mouse's top half for two minutes.

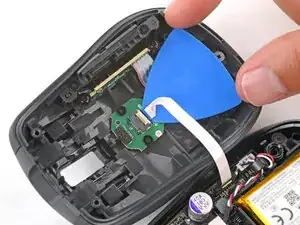
    • Gently slide the tip of an opening pick under the cable to separate its adhesive.

  9. CdTEJCl2igglBkNM
    CdTEJCl2igglBkNM
    1ivABlPhbgbdBdXE
    • Use your fingers or tweezers to pull the cable straight out of its socket.

    • During reassembly, insert the cable with its blue tab facing up, then flip down the locking flap.

    On my MX Anywhere 3, the interconnect cable is also glued to the board on the top half of the mouse. It was much easier to pop up the white top of the connector on the bottom half of the mouse to free the interconnect cable.

    dustin -

  10. 2TWFVkSuT1a5Pm3d
    • Remove the top shell.

    The switches in this mouse are the Omron D2FC-F-7N and they are very loud. It might also be the plastic chassis that's contributing to the overall clicky sound signature.

    Rad -

Conclusão

To reassemble your device, follow these instructions in reverse order.

Repair didn’t go as planned? Try some basic troubleshooting, or ask our Answers community for help.

Tobias Isakeit

Membro desde: 31/03/14

131371 Reputação

13 comentários

My left click started to have double click issue. Do you have any suggestions how to fix it? If I want to replace it, does ifixt have the part? If not, what is the part number? Thanks

Vim -

You could replace the left switch. See step 9 for the part number. You’d need to desolder the switch.
Sometimes it is enough to open the case of the switch and clean or tweak the small metal plate. But this is a very delicate finger exercise.

Tobias Isakeit -

Mine had the left click issue. Opening the switch case and cleaning the contact points resolved it.

Meo Tras -

Steps 6 and 7 are not necessary to get access to buttons (the most common malfunction). My model had this interconnect cable glued hard to the top half of the device. You can easily remove it without disconnecting the cable, oil the buttons and assemble mouse back

Максим Шилиманов -

My interconnect cable wasn't glued hard, but was attached via adhesive which took careful effort to peel away. I had to remove the screws on the board to get to the lower level to clean up coffee, though fortunately there was very little. However when I went to reassemble, I found a free spring and no clue where it came from. Thankfully, enlarging the third picture in step 5 shows where the spring is under the wheel assembly and I was able to reassemble successfully (also the two screws holding the wheel assembly are slightly longer than all others). I even managed to reinsert and restick the interconnect cable correctly.

Carol Y -

my mouse has a red blinking light on the battery status LED after cleaning the click switches with dielectric contact cleaner, any way to solve this?

luis javier gutierrez jeronimo -

Hi luis, I bought a used MX Anywhere 3 which middle clicks turned out to be unreliable. So I opened it, removed its battery and scrollwheel unit and also tried to fix it with dielectric cleaner. After letting it dry for a moment, I carefully reassembled everything. But just like yours, it not longer works and just flashes red. It seems like a bootloop to me, but I couldn't find any documentation on how to reset its memory or reinstall its firmware without wireless connection. Does this mean, end users are not supposed to disconnect its battery? But how would I clean or replace the switches then?

pnoqable -

I have the same issue!! Does anyone knows how to solve it???
After I reassembled my MX Anywhere 3 mouse, when I turn on the switch, the LED at the back of the mouse wheel only blinks red. I have already tried charging it, but the red LED keeps blinking whether it is charging (with the power switch turned on or off) or not charging (with the power switch turned on). Additionally, the LED on the Bluetooth switch, which has 3 options to connect up to 3 devices, no longer turns on. Does anyone can help me?

Alexandre Abreu -

Bonjour, la molette se bloque, alimentée ou non. ⏎
j'ai démonté, et une rondelle métallique crantée à l'intérieur saute et se bloque.⏎

j'ai réussi à réparer, normalement :)⏎
Sans savoir si cette fameuse rondelle était collée, ce que je suppose, eh bien de la colle et ça fonctionne.

Christ Ophe -

Had similar issues as others where its hard to click and drag things as the click would randomly disconnect. Very annoying for what's supposed to be a premium mouse. How much would it be to have it repaired or is it better to buy a new one? Definitely would not get the same one again!

Andrew Shaw -

I have the same problem. I had same problem with my earlier Logitech mouse too. I bought MX Anywhere3 due to high resolution for mouse operations. But these not lasting more than 2 years.

Govind Avireddi -

On/off switch is moving more difficult every day, this happens on all 3 of my MX3's

Arjan -

mx anywhere 3 что-то стала глючить, нажиматься 2 раза вместо одного и при зажатой кнопке и выделении текста может просто отжаться и нажаться в любой момент и из-за этого текст выделяется не правильно - всё это сильно мешает и раздражает. Разобрал, почистил, собрал - проблема ушла.

De Bug -