Introdução
Use this guide as a reference on how to maintain and repair a Lekker Switch - Linear45 (L45) switch on a Wooting Keyboard.
In the case that users face inconsistency or other issues with key presses, there is a possibility that dust and debris may be interfering with the keyboard sensor and the magnet inside the switch. Cleaning out the switch interior can fix this unless there is a software issue.
If problematic key presses are caused by a cracked switch housing or the spring is worn out, a switch and/or spring replacement will be required. Refer to the guide instructions as they point out which steps relate to each target fix.
Ferramentas
Peças
-
-
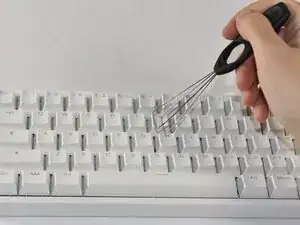
Align the keycap puller so the prongs wrap underneath the sides of the keycap, then pull up to remove the keycap.
-
-
-
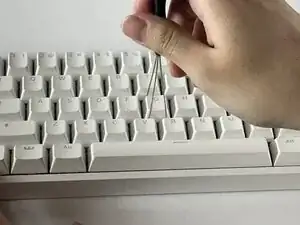
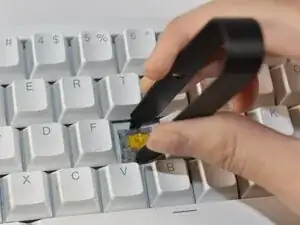
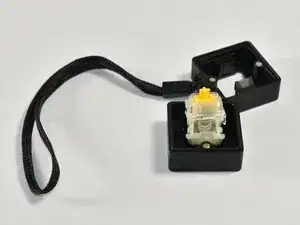
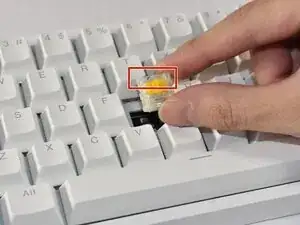
Align the prongs of the switch puller so it clips underneath the grooves of the north and south side of the switch, then pull up.
-
-
-
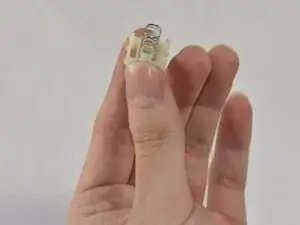
Identify the four prongs on the switch opener.
-
Align the switch onto the switch opener so that it sits flush on the prongs, then push down on the switch to disassemble the switch.
-
-
-
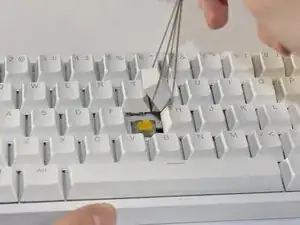
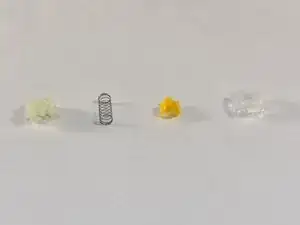
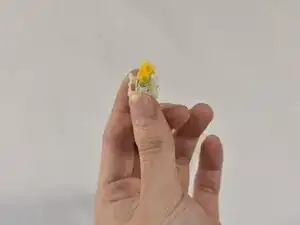
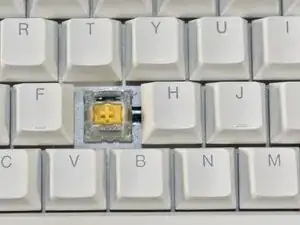
Identify the various switch components and the order of construction (from left to right or bottom to top): bottom housing, spring, stem, top housing. Separate them from the switch.
-
-
-
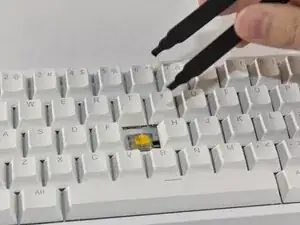
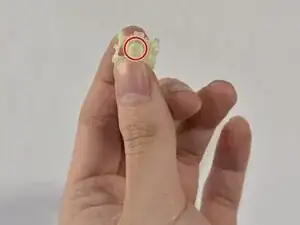
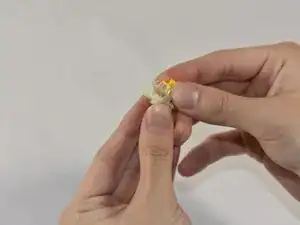
Identify the individual parts and see if any parts are dirty to the degree that it could interfere with the magnet sensor.
-
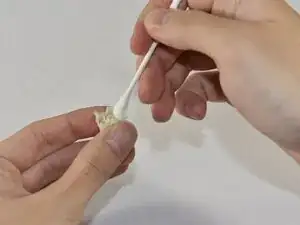
Clean out the dust or debris thoroughly with a cotton swab.
-
-
-
Hold the bottom housing such that the inner cylinder faces up.
-
Slip the spring onto the cylinder.
-
-
-
Place the stem so the magnet faces the bottom housing, and the stem mount faces up.
-
Orient the stem so the side notches at the top face the sides of the switch.
-
-
-
Place the top housing on top of the stem and align it so the LED window faces north.
-
Clip the switch parts together into place.
-
-
-
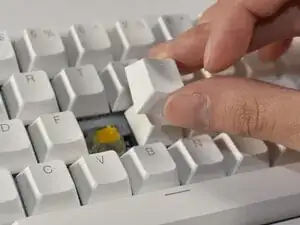
Align the switch into the board such that the LED window is facing north.
-
Push down so the switch clips into place and isn’t loose.
-
-
-
Align the keycap so it faces the correct orientation.
-
Press down the keycap onto the switch.
-