Introdução

Replacing a laptop's speakers restores or improves sound quality, especially for damaged or distorted audio. It can fix problems like muffled sound, blown speakers, or other hardware failures. This guide tells you how to replace the speakers in the Dell Latitude 5580 laptop.

  1. MAflpuSYWmBEsFWK
    MAflpuSYWmBEsFWK
    pC2UcUl4lRF2Bt4N
    XWHFxbjjhihwDDCk
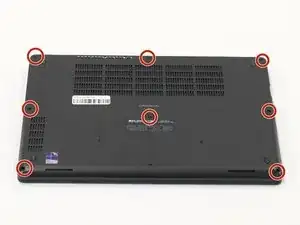
    • Orient your laptop so that you have access to the lower case, with the vents facing upwards.

    • Use a Phillips screwdriver to loosen the eight screws securing the bottom cover.

    • They are captive screws and do not fully come out of the holes. Don't force them or you may damage the screws or holes on the bottom case.

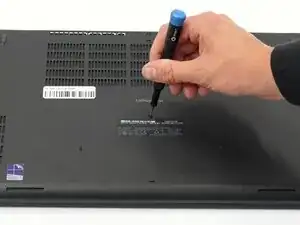
    • Insert the end of an iFixit opening tool or an opening pick into the seam between the bottom and top case to release the clips holding them together.

    • Slide the opening tool or pick around the edge of the laptop until the case is fully released.

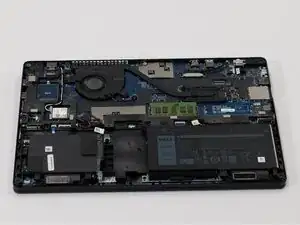
    • Remove the lower case.

  2. Rive64IngC4aQ2P4
    Rive64IngC4aQ2P4
    IPxLaAsojVJMbYXt
    X6KZWWG5P6LEH6Qo
    • Orient your laptop so that you have access to the bottom cover, with the fan vents facing upwards.

    • Use a Phillips #00 screwdriver to loosen the eight screws securing the bottom cover.

    • They are captive screws and do not fully come out of the holes. Don't force them or you may damage the screws or holes on the bottom case.

    • Insert the end of an iFixit opening tool or opening picks into the seam between the bottom and top case to release the clips holding them together.

    • Slide the opening tool or pick around the edge of the laptop until it is fully separated.

    • Remove the bottom cover.

  3. VLgEZplGskbI1nsG
    VLgEZplGskbI1nsG
    H6SxyI1YZv6mn2jB
    4vWaJapWENlTeVwa
    • Remove the single Phillips #00 screw that is holding down the battery.

  4. CDQslW1koCJOr5Tp
    CDQslW1koCJOr5Tp
    gaxl3RGT2dwMeOAi
    • Use the pull tab to gently pull the battery cable out of its socket.

  5. Pv63TrcRVyFMl2g6
    Pv63TrcRVyFMl2g6
    qGitWdMXiWirnln4
    • Remove the old battery.

    • To install the battery connection cable, push gently into the original connection port to connect the replacement battery to the computer. Tuck in the battery connection cable underneath the plastic frame next to the battery.

  6. AskWrFGygWDKWGVi
    AskWrFGygWDKWGVi
    cBL4DeG2pwhABmKm
    yrSOAFuhXXqHwQP1
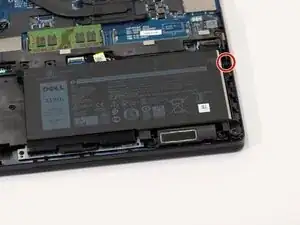
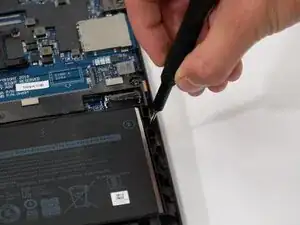
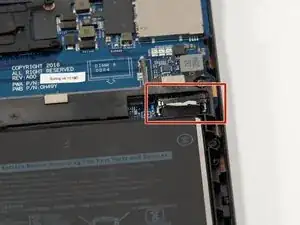
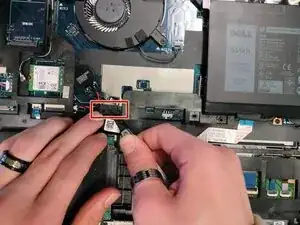
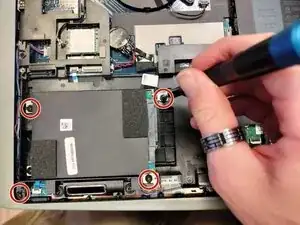
    • Use tweezers to unplug the wire connected to the hard drive, in the bottom left of the laptop.

  7. 3jZKRvbuUcknlKvI
    3jZKRvbuUcknlKvI
    EgLXqxNPMX1I21Sk
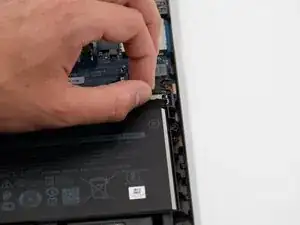
    • Unscrew the four 5.8 mm-long screws on the hard drive with a Phillips #1 screwdriver.

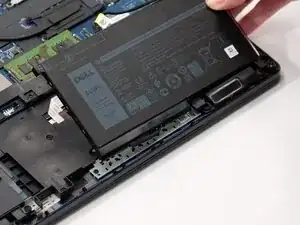
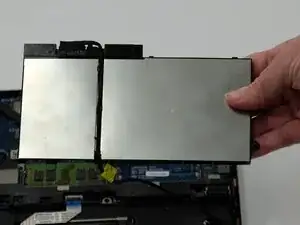
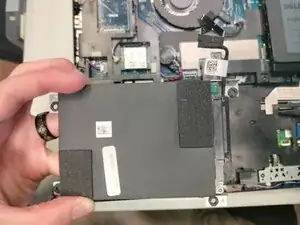
    • Lift the hard drive out of the laptop with your hands.

  8. oSL2PQkN5FUZT54Y
    oSL2PQkN5FUZT54Y
    en3OsrdPhZh3jrEo
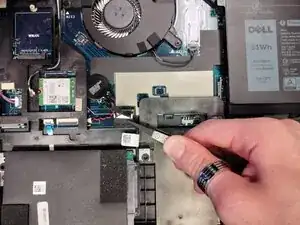
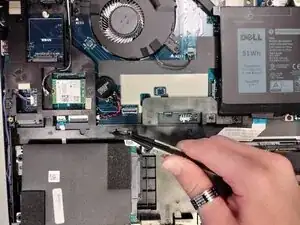
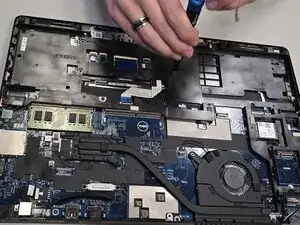
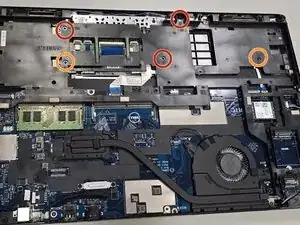
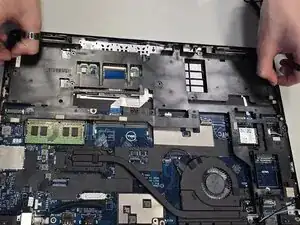
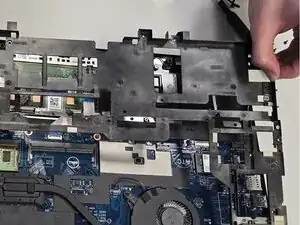
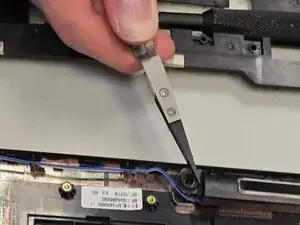
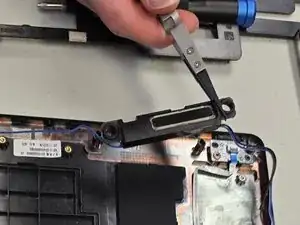
    • Unscrew the three 3.4 mm-long screws securing the midframe with a Phillips #1 screwdriver.

    • Unscrew the two 5.8 mm-long screws securing the midframe with Phillips #1 screwdriver.

  9. d1TDVaIRHvcXnqmF
    d1TDVaIRHvcXnqmF
    V1gnoTmqZayIS4Dh
    I2TgFRFZPLTYvGkA
    • Remove the midframe.

  10. kEK23rZeccEI3FEX
    kEK23rZeccEI3FEX
    xje5TmLIxnK3RlxT
    vZyqSY2OhgNldLKh
    • Use tweezers to lift out the speakers in the bottom right of the laptop.

  11. KRqZULUpkc2no1VF
    KRqZULUpkc2no1VF
    QfPdste5vnyCiBAK
    bwEfN5WyLFWXpFIe
    • Use tweezers to lift out the speakers in the bottom left of the laptop.

  12. UC2YfneaZpayyMdO
    UC2YfneaZpayyMdO
    VR5WyFtHgALFnS5G
    • Disconnect the speaker connector.

  13. WOD2YgICdPuZy2uq
    WOD2YgICdPuZy2uq
    vSbhxKyYvENwhykd
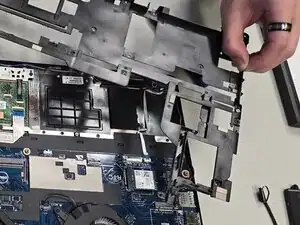
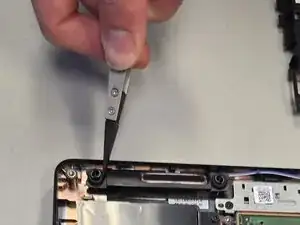
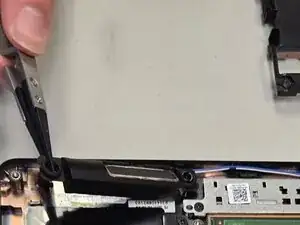
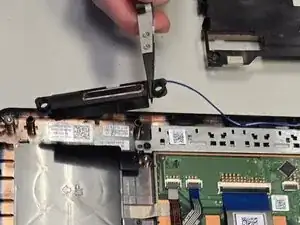
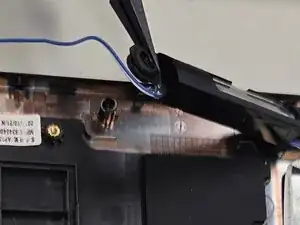
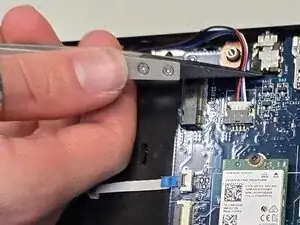
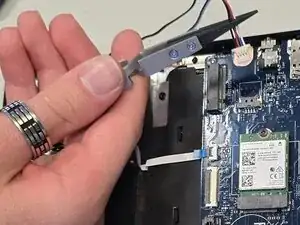
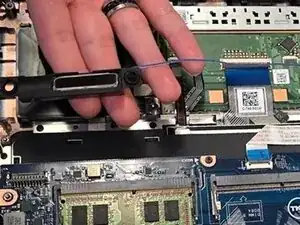
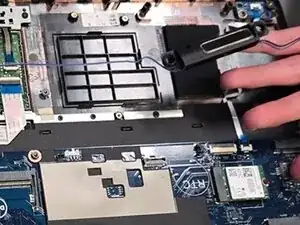
    • Remove both the left and the right speakers along with the wire connected to them, with your hands.

Conclusão

To reassemble your device, follow the above steps in reverse order.
Take your e-waste to an R2 or e-Stewards certified recycler.
Repair didn’t go as planned? Try some basic troubleshooting or ask our Answers community for help.

Levi Dobkins

Membro desde: 08/09/25

157 Reputação

0 comentários