Introdução
Are you experiencing slow Wi-Fi speeds, frequent disconnects, or inconsistent internet performance on your Dell Latitude 14 Rugged 5414? This guide will walk you through the steps to replace your Wi-Fi card and restore fast, reliable wireless connectivity.
Before beginning, verify that the issue isn’t caused by the router, network congestion, or software-related problems, such as outdated drivers. Testing your device on different networks or updating drivers can help rule out these possibilities. If performance issues continue across multiple networks, a failing or outdated Wi-Fi card may be the cause, and replacing it is a practical solution.
Be sure to fully power down your laptop and unplug it from any chargers or connected devices before starting the repair. Work on a clean, static-free surface to prevent electrostatic discharge, which can damage the internal components you’ll be handling.
-
-
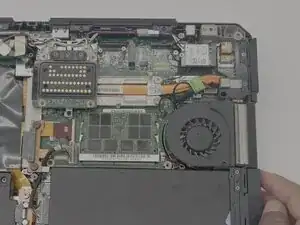
Flip the laptop over so the bottom side is facing up.
-
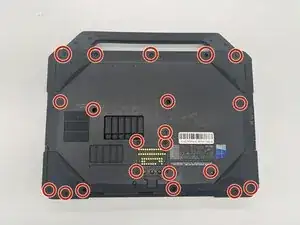
Use a JIS #1 screwdriver to remove all twenty-one 7 mm screws that secure the bottom cover.
-
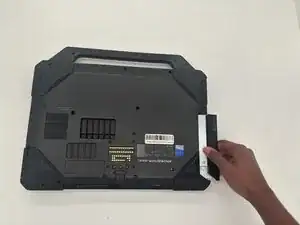
Gently slide out the optical disc drive from the underside of the right edge of the laptop.
-
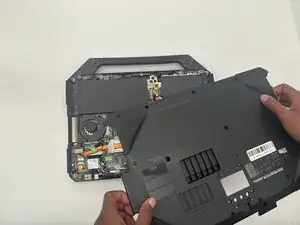
Lift the bottom cover of the laptop starting from the corner.
-
Insert an opening tool or heavy duty nylon spudger into the seam between the top and bottom case and slide it around the perimeter to release the clips holding it together.
-
Remove the bottom cover.
-
-
-
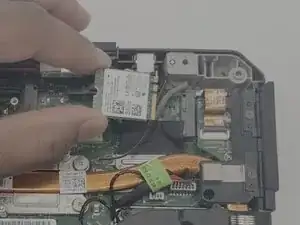
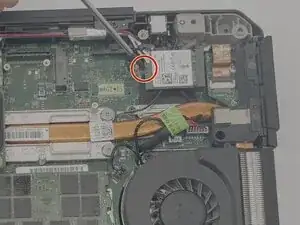
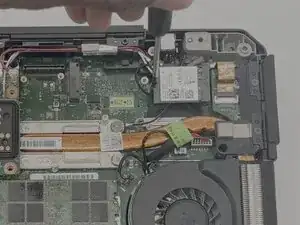
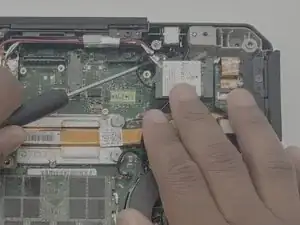
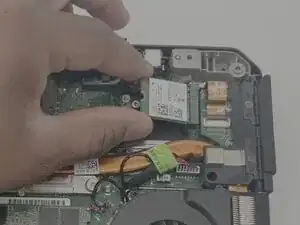
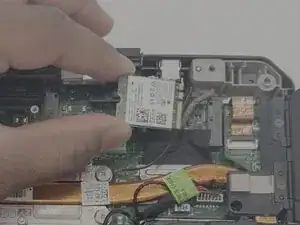
Use a Phillips #0 screwdriver to remove the single screw securing the Wi-Fi card in the top right corner.
-
Begin by
-
-
-
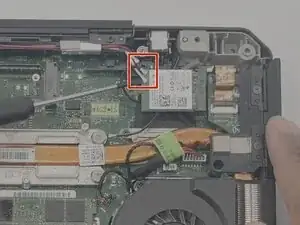
Slide a thin, nylon spudger or angled tweezers under the metal neck of the connector (as close to the head as possible) and lift straight up from the board.
-
To reassemble your device, follow these instructions in reverse order. Take your e-waste to an R2 or e-Stewards certified recycler.