Introdução

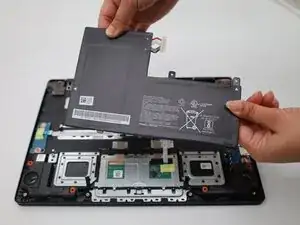
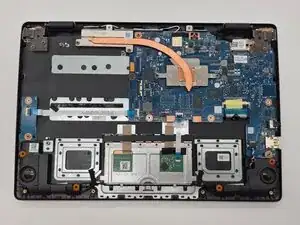
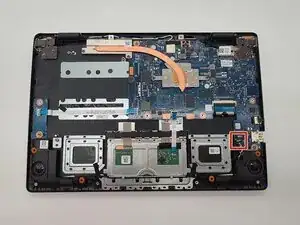
If the Acer Chromebook CBOA311-1H-C90F shows symptoms such as failing to turn on, crashes frequently, overheating, display issues or hardware malfunctions, the motherboard might be faulty. In this case, you can simply change the motherboard of the device by following this replacement guide. Before starting with the motherboard, you need to disconnect it from the battery. You can easily do this by following our Battery Replacement guide.

  1. SREYX4G1Dflrp1xS
    SREYX4G1Dflrp1xS
    tBBf3PhJW3VstiIj
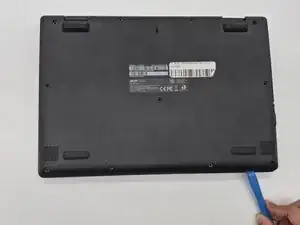
    • Turn the Chromebook over so the bottom is facing up.

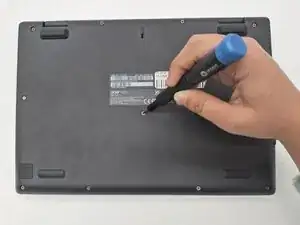
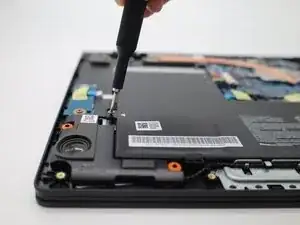
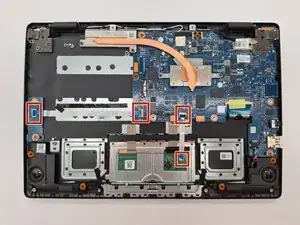
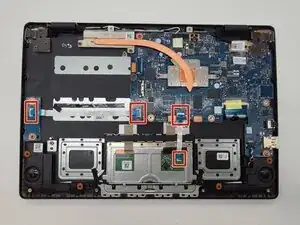
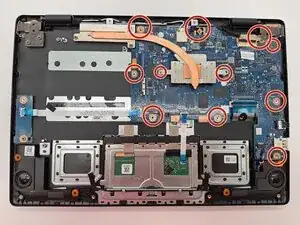
    • Remove eleven 6 mm screws from the back using a Phillips #00 screwdriver.

  2. CFgVTiNbMZE6WfPM
    CFgVTiNbMZE6WfPM
    1jSRVmpsagcSNJTx
    21QMhlUpEnOJPmOD
    • Use an opening tool on all sides of the computer to gently lift off the back cover.

    • You may hear a cracking noise as the cover lifts.

    • Caution: Do not work with metal tools, as they can damage internal components and cause an electric shock. 

  3. WFduFEPaRQo1PJWK
    • Use the plastic opening tool to gently lift the white power cable from the motherboard.

  4. KWRAMJVLAtKaFJfP
    KWRAMJVLAtKaFJfP
    RTNWUWYyPVMkwDGy
    • Use a Phillips #00 screwdriver to remove the two 3mm screws that hold the battery in place.

  5. P4FefEJYPG4YGSAR
    P4FefEJYPG4YGSAR
    2NCDvydpONyFAxij
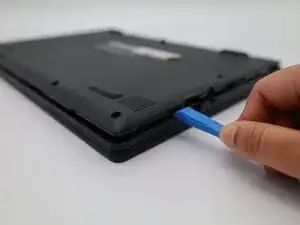
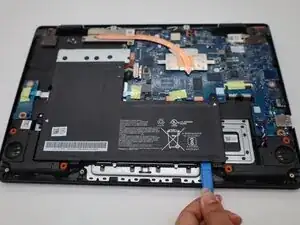
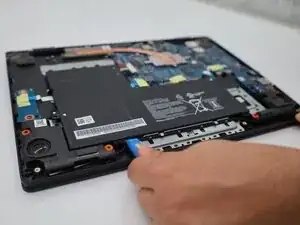
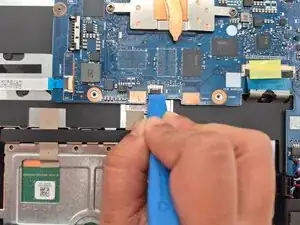
    • Use a plastic opening tool to lift the tiny locks on the bottom that hold the battery in place.

  6. tRCPZmmeNpLy6gQh
    • Gently remove the old battery and replace with a new one.

  7. yAEwBoR4TQbTKdtY
    yAEwBoR4TQbTKdtY
    4KdmMJGKLBqPnvum
    uyTyt4JmtWPaeEhr
    • Gently lift the yellow tapes that connect the ribbon cables to the motherboard.

  8. Q6ARHpDNIq1hvlNU
    Q6ARHpDNIq1hvlNU
    IXUTNrxOqeCcjdb5
    • Lift the black colored locks with the help of a plastic opening tool.

  9. SGTg6IoSaH36QRjh
    SGTg6IoSaH36QRjh
    dW1BP2V2Hw2LdJNW
    • Slide the ribbon cables off the locks.

  10. jToWjajJrGxPGyll
    jToWjajJrGxPGyll
    SeVw2mJeOVVobXCY
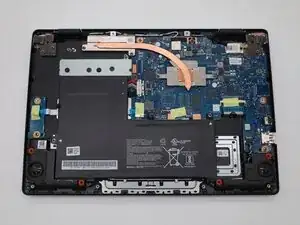
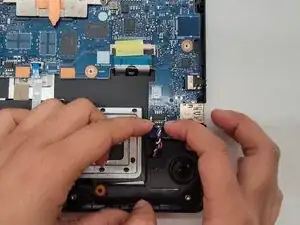
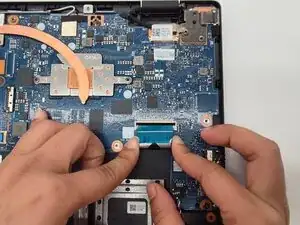
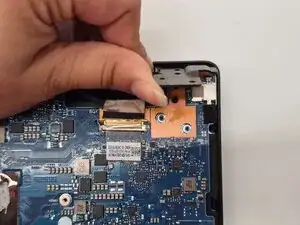
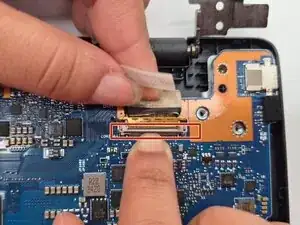
    • Grip the connector with colorful wires on the bottom right corner of the motherboard and wiggle it gently.

    • Pull the connector straight out of the motherboard socket.

  11. Q3abHb6xMrHQLIUu
    Q3abHb6xMrHQLIUu
    xFQXrLnSimDAdjmC
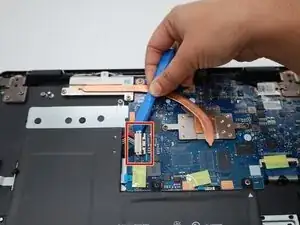
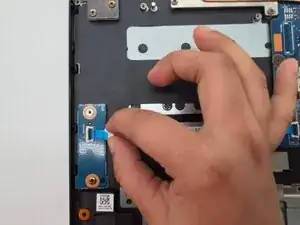
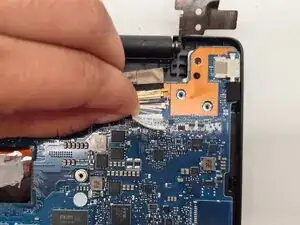
    • Lift the black colored lock with the help of a plastic opening tool or finger nails.

    • Slide the cable off the lock.

  12. gmFXEX1uHUIlgYmE
    gmFXEX1uHUIlgYmE
    tCVuqGDCOe6d4KqL
    • Remove all eleven 4 mm screws from the motherboard using a Phillips #00 screwdriver.

  13. 4IDYsHYYX2qVVKIh
    4IDYsHYYX2qVVKIh
    iyUuQIyjlQhIdWKE
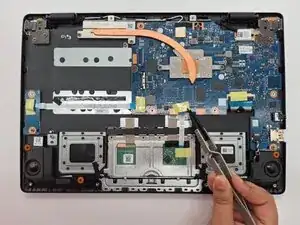
    • Peel the black tape that connects the black and white wires to the motherboard.

    • Pry the black and white wires and disconnect them from the motherboard.

  14. VQwcQKCwGPVkDGME
    VQwcQKCwGPVkDGME
    mP4Ho1UZuFxDhZSS
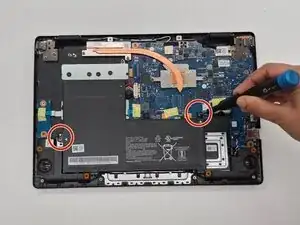
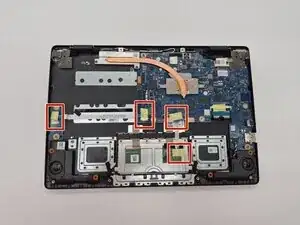
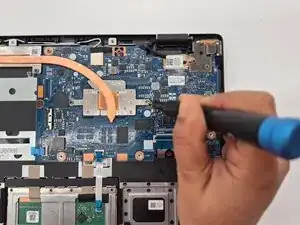
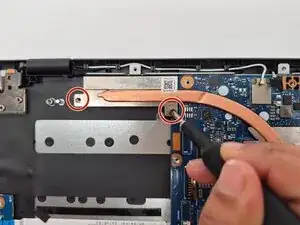
    • Unscrew the heat sink using the Phillips #00 screwdriver.

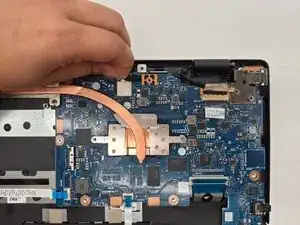
    • Remove the heat sink from the laptop.

  15. b1jEVSZAVaLCYIOX
    b1jEVSZAVaLCYIOX
    WXHUUg1deICInHuc
    • Lift up the hinge on the top right corner.

    • You can use a pry tool to lift from the right side if it seems stuck.

  16. n6jnhE4fAYx2u6iS
    n6jnhE4fAYx2u6iS
    nCAWXHcRFoOWZW2v
    rlhWiBWZWQPQUgLn
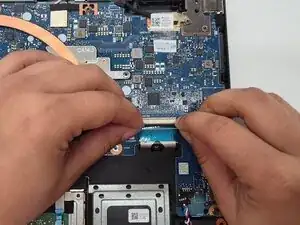
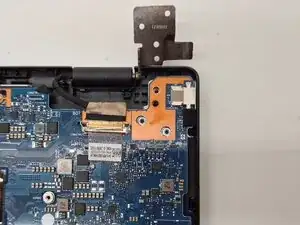
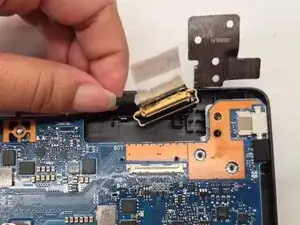
    • Peel the white tape that connects the thick black wire to the motherboard.

    • Lift the tiny brown lock with your finger nails.

    • Pull the thick black wire gently to disconnect it.

  17. JsO2nOM5c3BKm13v
    JsO2nOM5c3BKm13v
    podvadB4FoGACTXW
    UeIALUTx4DFMWpLo
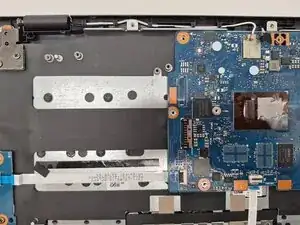
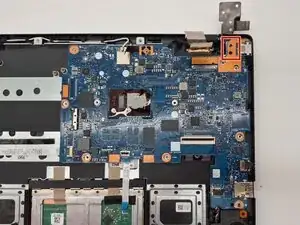
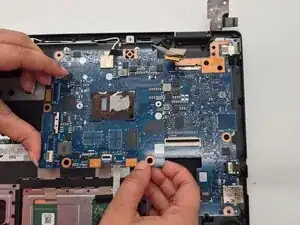
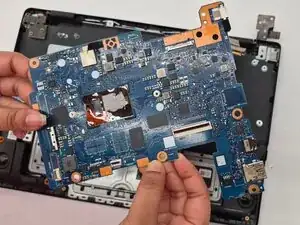
    • When the motherboard is free from all connections, lift it up a little to remove it from the lock.

    • Slide the motherboard to the left slowly to remove it from the laptop.

    • You can use a pry tool to lift from the right side if it seems stuck.

Conclusão

To reassemble your device, follow these instructions in reverse order.

Purnima Sanjel

Membro desde: 09/09/25

637 Reputação

0 comentários