Introdução

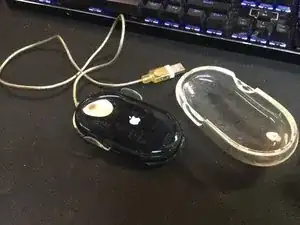
Apple Pro Mouse (Black M5769)

Take apart guide:

  1. cn5sIu1Kfkn4LeOO
    • Step 1: The tools needed to open up an Apple Pro Mouse (Black) will be [1] Exacto Knife and [2] Spudger with one Flat end and Pointed end.

  2. ujjuJkdYjgEdRof6
    ujjuJkdYjgEdRof6
    D5JZnkcaSmibr6Pm
    VXwNF5Onv2rk2hI4
    • Step 2: Where to cut the glue points shown in RED to remove the Clear Top of the mouse.

    I found the best place to pry off the white ring is near the cable entrance to the mouse. It is just held in by some friction fit tabs instead of glue, so it is not so bad as removing the clear top.

    Paul -

    What are the two "wings" on the side of the mouse for? They look like buttons but they don't seem to do anything.

    dawna -

    Google AI answer - The "side buttons" on the Apple Pro Mouse (also known as the Mighty Mouse) are actually a single, multi-directional button that can be pressed in various directions, not two separate buttons. These "buttons" are not individual physical buttons, but rather different areas on a single, touch-sensitive surface. The primary function of these areas is to enable a "secondary click" (right-click) and directional scrolling.

    sonnyhung -

    Google AI is wrong

    Side “buttons” are just places to hold Pro Mouse if you need to get it up from surface without misclick

    Its because the whole mouse body is button

    Eugene -

    Ah, sorry it seems the difference is between the Apple Pro Mouse vs the Apple Mighty Mouse.

    Apple Pro Mouse (Black/clear and white)( both have side tabs with no additional features. lol
    Apple Mighty Mouse, which is what I'm currently using does have tabs when squeezed that can be set to:
    Off - Default

    Mission Control

    Show Apps Window

    Show Desktop

    App Switcher

    Spot Light

    Other...

    Button 4

    *This in offered in MacOS Sequoia 15.5 on a MacBook Pro with a M1 Pro with an Apple Mighty Mouse attached.
    And now updated to MacOS Sequoia 15.6

    sonnyhung -

  3. RYMvXZTendMTPngP
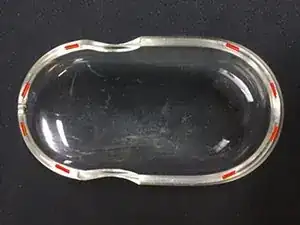
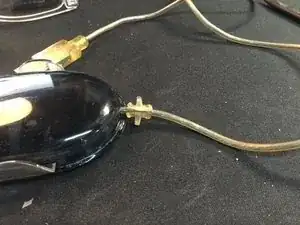
    • Step 3: Cut the Cable Reinforcement lengthwise as shown in the picture. This will allow the reuse of this piece when you have completed the repair.

  4. 1V52w6wLCBI1pJAh
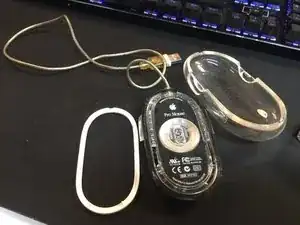
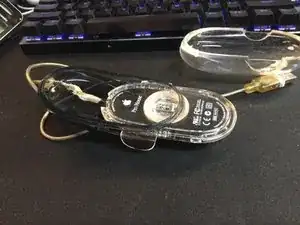
    • Step 3: You need to detach the Black Ring from the bottom up past midway. This will allow access to remove the Clear Mouse Tray.

  5. AXAgWmmrAFvymgnF
    AXAgWmmrAFvymgnF
    MbFyKisNPOkiHKWR
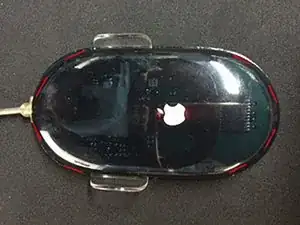
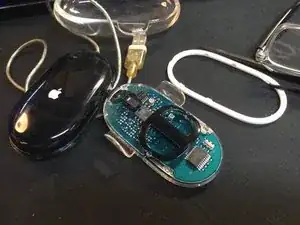
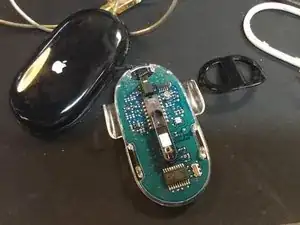
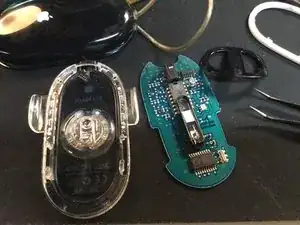
    • Step 5: Inner Clear Tray completely removed from the Semi-Transparent Black Case. Careful not to damage the cable attached to the connector on the PCB board shown in the second picture. Two cable wires were repaired by soldering them back together.

  6. VHoNVYDxyWo61YpL
    VHoNVYDxyWo61YpL
    HGZwuWjShVwYnR2J
    JDbFgNNxRmcUP2sb
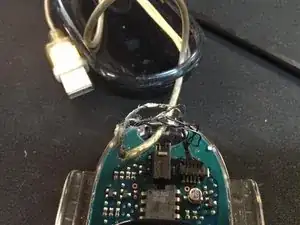
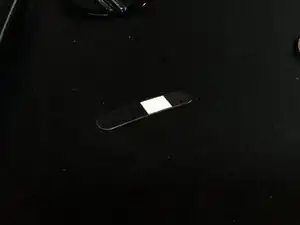
    • Step 6: Remove the Black Cage off the two nubs carefully. This cage covers the Red Laser and hides a clear plastic film with a rectangular white square. The white side facing the laser has a textured surface which I was unable to capture. If you lift the lower bottom edge of the PCB board you can slip it out from the Clear Tray.

  7. 1LwY6KpWRBlySITi
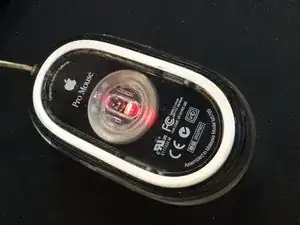
    • Final Step: After reassembly this is the Apple Pro Mouse being tested showing it's Red Laser light working. Be mindful that the when reinserting the assembled Clear Tray back into the Semi-Transparent Black Case that the top lip must sit properly into a ledge/nook in the Black Case or the click will not work.

sonnyhung

Membro desde: 25/06/10

182 Reputação

Um comentário

good not gonna lie, we need more ifixiters.

Sergei Perez -