Introdução

  1. E3cfKPUCqgGcwKUY
    • Glass shards can complicate disassembly—or worse, cause injury. If your phone has a cracked screen, follow this step.

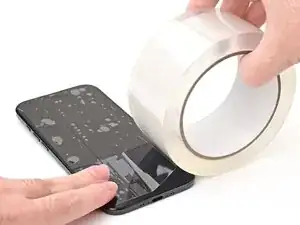
    • Apply strips of packing tape to the cracked glass until the whole screen is covered—this will help keep the glass contained and allow the suction cup to stick to the screen.

    • Make sure there's a single strip (not overlapping) of tape across the bottom edge, big enough for a suction cup to fit on.

    • Only cover the glass itself—don't stick any tape to the frame.

    • Consider wearing safety glasses to protect your eyes from any glass shaken free during the repair.

  2. G5me14S2BOkfmPRI
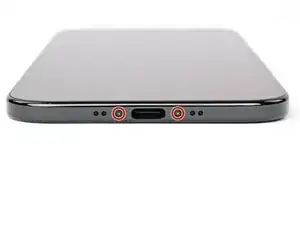
    • Use a P2 pentalobe driver to remove the two 4.9 mm-long screws on either side of the USB-C port.

  3. fAC2LtqjhIdRXqOH
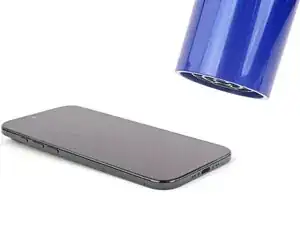
    • Use a hair dryer or heat gun to heat the bottom edge of the screen until it's slightly too hot to touch.

    • Improper use of a heat gun can destroy the display and/or battery—follow the linked instructions carefully.

  4. R3Qc3DpilMpSGsi5
    R3Qc3DpilMpSGsi5
    ZYaHnEf6LcBsfvNy
    2yLLSlP3ZTBgV2Qx
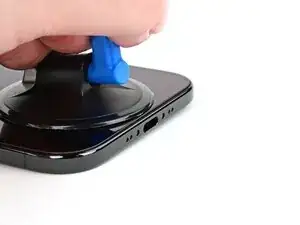
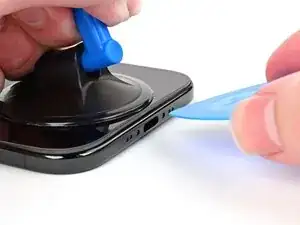
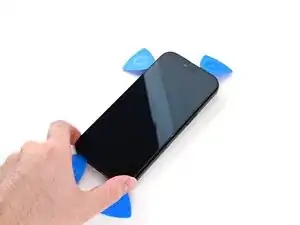
    • Apply a suction handle to the bottom edge of the screen.

    • Pull up on the suction handle with strong, steady force to create a gap between the screen and the frame.

    • If you can't create a gap, apply more heat to the edge and try again.

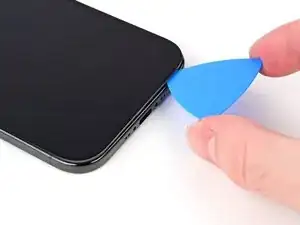
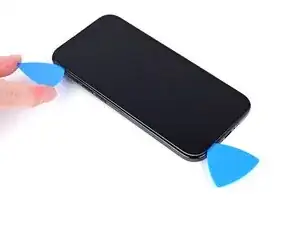
    • Insert the tip of an opening pick into the gap.

  5. pOGXQxo3Rm1BitPh
    • As you slice the adhesive securing the screen in the following steps, don't insert your pick deeper than 3 mm to avoid damaging the following areas:

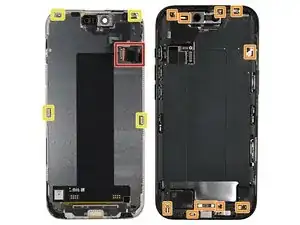
    • Two delicate cables connecting the screen to the iPhone—one just above the Action button and the other about halfway along the left edge of the iPhone

    • Multiple spring contacts around the perimeter of the iPhone

    • There are multiple clips around the iPhone. You'll hear and feel these release as you slide past them.

    • Since you can't disconnect the battery during this repair, make sure your phone stays powered down, don't use metal prying tools, and be careful not to touch exposed contacts.

  6. cBJNbbIr1blFEmAp
    cBJNbbIr1blFEmAp
    urWL4yqFFMShcgSl
    MM2PEwgjoUcdNJ4v
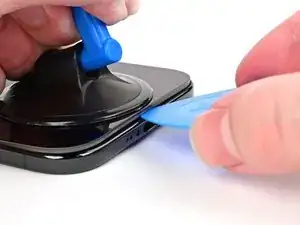
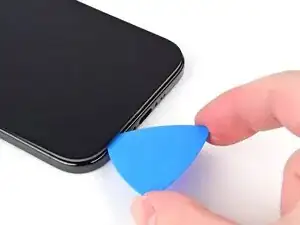
    • Slide the opening pick along the bottom edge to release the adhesive.

    • If the adhesive feels difficult to slice, reheat the edge for a minute.

    • Leave the opening pick in the bottom left corner to prevent the adhesive from resealing.

  7. bXLJtetOGVJWIUWF
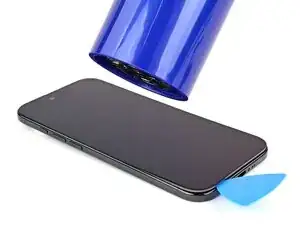
    • Use a hair dryer or heat gun to heat the left edge of the screen until it's hot to the touch.

  8. d6JQGGGPhaiFeYBn
    d6JQGGGPhaiFeYBn
    En26WUleQOM3AEOB
    dQDJmPBHLi3pmbWk
    • Don't insert your pick deeper than 3 mm to avoid damaging the ribbon cables.

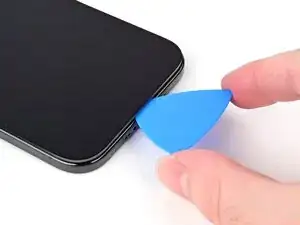
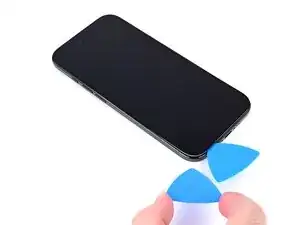
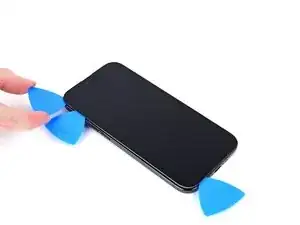
    • Insert a second opening pick in the bottom left corner, close to the existing pick.

    • Slide the opening pick along the left edge of the screen to separate the adhesive and release the metal clip.

    • You'll hear and feel the metal clip release as you pass it.

    • Leave the opening pick in the top left corner to prevent the adhesive from resealing.

  9. sbYCVtdh5EDjy6vG
    sbYCVtdh5EDjy6vG
    VbMkC2ldReb6Y4fF
    Zf3sVcPi16uZKVWb
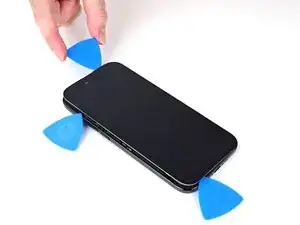
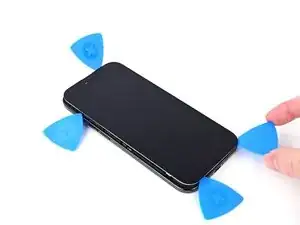
    • Repeat the heating and sliding procedure along the remaining screen edges to separate the adhesive and release the clips.

  10. RtVNtlHlt31JGsTp
    RtVNtlHlt31JGsTp
    G1ULtUSSsUYmSCXw
    QJo6JAvjZEFouAm4
    • At this point, the screen should be free from the frame. If the screen feels stuck, go back around the perimeter with your pick and separate missed sections of adhesive or stuck clips.

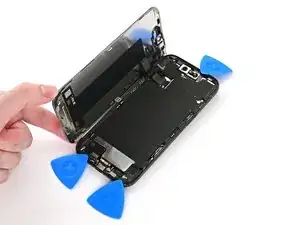
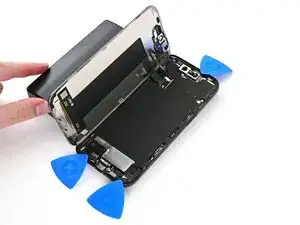
    • Carefully lift the screen and swing it over the left edge of the iPhone.

    • Prop the screen up with a small, sturdy object.

  11. gIPNolIASYJpRqOF
    gIPNolIASYJpRqOF
    AfGTvNPyrEOQiVss
    • We recommend using polyimide (aka kapton) tape to keep the front cameras clean. You may skip this step, but be extra careful not to touch the cameras.

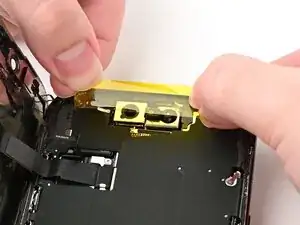
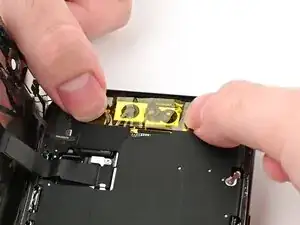
    • Install a strip of polyimide tape over the front camera assembly by pressing the tape down on either side of it. Don't press down on the assembly itself.

  12. NZALUVLMKfJsrBS4
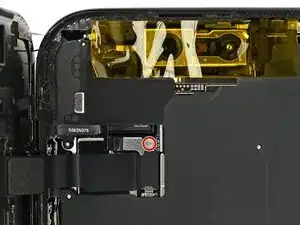
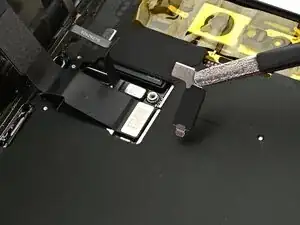
    • Use a tri-point Y000 driver to remove the 1.1 mm‑long screw securing the front sensor and display connector cover.

  13. JOHElIloFwQrtobG
    JOHElIloFwQrtobG
    PIJ2GVOLslKbYLGu
    OrEpLXkYGD2YFHVk
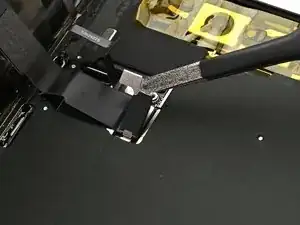
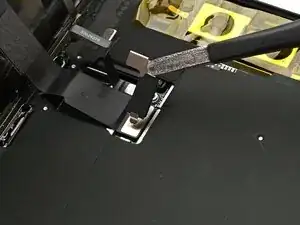
    • Use tweezers or your fingers to lift the front sensor cover to a 45-degree angle and remove it.

    • During reassembly, insert each cover at a 45-degree angle to re-engage the hook before laying it flat against the press connector.

  14. TKKuJNPZtsogHEYU
    TKKuJNPZtsogHEYU
    ekHJMgGY2tu2XBTr
    MEByEOEQwxrGOCeI
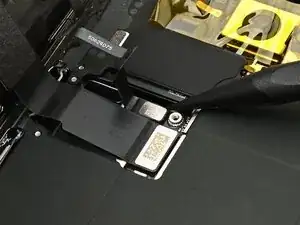
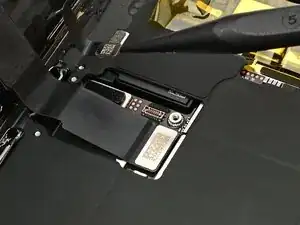
    • Use the tip of a spudger to pry up and disconnect the front sensor and screen press connectors.

    • During reassembly, align each connector carefully over its socket and press down with your fingertip or flat end of a spudger—first on one side, then the other—until it clicks into place. Don't try to force the connector into place. If you're having trouble, reposition it and try again.

  15. Bvt23bFKRIcATTdS
    • Remove the screen.

    • Follow this guide to reapply adhesive and install the new screen.

    • Be careful not to damage any of the spring contacts as you clean the frame.

Nick Schultz

Membro desde: 24/03/24

45909 Reputação

0 comentários