Introdução

  1. NpcJRNbrrXq1QKQc
    • Glass shards can complicate disassembly—or worse, cause injury. If your phone's back glass is cracked, follow this step.

    • Apply packing tape to the cracked glass until it's completely covered—this will help keep the glass contained and allow the suction cup to stick.

    • Make sure there's a single strip (not overlapping) of tape on the bottom edge, big enough for a suction cup to fit on.

    • Only cover the glass itself—don't stick any tape to the frame.

    • Consider wearing safety glasses to protect your eyes from any glass shaken free during the repair.

  2. UhMKXmpTyoW5ewpa
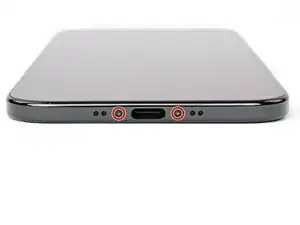
    • Use a P2 pentalobe driver to remove the two 4.9 mm-long screws on either side of the USB-C port.

  3. ZxbCHqCOhhqH2joC
    ZxbCHqCOhhqH2joC
    qjIJaCfQrhXKsMiL
    • Apply a heated iOpener to the bottom edge of the back glass for two minutes.

    • Alternatively, you can use a hair dryer or heat gun to heat the bottom edge of the back glass until it's slightly too hot to touch.

    • Improper use of a heat gun can destroy the display and/or battery—follow the linked instructions carefully.

  4. GGX5LLNGcScAFZIj
    GGX5LLNGcScAFZIj
    YdXUpSLkUjlvDB2c
    rBd2axyXZw1tB4ob
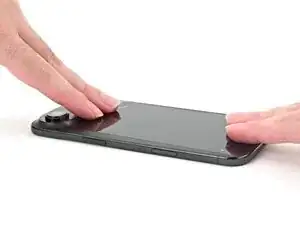
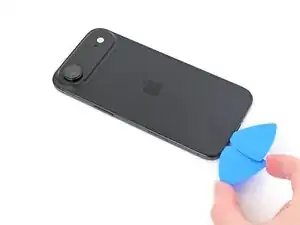
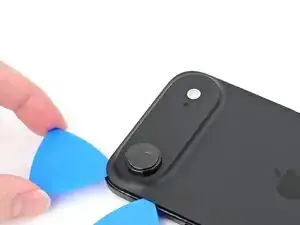
    • Apply a suction handle to the bottom edge of the back glass, as close to the edge as possible.

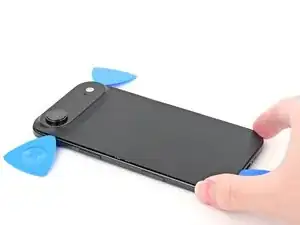
    • Pull up on the handle with strong, steady force to create a gap between the back glass and the frame.

    • If the back glass doesn't budge, reheat it and try again.

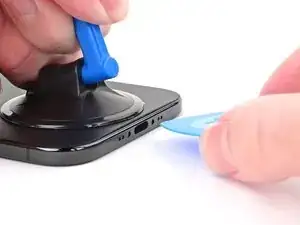
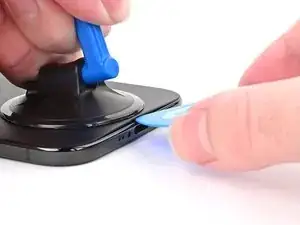
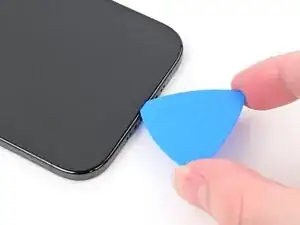
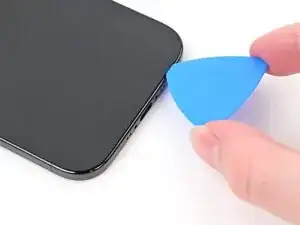
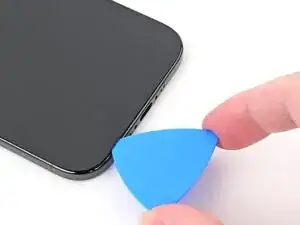
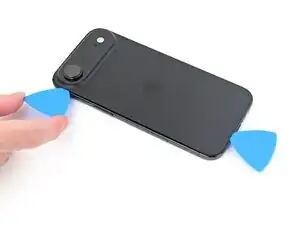
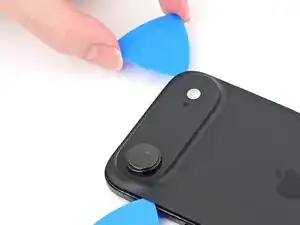
    • Insert the tip of an opening pick into the gap.

  5. XrpxLKMutOiscHnZ
    XrpxLKMutOiscHnZ
    bSLkcUPwdkxLYVPk
    • As you slice the adhesive securing the back glass in the next steps, be careful of the following areas:

    • There's a delicate cable connecting the back glass to the phone, right next to the volume up button.

    • There are multiple spring contacts along the top edge of the phone. Be extra careful not to insert your pick deeper than instructed in each step to avoid bending these contacts.

    Can request to have the wallpaper for it on the back

    wilson wong -

  6. rkKijnTcD3ZDcARP
    rkKijnTcD3ZDcARP
    pxho1GAiUGSZI4Co
    UInbNahsEIgx2U2M
    • Slide your pick back and forth along the bottom edge to separate the adhesive.

    • Leave your pick inserted in the bottom left corner to prevent the adhesive from resealing.

  7. cLHwqYGX4hMO6wLd
    • Apply a heated iOpener to the left edge of the back glass for two minutes.

    • When using a hair dryer or heat gun, only heat the back glass until it's hot to the touch.

  8. j1HKHJLrEiSjnfVE
    j1HKHJLrEiSjnfVE
    U2jEUMVMb3ZoITOW
    neRSNVhCoPMPyWuM
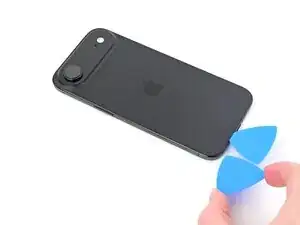
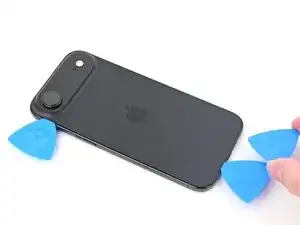
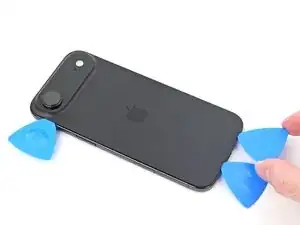
    • Insert a second opening pick to the left of the original.

    • Slide the second pick around the bottom left corner and along the left edge of the back glass to separate the adhesive and release the metal clip.

    • Leave this pick inserted at the top left corner to prevent the adhesive from resealing.

  9. DteUYQtXYlZ45IgC
    • Apply a heated iOpener to the right edge of the back glass for two minutes.

    • When using a hair dryer or heat gun, only heat the back glass until it's hot to the touch.

  10. BefXyBMTJTuKAhUh
    BefXyBMTJTuKAhUh
    mjTFWOxKdwRGEMbo
    xoupmt5mRqgi1GR2
    • Don't insert your pick deeper than 3 mm along the right edge to avoid damaging the ribbon cable.

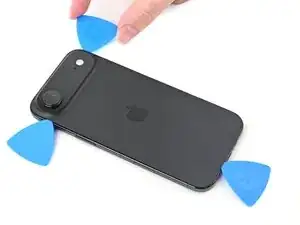
    • Insert a third opening pick to the right of the original at the bottom edge.

    • Slide this pick around the bottom right corner and along the right edge of the back glass to separate the adhesive and release the metal clip.

    • Leave this pick inserted at the top right corner to prevent the adhesive from resealing.

  11. koxwjQnxLjpWgqCQ
    koxwjQnxLjpWgqCQ
    UJI3gatVOruRFwup
    f5RfWdEta3uf2lPC
    • Don't insert your pick deeper than 3 mm along the top edge to avoid damaging the spring contacts.

    • Repeat the heating and sliding process along the top edge of the back glass to separate the adhesive and release the metal clips.

  12. JEkNSIRHIZ2IAiI5
    JEkNSIRHIZ2IAiI5
    eNLvyqiTBLHJOm1b
    ydXmBUAMuILodeJA
    • Don't try to fully remove the back glass just yet—it's still attached with a delicate ribbon cable.

    • If the back glass doesn't swing open easily, don't force it—go back around the perimeter with your pick to separate missed sections of adhesive or stuck clips.

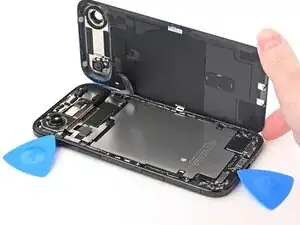
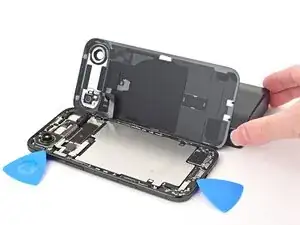
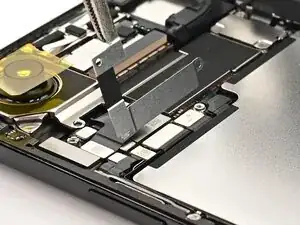
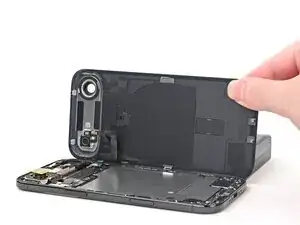
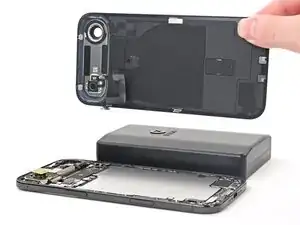
    • Gently lift the back glass and swing it open towards the volume buttons.

    • Support the back glass with a clean, sturdy object like a small box to avoid straining the cable.

  13. VpHivEitIMQLYcJg
    • We recommend using polyimide (aka kapton) tape to keep the camera lens clean. If you don't have any, you may skip this step, but be extra careful not to touch the camera.

    • Set a piece of polyimide tape over the rear camera lens.

    • Don't press down on the rear camera.

    • During reassembly, carefully remove the tape without jostling the rear camera—its stabilizing mechanism is extremely fragile.

  14. pq4iNpKvcmDMNxNF
    pq4iNpKvcmDMNxNF
    3vaKxlqGDT4NGfYm
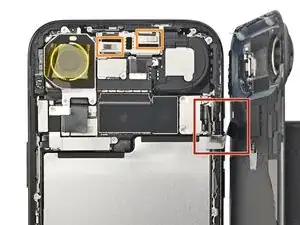
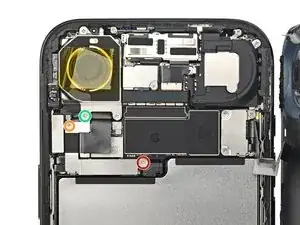
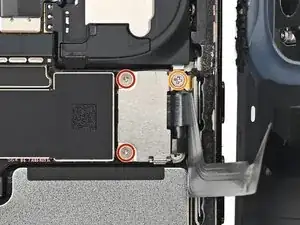
    • Remove the three screws securing the left connector cover, located below the rear camera:

    • One 1.1 mm-long tri-point Y000 screw

    • One 1.0 mm-long tri-point Y000 screw

    • One 3.2 mm-long JIS 00 screw

    • Small iFixit Phillips bits are designed to work with JIS screws, so you can use an iFixit PH 00 driver. You can try Phillips drivers from other manufacturers, but you risk stripping the screw.

  15. WOvSiFnksQ5ayIH1
    WOvSiFnksQ5ayIH1
    GQcsOVS6ocjYlnZp
    r2ENWeYOrZdJo3Dh
    • Use tweezers or your fingers to lift the cover to release its hook and remove it.

    • During reassembly, insert the cover's hook into its slot on the logic board at an angle, then lay the cover flat.

  16. XMvALCGgmwdcJYiP
    XMvALCGgmwdcJYiP
    DJuwkx2FgA4EUQQT
    • Use the point of a spudger to pry up and disconnect the battery press connector.

    • During reassembly, align the connector carefully over its socket and press down with your fingertip or the flat end of a spudger—first on one side, then the other—until it clicks into place. Don't try to force the connector into place. If you're having trouble, reposition it and try again.

  17. OiGNUaNerJD1myiD
    OiGNUaNerJD1myiD
    1sZLTNZUEYCZSXdt
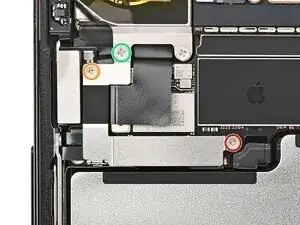
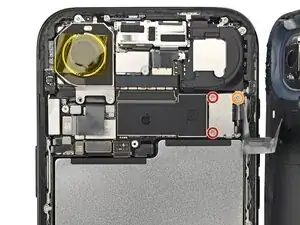
    • Remove the three screws securing the right connector cover:

    • Two 1.1 mm-long tri-point Y000 screws

    • One 2.8 mm-long JIS 00 screw

  18. OYOyjdhkQPbpujU4
    OYOyjdhkQPbpujU4
    OomOjYCDcLncLmJm
    6TTkHyRtZai3BHFv
    • Use tweezers or your fingers to lift the cover to release its hook and remove it.

    • During reassembly, insert the cover's hook into its slot on the logic board at an angle, then lay the cover flat.

  19. RS5RTXHsHkEYXRJ5
    RS5RTXHsHkEYXRJ5
    HVMHkYL4CRvldtQv
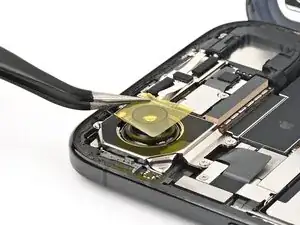
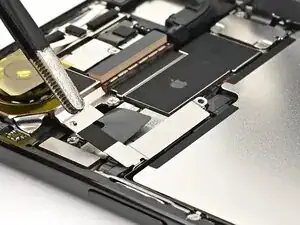
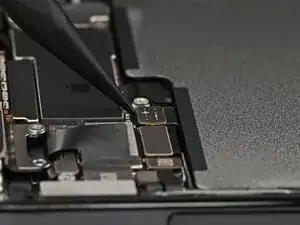
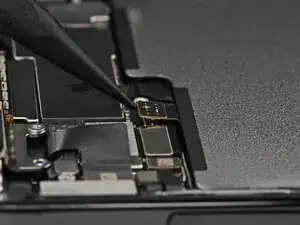
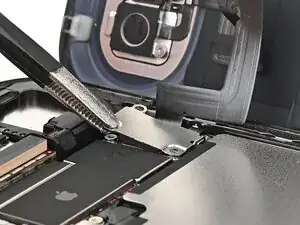
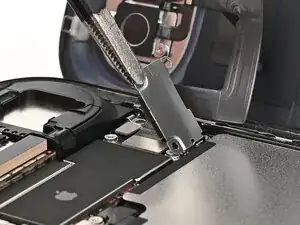
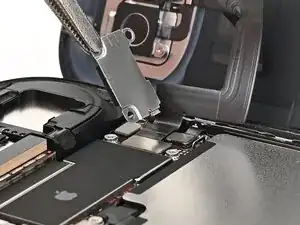
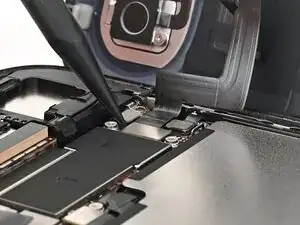
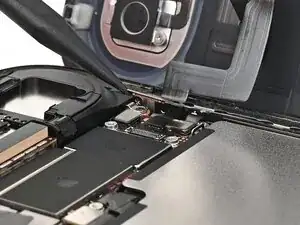
    • Use the point of a spudger to pry up and disconnect the flash and wireless charging coil press connector.

  20. wJywWtYrs2CgIAPd
    wJywWtYrs2CgIAPd
    XthQcglcrYSxl3I6
    • Remove the back glass.

    • Follow this guide to replace the adhesive and install the back glass.

Conclusão

To reassemble your phone, follow this guide to apply new adhesive and install the back glass.

After your repair, calibrate a genuine replacement screen using Apple's Repair Assistant. Navigate to Settings General About Parts & Service History, tap Restart & Finish Repair, and follow the onscreen prompts.

Take your e-waste to an R2 or e-Stewards certified recycler.

Repair didn’t go as planned? Try some basic troubleshooting, or ask our iPhone Air Answers Community for help.

Nick Schultz

Membro desde: 24/03/24

45909 Reputação

0 comentários