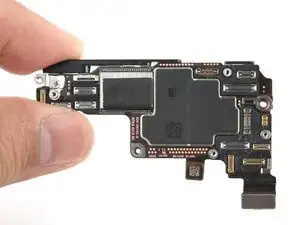
Introdução

  1. xxNVly5TMGtPsAuj
    xxNVly5TMGtPsAuj
    22RPN3SUaHmEZNSk
    • If your iPhone doesn't have mmWave functionality, you won't have this connector cover or cable. Skip the next two steps.

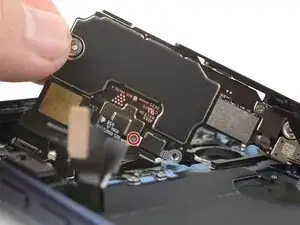
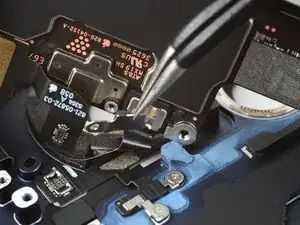
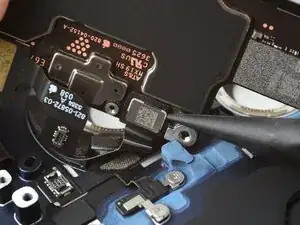
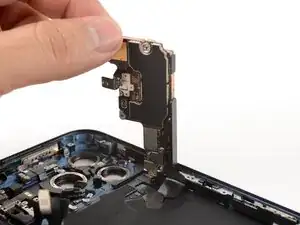
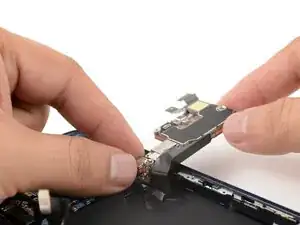
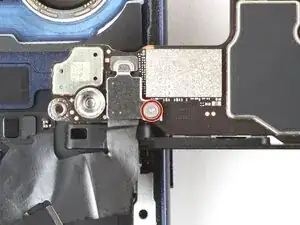
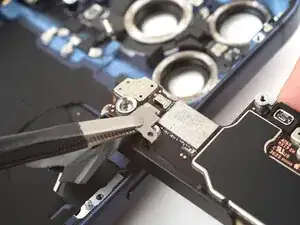
    • Use a tri-point Y000 screwdriver to remove the 1.0 mm‑long screw securing the mmWave antenna connector cover.

  2. PursNIwkWGCEjASL
    PursNIwkWGCEjASL
    2rZgYvQB5xO4BdPm
    • Use tweezers to unlatch and remove the mmWave connector cover.

  3. VhFYjxCphdCdYb1B
    VhFYjxCphdCdYb1B
    k35omNhClM4SIQXA
    • Use the point of a spudger to pry up and disconnect the mmWave connector.

  4. fanaQrHw2Q1QDgjR
    fanaQrHw2Q1QDgjR
    fvUcIYZgSNDMkKiH
    tZpEZsDYguQ2rTHp
    • Carefully swing the logic board over the right edge of the iPhone.

    • Be careful not to strain the wireless charging cable still attached to the underside of the logic board.

  5. iRPFG6pHiOyuMcu6
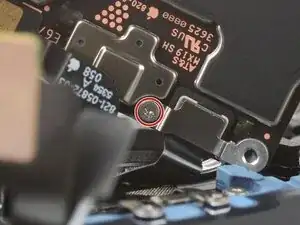
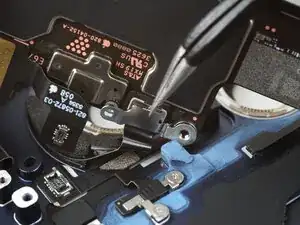
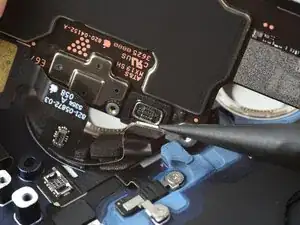
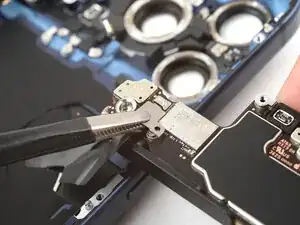
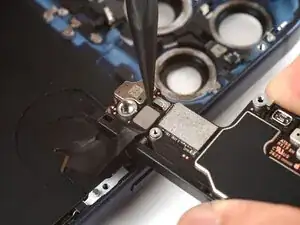
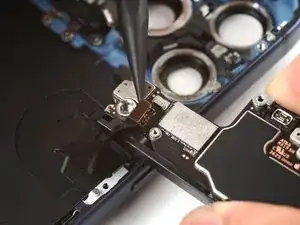
    • Use a tri-point Y000 screwdriver to remove the 1.0 mm‑long screw securing the wireless charging connector cover.

  6. sBFLspGPMKJYg4LF
    sBFLspGPMKJYg4LF
    h3uFQaBTPhJ6Bx1p
    • Remove the wireless charging connector cover.

  7. U6QNL3ZGv3DYMQAQ
    U6QNL3ZGv3DYMQAQ
    caIbXOUDbfHPGCCU
    • Use the point of a spudger to pry up and disconnect the wireless charging connector.

  8. BMJMvHUIgWsuJO4G
    • Remove the logic board from the iPhone.

Conclusão

To reassemble your device, follow these instructions in reverse order.

Arthur Shi

Membro desde: 03/01/18

326111 Reputação

0 comentários