Introdução

  1. yKkESYpdwxDWlJte
    yKkESYpdwxDWlJte
    BqHrTYNZkCPJSDTj
    nVbrNlQuxiiKWTD5
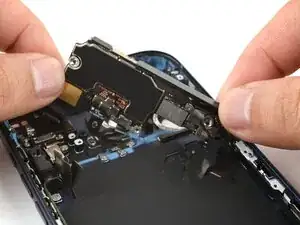
    • Use an opening pick to hold the flex cables along the left edge of the iPhone to prevent them from being trapped underneath the logic board.

    • Swing the logic board down in place, making sure no flex cables are trapped along the left and bottom edges.

  2. VjAkEJiCHONBM3Ty
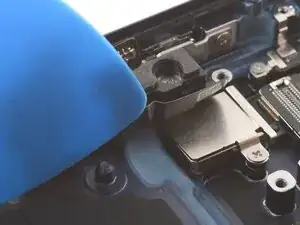
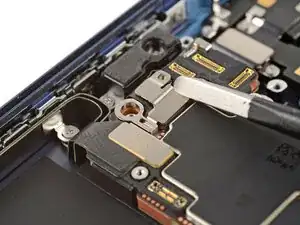
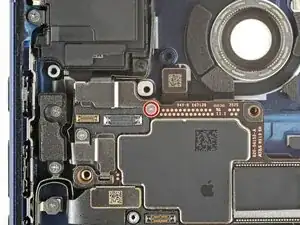
    • Check the right edge of the logic board to make sure the power button connector wasn't trapped underneath the logic board.

  3. uYX1Tery1nJeyhyW
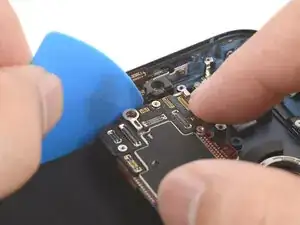
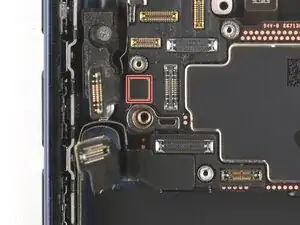
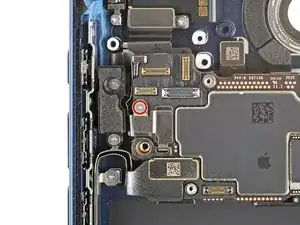
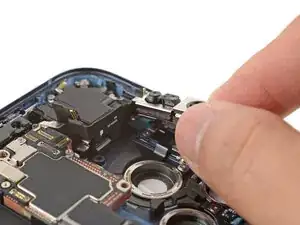
    • Use your finger to press and connect the small button connector on the left side of the logic board.

    • Stop if the connector feels like it won't reach. The button cable has a bend that often catches underneath the logic board. Lift the logic board, free the cable bend, and try again.

  4. VKsdOcVEU3gYFH25
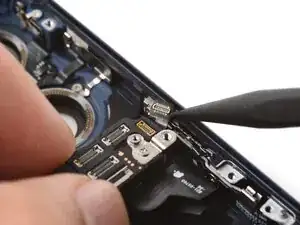
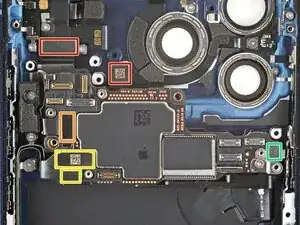
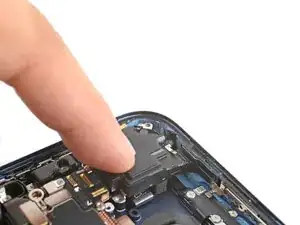
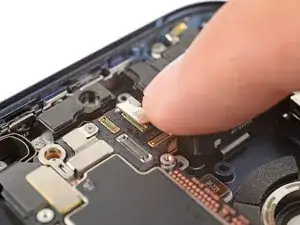
    • Use your finger to press and attach the six press connectors:

    • Two connectors along the top edge of the logic board

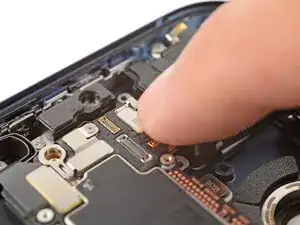
    • One remaining button board connector

    • Two USB-C port assembly connectors (one on top of the other)

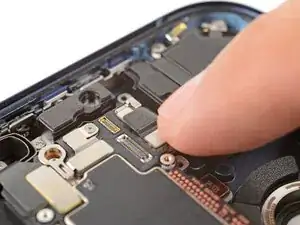
    • One power button connector

  5. IHLxqbKMrAXdjbdT
    IHLxqbKMrAXdjbdT
    DnlOqtxGV2DqvXTa
    p3dNHj2hATNq4uMa
    • Latch the end of the button connector cover onto the logic board.

  6. X54ropQMYUlYy2ui
    • Use a tri-point Y000 screwdriver to install the 1.0 mm‑long button connector screw.

  7. nHxQnNOKvFV6bSHU
    • Align the top edge of the top speaker with the iPhone.

    • Lay the speaker in its recess.

  8. dAGCqvVRYUH4WxhL
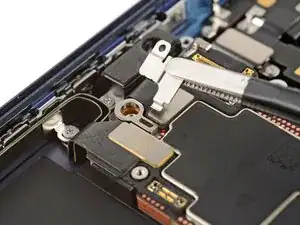
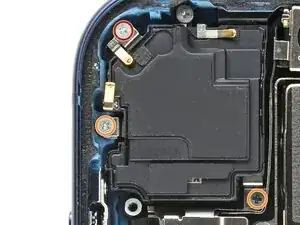
    • Use a JIS 00 screwdriver to install the three top speaker screws:

    • Two 2.4 mm‑long screws

    • One 2.1 mm‑long screw

  9. Ztm4paZVLWC1Ccq2
    • Lay the front camera assembly in its recess.

  10. G6RtWGVwUNaKvNWr
    G6RtWGVwUNaKvNWr
    kHuQgNQcWAFPgpJs
    PrjlpMIPBnCAiYbV
    • Use your fingers to press and connect the two front camera assembly connectors.

  11. KMW4beN2PY5GdpFy
    KMW4beN2PY5GdpFy
    REthOVH3TldmSZtk
    oaKKrHAZoXrCQQXC
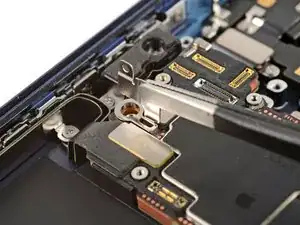
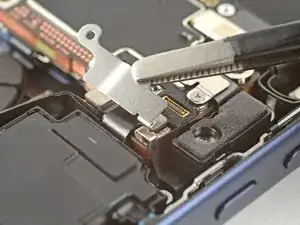
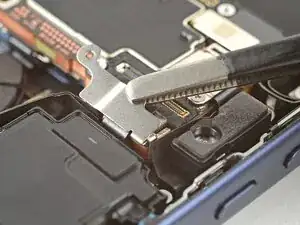
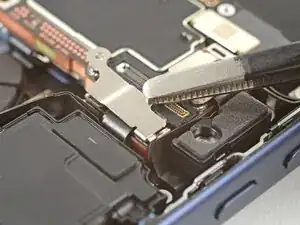
    • Hook the small latch in the corner of the camera connector cover onto the logic board and set it in place.

  12. pBLOGwO6JpJDchPN
    • Use a tri-point Y000 screwdriver to install the 1.0 mm‑long front camera connector screw.

Conclusão

To reassemble your device, follow these instructions in reverse order.

Arthur Shi

Membro desde: 03/01/18

326111 Reputação

0 comentários