Introdução

  1. rDrfW2TkJlCfF2FY
    rDrfW2TkJlCfF2FY
    kbBMcsEoqkIc3B5U
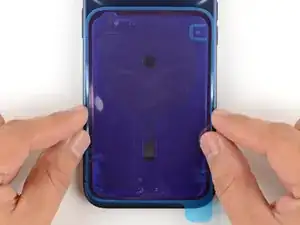
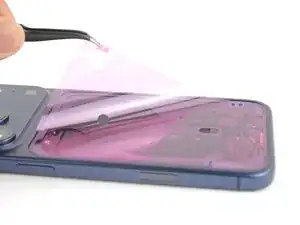
    • Use blunt-nose tweezers or your fingers to remove large pieces of adhesive from the frame.

    • Use a spudger to scrape the adhesive residue off the frame.

    • If the adhesive feels stubborn, apply some heat using a hair dryer or heat gun and try again.

  2. T1EyCYfYErH3gcui
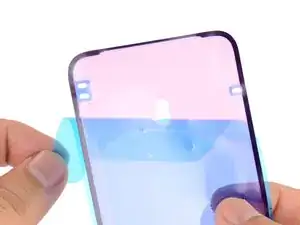
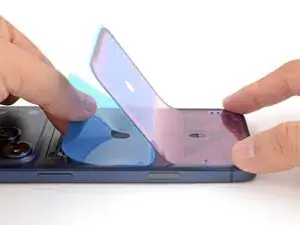
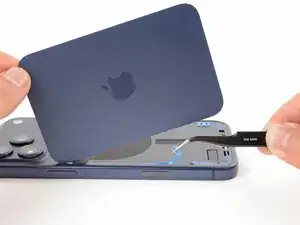
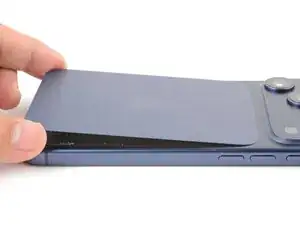
    • Without peeling any liners, lay the adhesive sheet over the frame to determine its proper orientation.

    • Use features such as the back glass connector notch to help orient the adhesive.

  3. GlB6I3fmiLWEpwZv
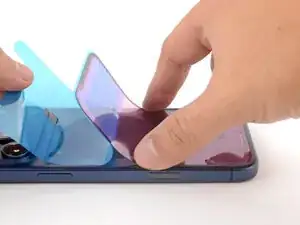
    • Grab the tab in the corner of the adhesive sheet and peel the liner to expose a third of the adhesive.

    • The exposed adhesive is very sticky. Don't let it touch anything until you're ready to apply it to the frame.

    • If your adhesive has multiple liners, peel the liner that exposes the side that sticks to the frame.

  4. 5Lx4NpYseMUNI5Se
    5Lx4NpYseMUNI5Se
    rTJYccYIXjTUIS5I
    SPyEx6wrVeBUNCTJ
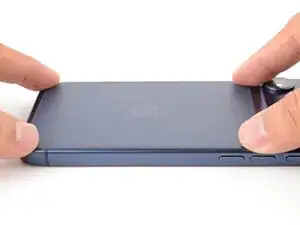
    • Carefully align and press the exposed edge of the adhesive strip onto the frame.

    • Once the adhesive is pressed into place, you can't reposition it—you'll have to remove it and start over with new adhesive.

    • Continue peeling away the liner from the adhesive, gently pressing the adhesive into place.

    • If you've correctly aligned the adhesive, the edges will fall perfectly into place.

    • If your adhesive is slightly misaligned, gently pull the long edges into alignment with the frame.

    • If the adhesive begins to crease or wrinkle, remove it and start over with fresh adhesive.

    • If you don't have another set of adhesive strips handy, it's okay to temporarily put your iPhone back together and use it normally without any adhesive. Just keep in mind that your iPhone's water resistance will be compromised until you replace the adhesive.

  5. 5qyHB2mQguirxOjK
    • Use a spudger to press the adhesive around the entire perimeter.

    • Don't press too hard, or you'll stretch and deform the adhesive.

  6. ywTKrcIGivQeUZch
    ywTKrcIGivQeUZch
    DkjfRQouby4NFjMc
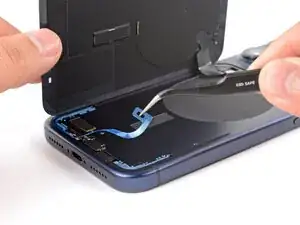
    • Use the pull tab to peel off the large front liner from the adhesive—the pull tab is often in a corner of the liner.

    • If the adhesive starts to peel up with the liner, hold the adhesive down with the point of a spudger as you go.

    • At this point, you may still have a liner covering the perimeter, which prevents the adhesive from accidentally sticking to anything while you're reassembling your iPhone. Don't remove these small release liners just yet.

  7. HZpfyowduwMFjcCE
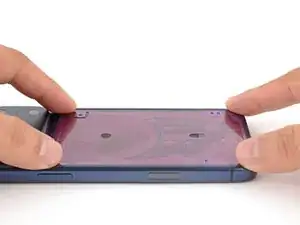
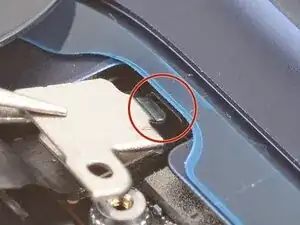
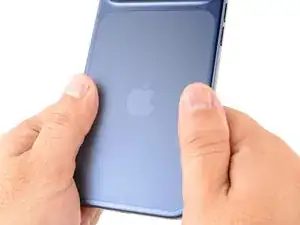
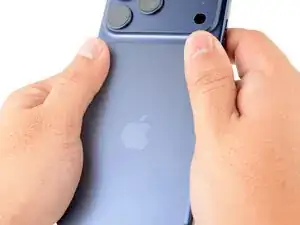
    • Position the back glass so you can comfortably reconnect it.

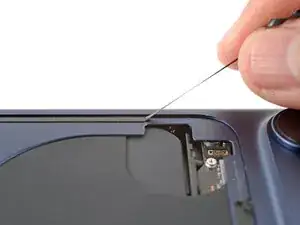
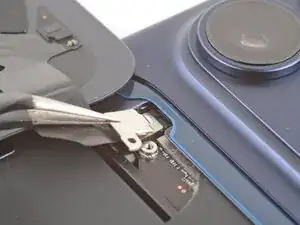
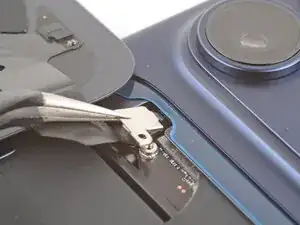
    • Use your finger or a spudger to press and connect the back glass press connector onto the logic board.

  8. T1ZKbswwngOakonl
    T1ZKbswwngOakonl
    T5dTGYLfBvECnQIn
    6LIxPtH4nJ6kiPur
    • Slide the connector cover in place so the tab on the top edge tucks under the lip.

  9. 3WmQ6OGdwHVaLJng
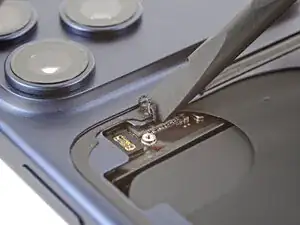
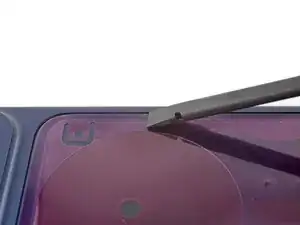
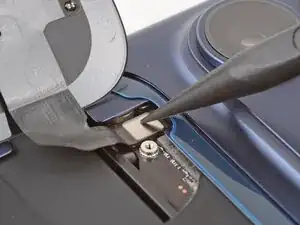
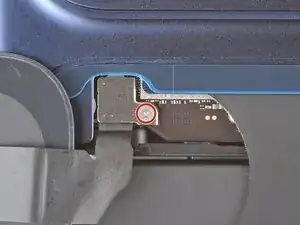
    • Use a tri‑point Y000 screwdriver to install the 1.0 mm‑long screw to secure the connector cover.

  10. XZ3EIWOJAbNQg6MR
    XZ3EIWOJAbNQg6MR
    2nFTSJA4FgwouhgH
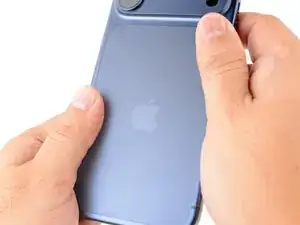
    • Use one hand to hold the back glass up. Be careful not to strain the cable.

    • Use your fingers or tweezers to peel away all remaining liners, exposing the perimeter adhesive.

  11. GKZDqXZ4UFRM4MXM
    GKZDqXZ4UFRM4MXM
    4m6clCXNLTeFQAVV
    • Align the top edge of the back glass with its cutout and lay it in place.

  12. lYlSwiKybIeIbRBH
    lYlSwiKybIeIbRBH
    Av4bUyLLLQjEoGKL
    rOpNcYQrGUEPOYvO
    • Use your fingers to firmly squeeze around the entire perimeter of the back glass.

Conclusão

To reassemble your device, follow these instructions in reverse order.

Arthur Shi

Membro desde: 03/01/18

326111 Reputação

0 comentários