Introdução

  1. ul25vF15scBJkrLl
    ul25vF15scBJkrLl
    MKN3j1rFaeCSI2aP
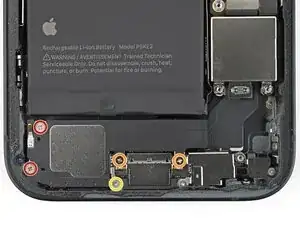
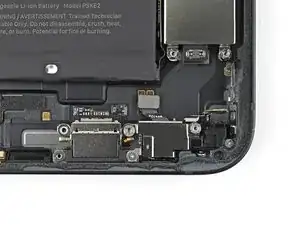
    • Use a Phillips screwdriver to remove the four screws securing the loudspeaker:

    • Two 1.4 mm‑long screws

    • Two 1.7 mm‑long screws

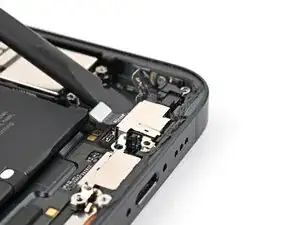
    • Use a tri-point Y000 screwdriver to remove the 1.3 mm‑long screw.

  2. qkAxxfAKTcFsjd13
    qkAxxfAKTcFsjd13
    XLPhRBDYyZTEsrNr
    PaJmyiSS1xQAFwqt
    • Use the point of the spudger to lift the loudspeaker out of the frame and remove it.

  3. chgNGVJREvVsSfpV
    chgNGVJREvVsSfpV
    UNFAoeJwNWLQmRD6
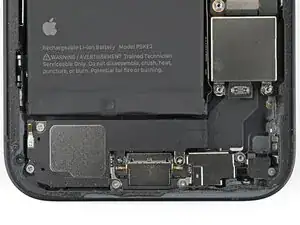
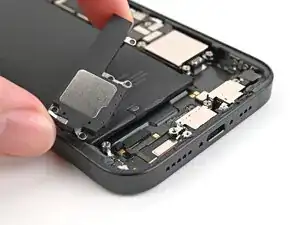
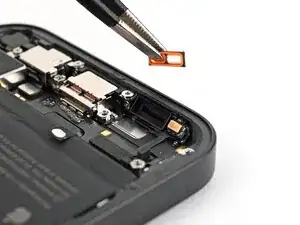
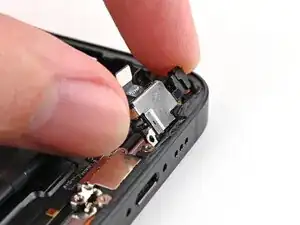
    • If the orange loudspeaker gasket fell out during disassembly, use tweezers to place it back into the sound channel.

  4. 4v2FkHHmQO2Ul2q3
    4v2FkHHmQO2Ul2q3
    DGcwJRS6vIkV1kPJ
    fJEIKQlqBVP5ZuoY
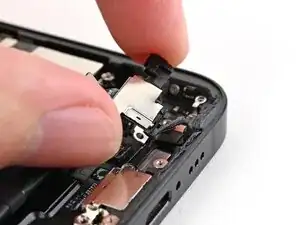
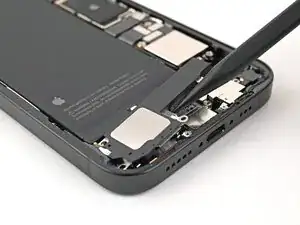
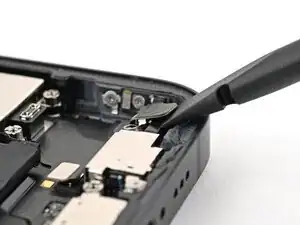
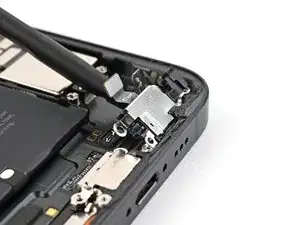
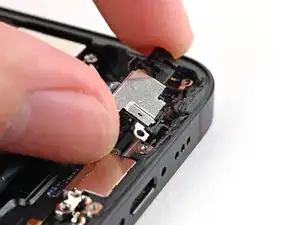
    • Insert the flat end of a spudger between the screw cover and the microphone.

    • Twist the spudger to separate the adhesive under the cover and release its metal clip.

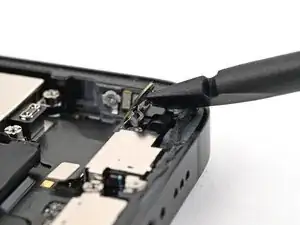
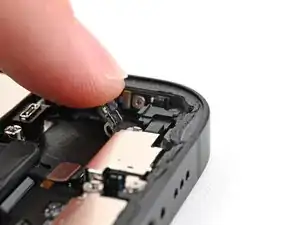
    • Use your finger to gently bend the cover toward the top of the phone and reveal the remaining standoff screw.

  5. KNHoJMaNLpPPP3R4
    KNHoJMaNLpPPP3R4
    m1qIZCGtDvIbZHPb
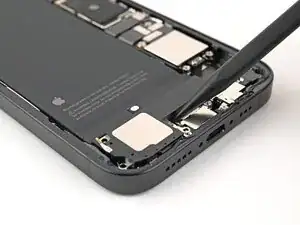
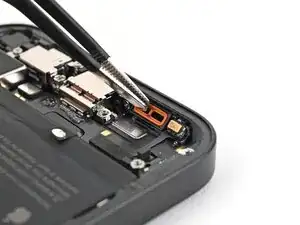
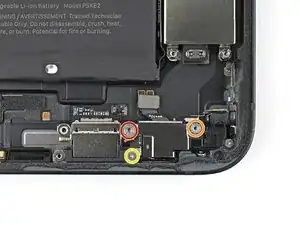
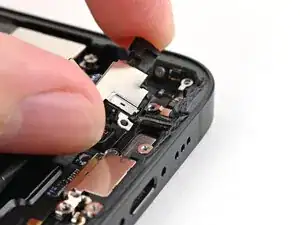
    • Use a standoff screwdriver to remove two screws securing the microphone:

    • One 3.0 mm‑long screw

    • One 2.8 mm‑long screw

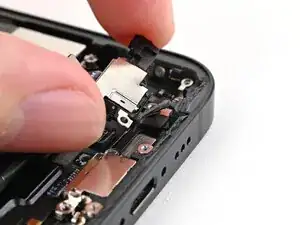
    • Use a tri-point Y000 screwdriver to remove the 1.3 mm‑long screw securing the microphone.

  6. cU2g3SDan3ZOyOXS
    cU2g3SDan3ZOyOXS
    6KXmfgcfgGyQPkNP
    V446oqTU3TLMLNb1
    • Use the flat end of a spudger to lift the microphone enough to grip it with your fingers.

  7. 6kGJN5FwOIQNVARH
    6kGJN5FwOIQNVARH
    CfiDguU2nPXsvGAm
    yHfEnRVRvDowRjjv
    • Pull the microphone away from the frame to separate the adhesive.

    • Remove the microphone.

Conclusão

To reassemble your device, follow these instructions in reverse order.

Alex Diaz-Kokaisl

Membro desde: 16/01/22

227430 Reputação

0 comentários