Introdução

Reassembly steps for the main microphone in the iPhone 16 Plus.

  1. a3mtMBKxJFcQ6gyQ
    • Peel away the new adhesive strip from its white liner, keeping the blue liner in place.

    • Don't stick the adhesive to the microphone yet.

  2. KOhtD1CMdNhuFABJ
    KOhtD1CMdNhuFABJ
    i26Xd346DHXIUr4H
    LbGd6MDmQWuibWCq
    • Once the adhesive sticks to the microphone, it cannot be removed and reused. Ensure it is perfectly aligned before adhering.

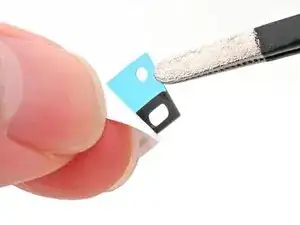
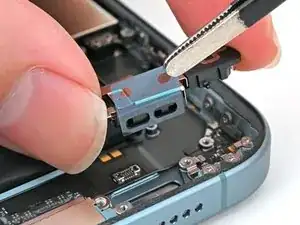
    • Align the two holes in the adhesive with the three holes in the microphone, and stick it into place.

  3. WphXZJVLqibPwRiG
    WphXZJVLqibPwRiG
    tUf4tyNfJLYF51yR
    • Use tweezers or your fingers to remove the blue plastic liner.

  4. RFBiVsBHHBwBFgG6
    RFBiVsBHHBwBFgG6
    2WYNhDOLyMjCj63c
    VGPocAIxRjsVuygb
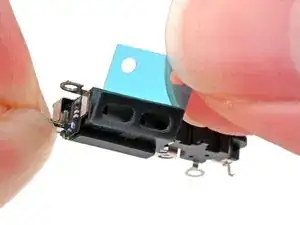
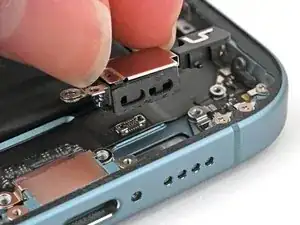
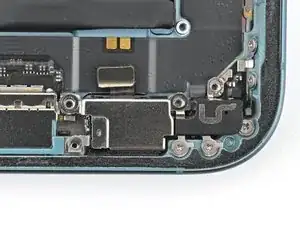
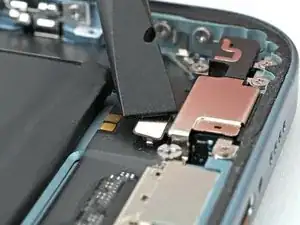
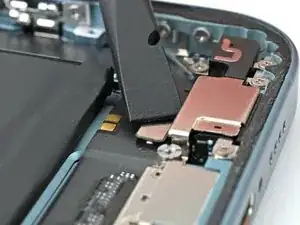
    • Align the microphone with its screw holes and set it into the frame.

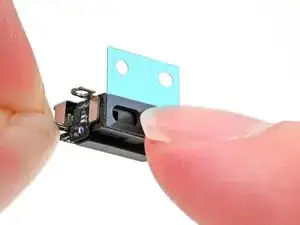
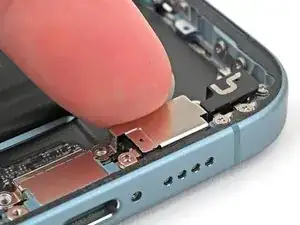
    • Press the microphone against the bottom edge of the frame once it's perfectly aligned.

  5. xbjSf26aRibs4IOH
    xbjSf26aRibs4IOH
    u6kY4GgUreIMOqhb
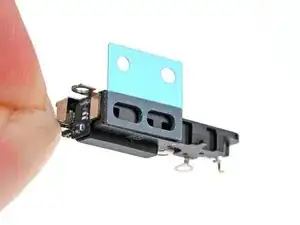
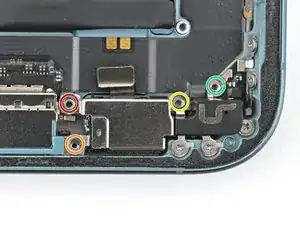
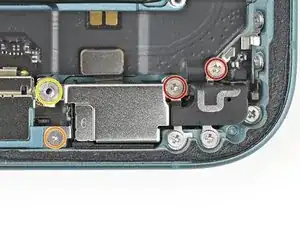
    • Partially install (don't fully tighten) the four screws securing the microphone:

    • One 3.3 mm‑long standoff screw

    • One 1.3 mm‑long tri-point Y000 screw

    • One 1.5 mm‑long Phillips screw

    • One 1.3 mm‑long Phillips screw

  6. 5QbhxafgmQX4oKMO
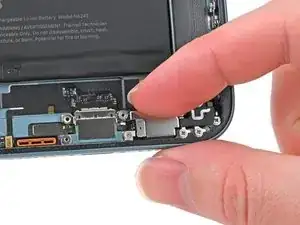
    • Squeeze the microphone against the bottom of the frame for 15 seconds to compress the adhesive.

  7. kt34WdZjG6FXEgEU
    kt34WdZjG6FXEgEU
    2igcVYMgQy22JSYq
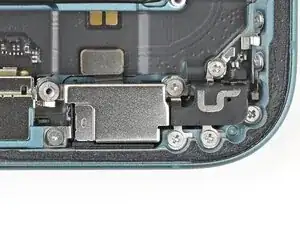
    • Fully tighten the four screws securing the microphone to the frame:

    • Two Phillips screws

    • One Tri-point Y000 screw

    • One Standoff screw

  8. NA1rncyOWWkaxgLH
    NA1rncyOWWkaxgLH
    MXViveDe5VX16pA1
    • Use the flat end of a spudger to connect the microphone's press connector.

Nick Schultz

Membro desde: 24/03/24

45909 Reputação

0 comentários