Introdução

  1. xNflKgXKwxPqRySo
    xNflKgXKwxPqRySo
    OcWPQ3UaPJqxY1Ua
    • Check if your new screen comes with an ambient light sensor installed.

    • If it doesn't, follow the remaining steps to remove and transfer the sensor from your original screen to your replacement.

  2. PH3DaqWT11cfJDDU
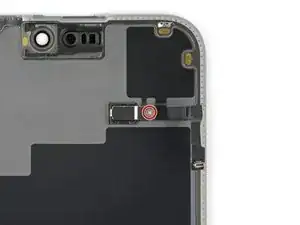
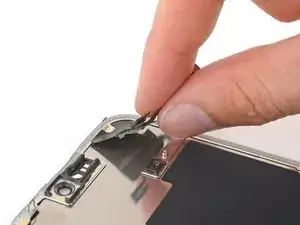
    • Use a Phillips #000 driver to remove the 1.4 mm screw securing the ambient light sensor cover.

  3. HLUwWRUCOPEFCYYm
    HLUwWRUCOPEFCYYm
    JN2ydKEFWn1YbC1S
    oyWkun2fLXkwCK6I
    • Use tweezers or your fingers to unlatch the ambient light sensor cover and remove it.

    • During reassembly, make sure to hook the latch into the small groove on the left side of the black plastic enclosure.

  4. mGNPJIxMNEFeuCGt
    • Be careful not to overheat the screen—the plastic components can melt if they get too hot.

    • Use a hair dryer or heat gun to heat the ambient light sensor until it's warm to the touch.

  5. cjQEGHNWENKAUBII
    cjQEGHNWENKAUBII
    X3FyRvOJJrlh3Vxm
    fRJKLuBMPXX6T6dB
    • Be very gentle handing the ambient light sensor, as its cable is extremely fragile and thin. Avoid using your tool in the direction of the cable.

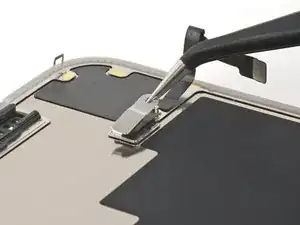
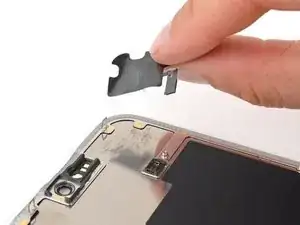
    • Use the tip of an opening pick to pry up the edge of the ambient light sensor out of its black plastic enclosure.

    • This may be tricky. The enclosure prevents you from inserting a tool underneath the sensor. Try from a couple angles, if your tool tends to slip.

  6. urRhoWpniLjKmoOp
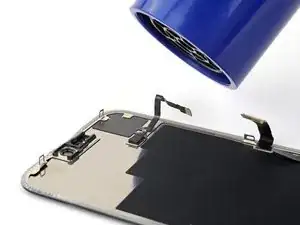
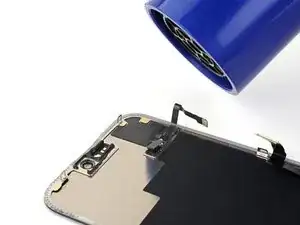
    • By this point, your sensor likely cooled down. Apply more heat until the entire glued down component is warm to the touch.

  7. mNHnAgUfRIMPN3ZE
    mNHnAgUfRIMPN3ZE
    VSE62lMSYvCGIRCd
    GbrKrgeCfeN3AMQa
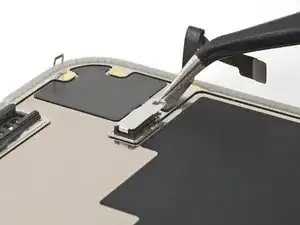
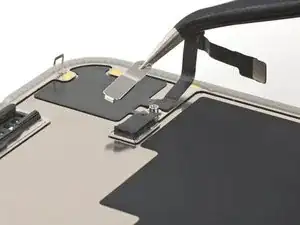
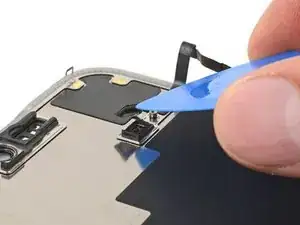
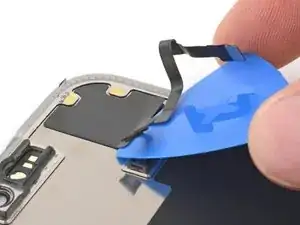
    • Insert the tip of your opening pick underneath the press connector cable.

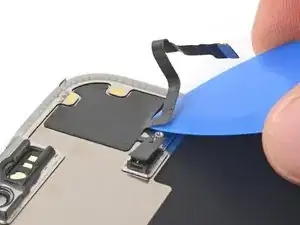
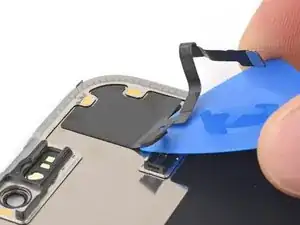
    • Slide your pick back and forth underneath both cables to separate the lower section of adhesive.

  8. I2EoCXQG1JUDuE55
    I2EoCXQG1JUDuE55
    b1nfIVs6UEULuXbG
    YHVXYZnBgPMh1qfW
    • Be careful not to sharply crease or tear the ambient light sensor.

    • Reheat the glued down section of the component at any point if the adhesive cools and becomes stubborn to cut.

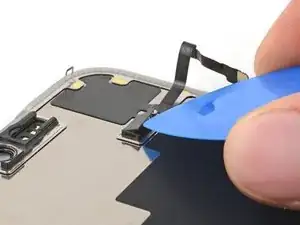
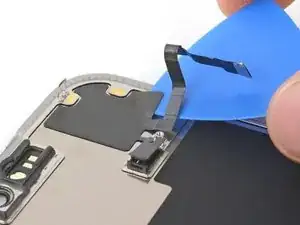
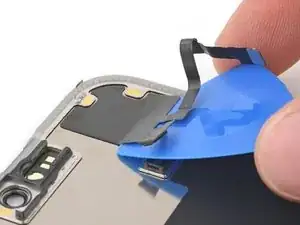
    • Use the flat end of your pick to slide back and forth underneath the sensor until you've separated roughly half of it from the screen.

  9. guyYuWdqhX5DXNIP
    guyYuWdqhX5DXNIP
    eKuQfvT6MNogBhTY
    • Use your fingers to grab the raised half of the sensor and peel it from the screen.

Clay Eickemeyer

Membro desde: 19/09/22

99651 Reputação

0 comentários