Introdução

  1. NN1QiTrD1vSIK3ZF
    NN1QiTrD1vSIK3ZF
    HG3ubO2GEjGnDiDb
    qSPKClN5YWvC3UfV
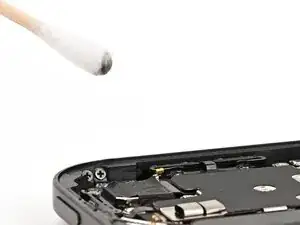
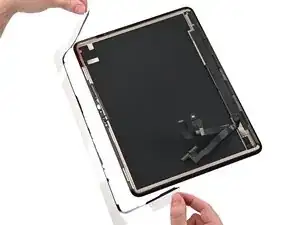
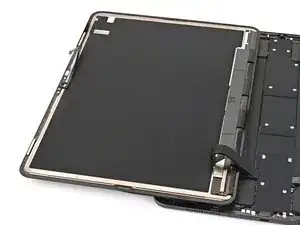
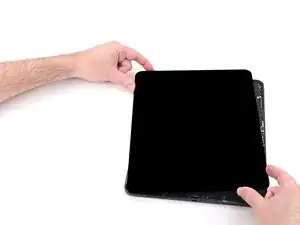
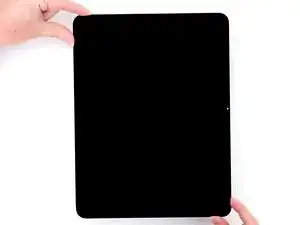
    • Don't touch the ambient light sensor near the middle of the left edge or TrueDepth camera near the middle of the top edge while cleaning the frame.

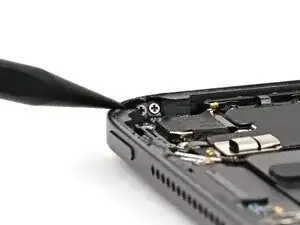
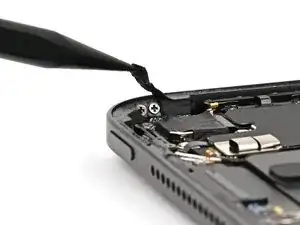
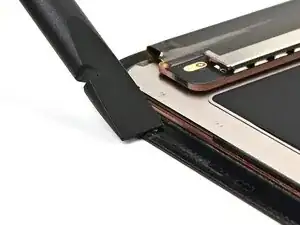
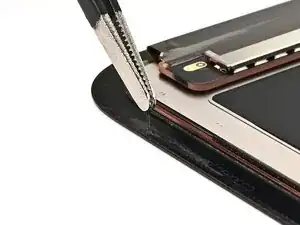
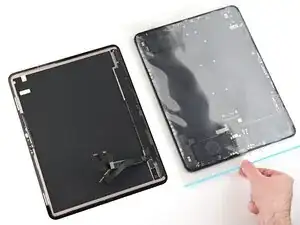
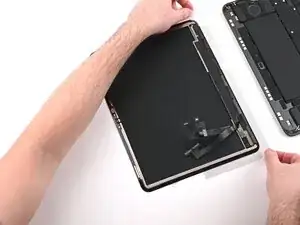
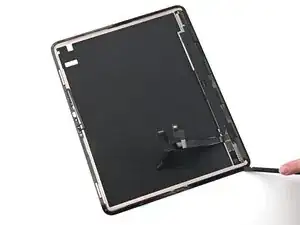
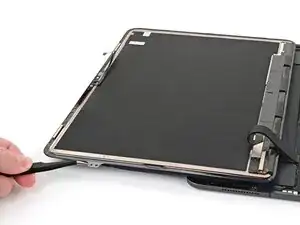
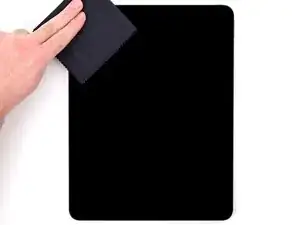
    • Use the tip of a spudger to lift a section of adhesive. Look for an edge or overhang where you can get underneath the adhesive strip.

  2. BOuf5SbtRVYmmfqa
    BOuf5SbtRVYmmfqa
    jopvucvKC5SDHUvY
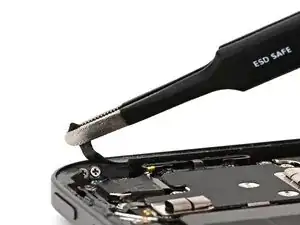
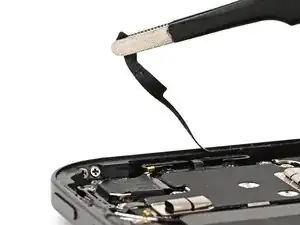
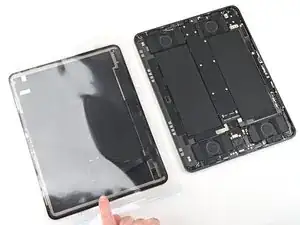
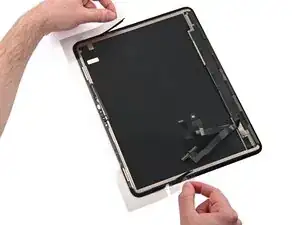
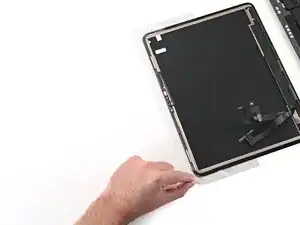
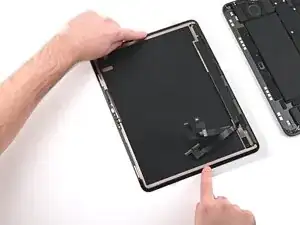
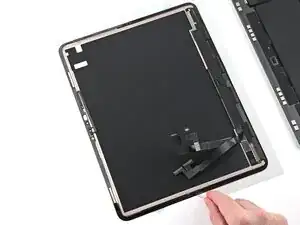
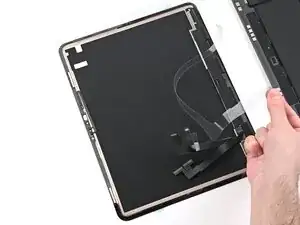
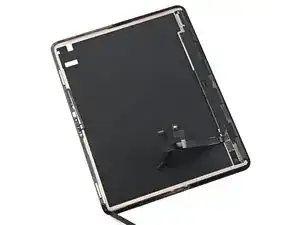
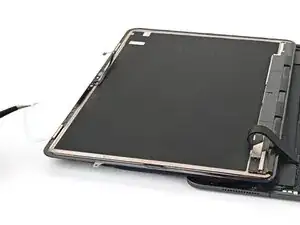
    • Use tweezers or your fingers to lift and remove the old screen adhesive. Apply a little heat to make the removal easier.

  3. xVZihMs6W3QkJRAw
    xVZihMs6W3QkJRAw
    MpDrPeL2yAvZVrZW
    TKHXigEta4FHFtRm
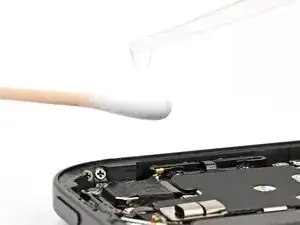
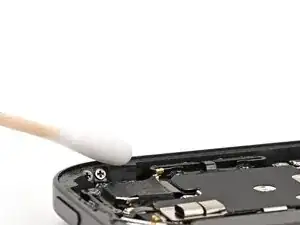
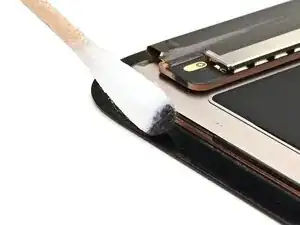
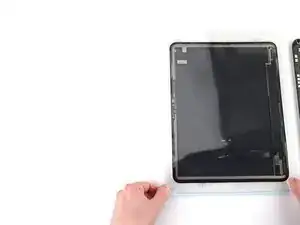
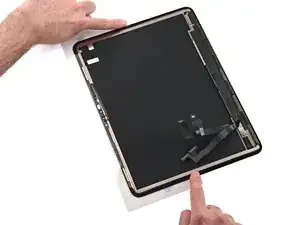
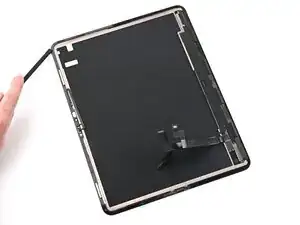
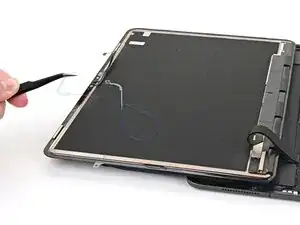
    • Apply a bit of isopropyl alcohol to a cotton swab or lint-free cloth and clean the frame until it's free of adhesive residue.

    • Alternatively, use our adhesive cleanup kit.

  4. 1DlhIAauAXKNWZCN
    1DlhIAauAXKNWZCN
    J36Qi3plTvhQvQSE
    cKZKCi5VDMmbnXee
    • Skip this step if you're installing a new screen.

    • Repeat this process to clean the adhesive off the screen bezel.

    • Don't scrape with a metal tool, or you will scratch the display assembly's black paint.

    • Only apply solvents (like isopropyl alcohol) to the black bezel. Don't let any get under the front sensor assembly or display itself. Solvents will also dissolve the foam gaskets, especially around the front camera cutouts.

  5. CjTZH1fS2uBS4Suj
    CjTZH1fS2uBS4Suj
    DBITTwsBWwNZtTYR
    • If your replacement screen comes with adhesive pre‑installed, skip the next twelve steps.

    • Be careful not to crease or stretch the adhesive during installation. It can't be used if damaged.

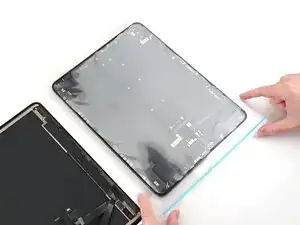
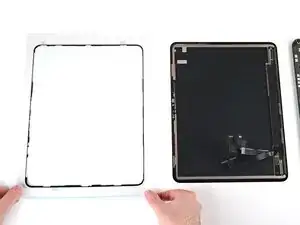
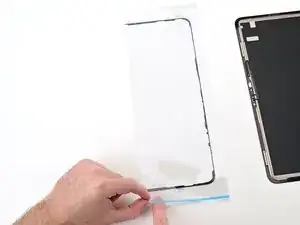
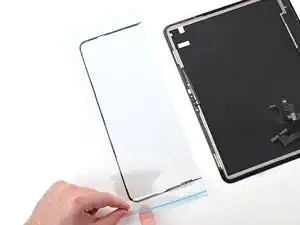
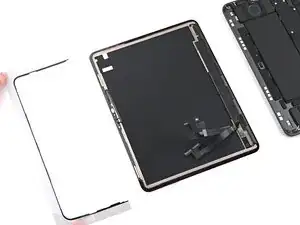
    • Align the adhesive with the frame of the iPad. It's easiest to align them above the USB‑C port.

  6. irtf6W4AYV1mO1Mk
    irtf6W4AYV1mO1Mk
    huGvMEDc5yV2BTHP
    • Flip the adhesive over so it's aligned with the back of the screen.

  7. DQc1DZUcBM1VnVrw
    DQc1DZUcBM1VnVrw
    63iCc1OIeMeoZ61A
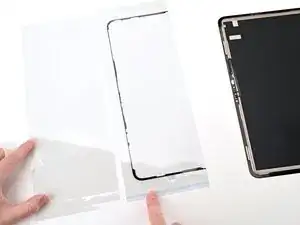
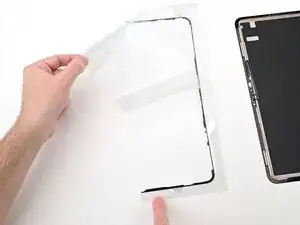
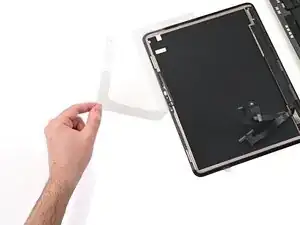
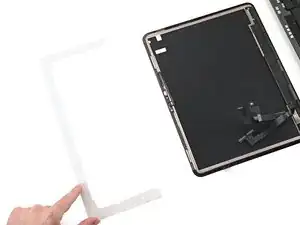
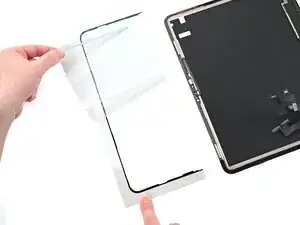
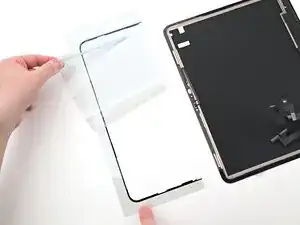
    • Lift the adhesive off the back of the screen and set it to the side. Keep it in the same orientation as the screen.

  8. GKY652G4lcyXaVQQ
    GKY652G4lcyXaVQQ
    NL5rqsT4KRpKEIUJ
    • Don't remove any of the plastic adhesive liners yet—they keep the adhesive in shape.

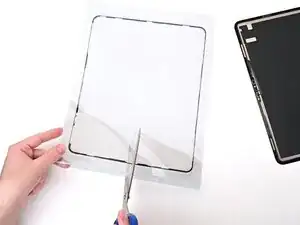
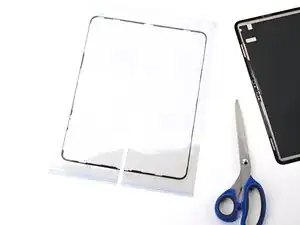
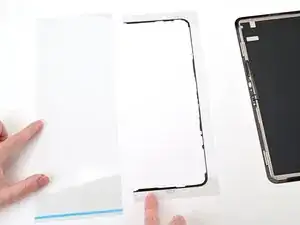
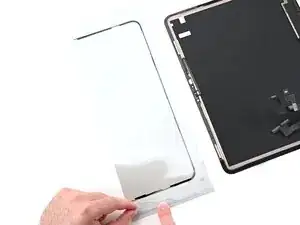
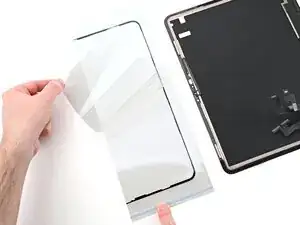
    • Use scissors to cut the adhesive vertically in half. Be careful not to crease or pull the adhesive itself.

  9. OrwiauZFihjZSYXi
    OrwiauZFihjZSYXi
    JSwnhqons1lFARkS
    cTFc55AUqxdKMWDb
    • The adhesive is encased in four layers of plastic—three on top and one on the bottom.

    • Peel and remove the topmost plastic cling layer from the left adhesive strip.

  10. 3uNLYGgxnvVKUCFH
    3uNLYGgxnvVKUCFH
    VlpPfWkZJMbyaopC
    H2DodJbPf3emKl4d
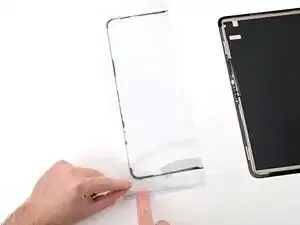
    • Flip the left adhesive over.

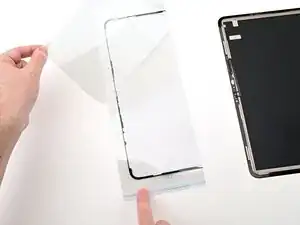
    • Peel the clear liner with the blue line off the back of the left adhesive. The adhesive is now exposed.

  11. pdOiVkY53Tp524iQ
    pdOiVkY53Tp524iQ
    oduAWUtOsqUnRZ2d
    nyAYMrm4i2baZQGh
    • Work slowly when installing the adhesive—once it sticks, it can't be repositioned.

    • Flip the left adhesive and align it to the left edge of the display assembly.

    • Set the left adhesive in place aligned with the left edge of the screen.

    • Press the top and bottom sections of the left adhesive onto the back of the screen.

  12. H1mglY1AyuWB6nFv
    H1mglY1AyuWB6nFv
    Zacu15KH2l24FoZ1
    XdouPobHflSMiNZ2
    • Remove the clear liner on the left adhesive. Leave the final blue liner in place.

  13. dJVfVXYZBwvsroIw
    dJVfVXYZBwvsroIw
    aEVEJibCKiwTX1eQ
    ZkdKGYNd3LpWfGmc
    • Repeat the preparation process with the right adhesive strip.

    • Peel and remove the topmost (clear) cling layer from the strip.

    • Peel and remove the bottom liner layer (clear with a blue line) from the strip.

  14. TPPmOM5KwTGZTxUS
    TPPmOM5KwTGZTxUS
    fkuLfxYCkLRwdrdD
    • Flip the right adhesive and peel off the clear liner with a blue line.

  15. XEKxWdxMNVDPo4aA
    XEKxWdxMNVDPo4aA
    3TnyEs1fGgu2XUPK
    aT1BFP4Y4WXAN6gS
    • Flip the right adhesive and set it in place, aligned with the right edge of the screen.

    • Press the top and bottom sections of the right adhesive onto the back of the screen.

  16. aMuoftUEJKHbtHJu
    aMuoftUEJKHbtHJu
    K4VIRVcr5BuBZ2s2
    • Remove the clear liner off the right adhesive. Leave the final blue liner in place.

  17. 2AuZOhcCYJU1Z6B2
    2AuZOhcCYJU1Z6B2
    RuNgyPghGMwG2RCO
    1sV2niKXeS1JGmAD
    • Use the flat end of a spudger to gently press all the adhesive into place around the entire perimeter of the iPad. Be careful not to press on the delicate ribbon cables across the bottom of the screen.

  18. yk5yLRBPF1YxmQhL
    yk5yLRBPF1YxmQhL
    Nio5KAWeWSLxkIEl
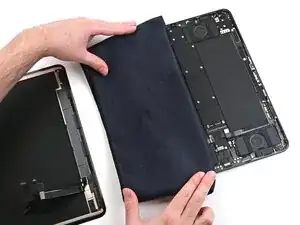
    • Place a clean cloth over the left battery cell in the iPad.

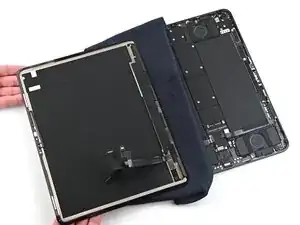
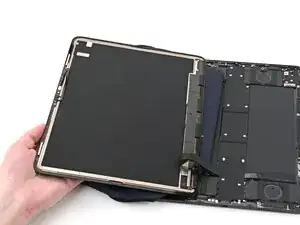
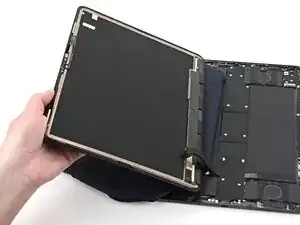
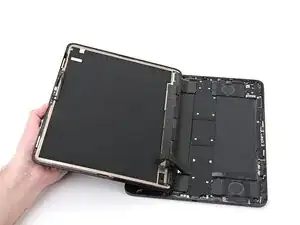
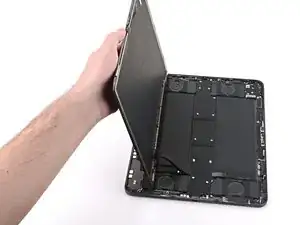
    • Set the screen on the iPad, so the screen cable connectors can reach their respective sockets in the iPad.

  19. RUDVNVwvrKARYKFD
    RUDVNVwvrKARYKFD
    sNHLfMQJXoiYPUQG
    cwUP1ty1SnWoWcsN
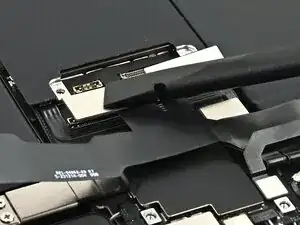
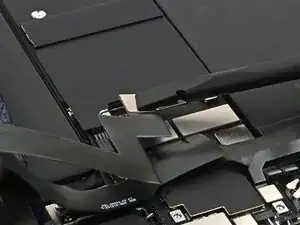
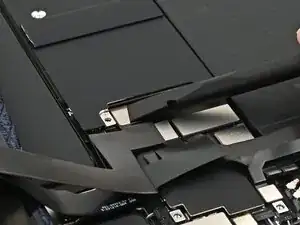
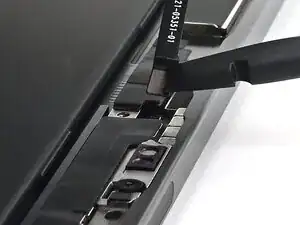
    • Align one of the display power cable press connectors over its socket on the logic board.

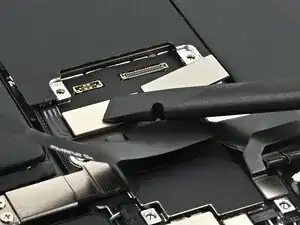
    • Press down with the flat end of a spudger or your fingertip—first on one of the short sides, then the other—until it clicks into place.

    • Don't try to force the connector into place. If you're having trouble, reposition it and try again.

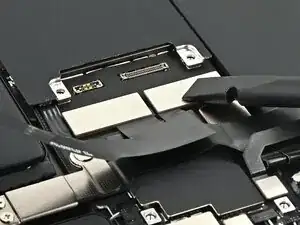
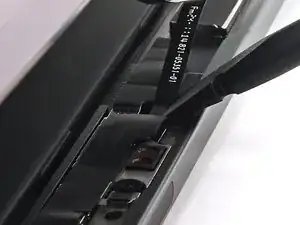
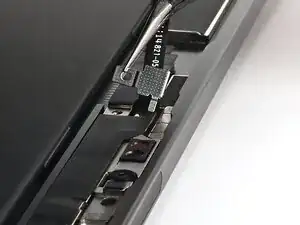
    • Repeat this process to connect the second display power cable press connector.

  20. 1tcCCI4g3qIXBYnY
    1tcCCI4g3qIXBYnY
    Hrq4bfCvUMCaw2xt
    j2AGbFOlNjBPspFu
    • Repeat the same procedure to connect the two remaining display cables.

  21. AABItHJIjfTj1kVv
    AABItHJIjfTj1kVv
    5WiuRKCVZJGFpUuA
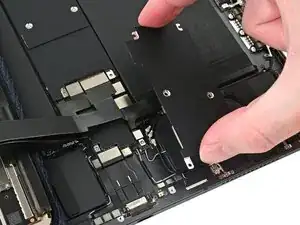
    • Set the display connectors cover onto the logic board so it's aligned with its screw holes.

  22. QpQGyLvCErOpJbey
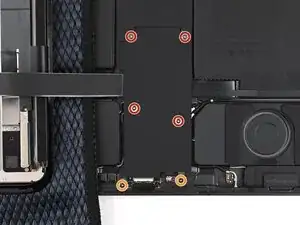
    • Use a JCIS or JIS 00 screwdriver to install the six screws securing the display connectors cover:

    • Four 2.1 mm‑long screws towards the center of the iPad

    • Two 1.6 mm‑long screws near the edge of the iPad

  23. Muat6yTZDys6xGSF
    Muat6yTZDys6xGSF
    gR6QEw4Qh2TmaNyQ
    R1noXbY5UsZhQCoN
    • Use tweezers or your fingers to remove the final, blue liners off the iPad screen adhesive.

  24. Nk35ElkGtH4HDBw6
    • Verify all the adhesive liners are removed. The adhesive is now exposed.

  25. GYW556ZOtWDFsjbN
    GYW556ZOtWDFsjbN
    hvmTFgOLLE3YqKYR
    FS5Rn4HhlwBLAkpE
    • Without touching the adhesive, slightly lift the iPad screen and remove the cloth between it and the iPad.

  26. Lnxw4jGf26BMFGDR
    Lnxw4jGf26BMFGDR
    4ixMxqdxWocuEWqe
    C3OdOhaYL5HcYjjv
    • Don't align the iPad screen with the frame yet—the front sensor assembly still needs to be connected.

    • Flip the iPad screen over and set it down at a slight angle on top of the iPad frame.

  27. dgcXeNagNOCnwFcZ
    dgcXeNagNOCnwFcZ
    TikNm3xSgWAtwtNB
    • Be careful not to strain the microphone cable while connecting it. If it doesn't reach, lower the screen until it does.

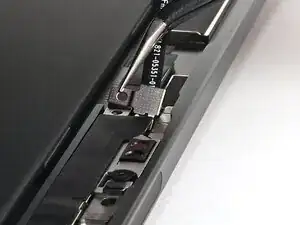
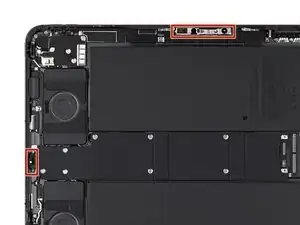
    • Hover the top of the screen over the microphone connector's socket on the board.

    • Use the flat end of a spudger or your finger to connect the microphone press connector to its socket on the board (located next to the front camera assembly).

  28. 2ysGk6SrCekfPSQw
    2ysGk6SrCekfPSQw
    vChb1HKy6cwGObnB
    TbhILANd2AO5ioov
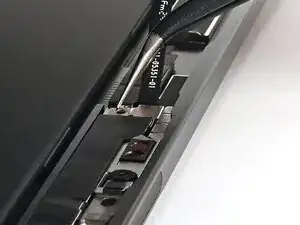
    • Use tweezers to install the microphone connector cover into its slot beneath the front camera assembly bracket.

    • Set the cover down so it's aligned with its screw hole.

    • The cover may try to stick to the magnets next to it. Keep it in place for the next step.

  29. mtUsU2mBAPxB3gSN
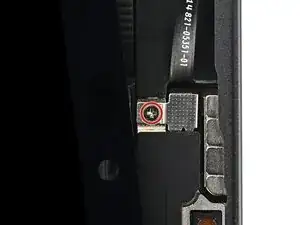
    • Use a JCIS or JIS 00 screwdriver to install the 1.3 mm‑long screw securing the microphone connector cover.

  30. VdSPpRqrOCAJgmfW
    VdSPpRqrOCAJgmfW
    InZH2cXNP2Kp2hOv
    IUXJwwq1ujW2qADT
    • Carefully align the bottom edge of the screen with the bottom edge of the iPad.

    • Position the screen so it sits into the lip on the edge of the iPad.

    • Before closing up the display, check to make sure that no cables are trapped beneath the screen. If they are, lift the top edge slightly (without straining the microphone cable), reposition the screen, and try again.

  31. w2nYNOmplpGFO2Jt
    w2nYNOmplpGFO2Jt
    Tk5KCbowY3BTVuJI
    • Lower the screen into place, ensuring the screen's bottom edge stays flush with the bottom edge of the iPad.

  32. xeYCiKHJIPOUBiXY
    xeYCiKHJIPOUBiXY
    pfmOpEQvhIXe3ppJ
    jx4HSLGI6rg3LRsr
    • Press down across the bottom edge, then across the entire perimeter of the screen so it sits flush.

  33. AN2RDmytvySZcqxr
    AN2RDmytvySZcqxr
    S6fo1cQUjqpwDDA5
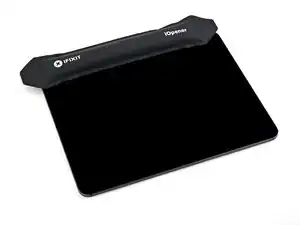
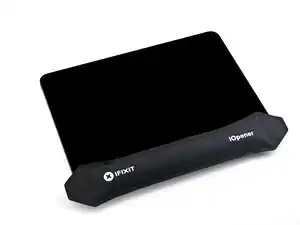
    • To help the adhesive bond, apply heat to all four edges of the screen using an iOpener, hair dryer, or heat gun until it's hot to the touch.

  34. kmqiVGZw1GNFOCMH
    kmqiVGZw1GNFOCMH
    BLKHgs5DAJJRKpqv
    • In order for the adhesive to bond correctly, you'll need to apply even pressure around the perimeter of the iPad. You can compensate for the camera bump by laying the iPad face-down and placing coins around its perimeter.

    • Alternatively, you can use screen vise clamps around the perimeter of your device to set the new adhesive.

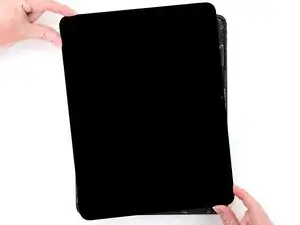
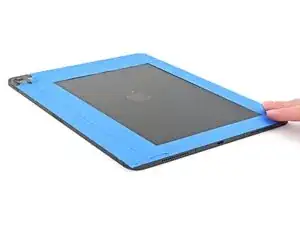
    • Place the iPad screen-side-down on a soft, flat surface.

    • Apply tape to the back to protect its finish.

  35. 2xOeoHFRv6enVNce
    2xOeoHFRv6enVNce
    mgQ13ArGtZRdyg2h
    baCwZSTLRvcIBQwg
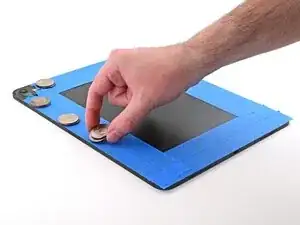
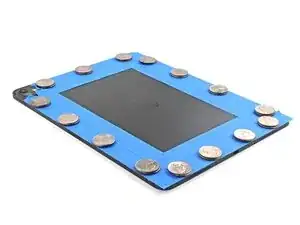
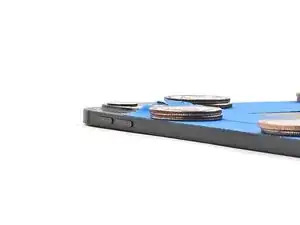
    • Place evenly spaced layers of coins or similarly thick objects on the tape along the edges of the back glass.

    • Stack them to a consistent height taller than the camera bump.

  36. bwAAKdjr6C2RCrEP
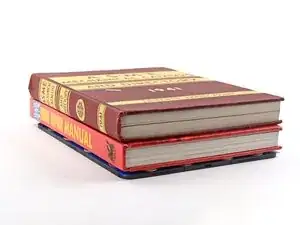
    • Stack multiple books or other heavy objects on the iPad.

    • The coins may leave an impression on the bottom object, so don't use anything valuable.

    • Leave the objects in place for at least thirty minutes. The lighter the objects, the longer they should be left. Ideally, leave them stacked overnight.

Nick Schultz

Membro desde: 24/03/24

45909 Reputação

0 comentários