Introdução

  1. mkTWUPDVpsnyYxNb
    mkTWUPDVpsnyYxNb
    HVjgHffK6lrBD51n
    lJSuBUZTLYg33BwA
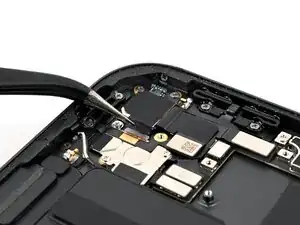
    • Use a pair of angled tweezers to gently peel up the black grounding sticker covering the back of the camera.

    • Check the replacement camera. If it doesn't have a grounding sticker, set the sticker aside carefully so you can put it on the new camera later.

  2. BX6YSrFET5rAMirM
    BX6YSrFET5rAMirM
    QLBQdkujP4hGU3YN
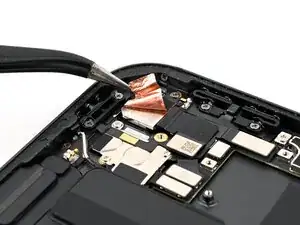
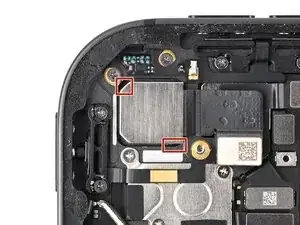
    • Place the flat end of a spudger between the camera ribbon cable and the top button ribbon cable, against the camera press connector.

    • While holding the top button ribbon cable down with the spudger, twist the spudger to disconnect the rear camera press connector.

  3. FMHqgirpnKSIQg3U
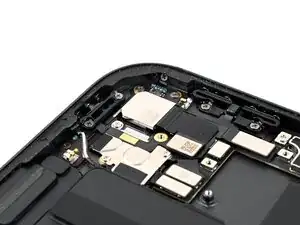
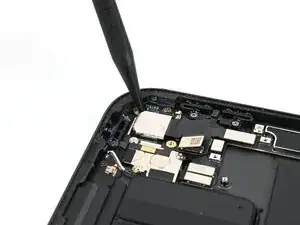
    • Use a spudger to break the glue dots near the top-left and bottom-right corners of the camera.

    • These glue dots are small and hard to see. If the camera doesn't pry up easily in the next step, look for more glue dots.

  4. GafBC6uTSDx6Ntjg
    GafBC6uTSDx6Ntjg
    PkDLT6imuOPAbrRY
    QohLjyVt5ILJjYIE
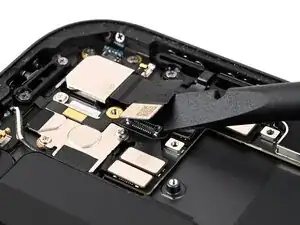
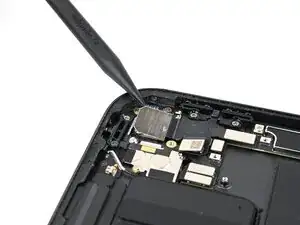
    • Use the point of a spudger to pry the camera up from the top-left corner.

    • The camera is adhered to the iPad. Apply slow, firm pressure to give it time to release.

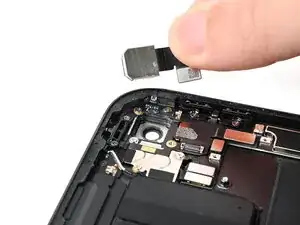
    • Once the camera is free, grab it by the ribbon cable and remove it.

Nick Schultz

Membro desde: 24/03/24

45909 Reputação

0 comentários