Introdução
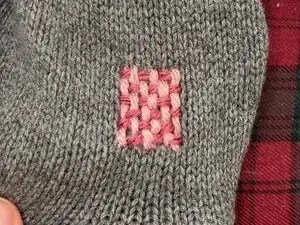
This guide demonstrates how to repair a hole on a Patagonia® wool sweater using woven darning. Darning is a mending technique that recreates stitches to fill and reinforce holes.
This tutorial outlines a specific technique called surface darning, where rows of stitches are laid on top of the fabric, and is best done with knits made of medium to heavy weight yarns. For a technique that works well on lightweight knits, see How to Darn a Hole in a Knitted Garment.
Hand sewn repairs are a fun and effective way to extend the life of gear at home. DIY repairs won't void the Patagonia warranty—they're actually encouraged!
Patagonia items can also be taken in to a local retail store for repair evaluation or sent in to Patagonia through their mail-in repair service.
Let's get fixing!
Related Tutorials
Related Articles
Ferramentas
-
-
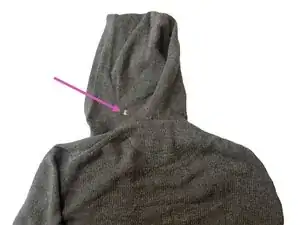
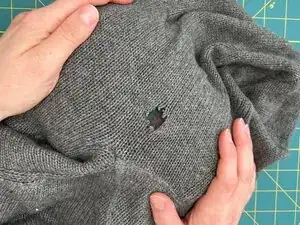
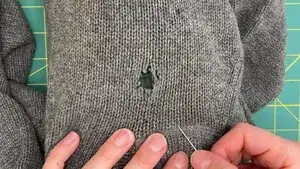
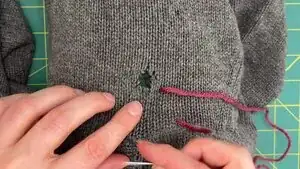
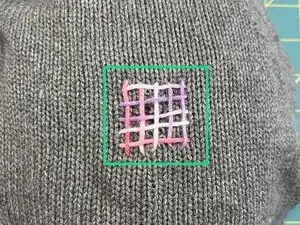
Locate the hole.
-
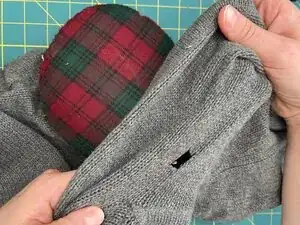
Place something behind the hole. It can be a darning egg or darning mushroom, an ironing ham, or even a piece of paper.
-
-
-
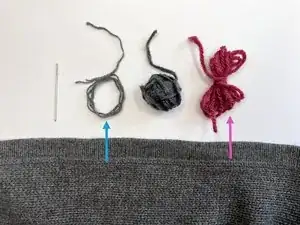
Yarn: The ideal yarn is the same fiber content, weight, and color as the garment. This will create the most invisible repair.
-
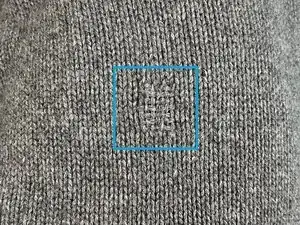
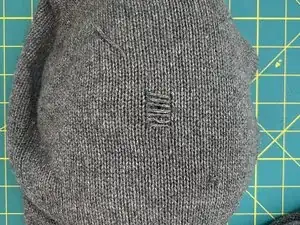
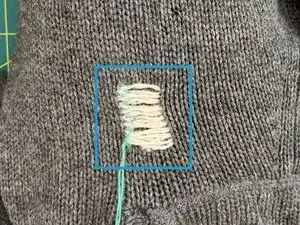
In this tutorial, heavier contrast color yarn is used to show the technique. See details on the invisible version in Steps 17 - 19.
-
Thread the needle with a length of yarn no longer than 24 inches (~61 cm). Don't knot the thread.
-
For more info, see Needles and Thread.
-
-
-
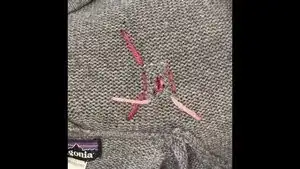
From the front side, insert the needle at least one needle‑length diagonally away from the damage, approximately 2 inches (~51 mm), and come up 1/4 inch (~6 mm) diagonally away from one corner of the damage.
-
Pull the needle and thread through, leaving a short tail.
-
-
-
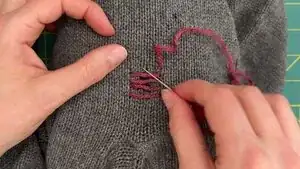
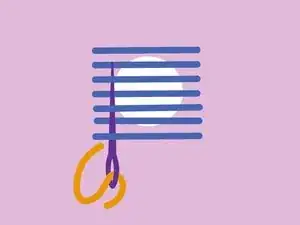
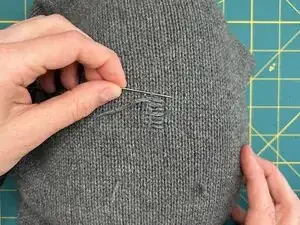
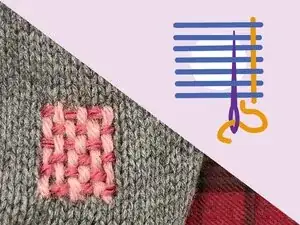
Cross the needle to the opposing side of the damage and make an upward stitch. Pull through to create a horizontal line of yarn.
-
Continue to cross back and forth over the hole, creating lines of floating horizontal stitches.
-
See the next two steps for detailed videos of this technique.
-
-
-
Use the yarn as a guide for where to stitch on the opposite side of the damage.
-
Pass the needle between existing loops of knit stitches instead of piercing through them.
-
Consistently adjust the yarn to maintain the correct tension.
-
-
-
Continue until the hole is covered and the last row of yarn is at least 1/4 inch (~6 mm) beyond the damage.
-
Insert needle and come back up at least 2 inches (~51 mm) away from the damage.
-
Cut the yarn, leaving a short tail.
-
-
-
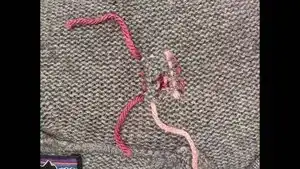
Insert the needle approximately 2 inches (~51 mm) away from the damage diagonally.
-
Come up one yarn width below the bottom row and about one yarn width inward.
-
Pull the yarn through, leaving a short tail.
-
-
-
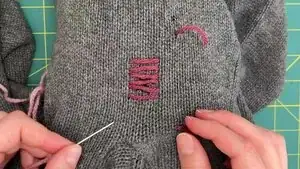
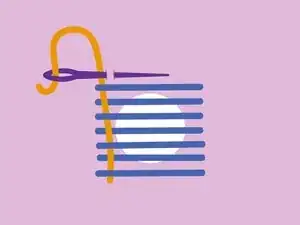
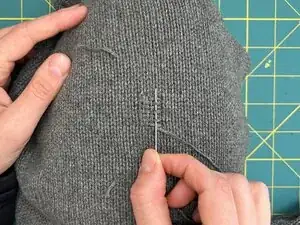
Pass the needle through the horizontal yarns, alternating over and under each row.
-
After passing through all rows, pull the yarn through to create a vertical line of yarn, then make a horizontal stitch at the top to secure the yarn.
-
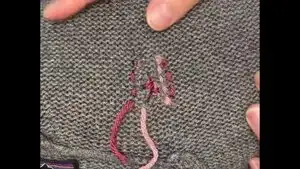
Then move back across, weaving the needle over and under the rows in the opposite way.
-
Repeat this process, alternating over and under with each pass and securing each pass with a small horizontal stitch.
-
See the next two steps for detailed videos of this technique.
-
-
-
Carefully weave the needle between the existing rows of yarn.
-
After each pass, use the needle to shift the yarn over so it lays vertical.
-
-
-
Continue until the last vertical yarn lays within a yarn width of where the horizontal threads end.
-
To finish, insert the needle and come back up at least 2 inches (~51 mm) away diagonally.
-
Cut the yarn, leaving a short tail.
-
-
-
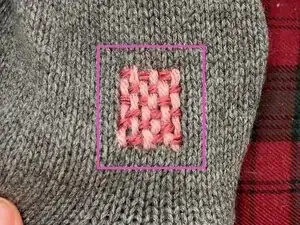
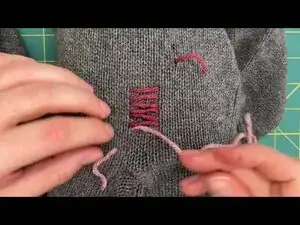
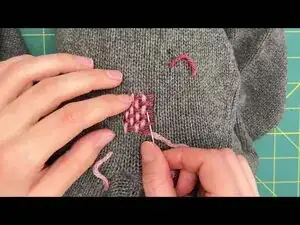
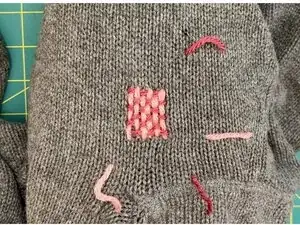
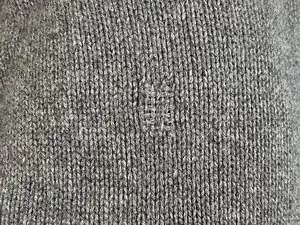
Before moving on to finishing, inspect the woven darning.
-
Ideally, there should be the same number of horizontal and vertical yarns.
-
Check the hand feel and density of the stitching compared to the rest of the garment. Hold the repaired area up to the light and see if the same amount of light passes through the darning as the rest of the garment.
-
-
-
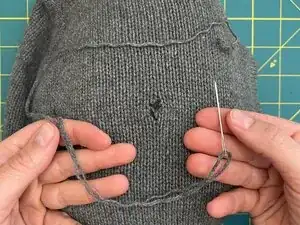
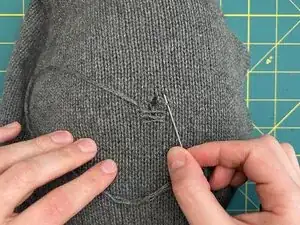
Flip the garment over to the backside.
-
Carefully pull out each yarn end.
-
One at a time, thread each end into the needle and stitch the yarn back in the direction that it came from.
-
Pull the yarn tight and snip the loose end.
-
-
-
Double check that the yarn end is being stitched back in the direction that it came from.
-
To avoid these stitches showing through on the front side:
-
Try to stitch only into the garment, keeping to the top layer and not piercing all the way through.
-
Don't extend the running stitch past the repaired area.
-
-
-
In the case where two yarn ends are close to one another, it's possible to tie them together in an overhand knot.
-
-
-
Lightly steam the area and gently massage it with your fingers to help the fibers settle in.
-
-
-
Stabilizing Circumference Stitch: To be extra sure that the hole doesn't expand or fray, place a running stitch around the circumference of the hole before beginning. Place the stitch about 1/4 inch (~6 mm) away from the damage and ensure the vertical and horizontal darning stitches extend past it.
-
Gap Between Rows: Try to create a gap between each horizontal and vertical row that's the same as the width of the yarn. This will create the most balanced weave structure, with the horizontal and vertical yarns appearing an equal amount like a checkerboard.
-
Too Close: The yarns are packed too tightly. This will make it difficult to weave in the vertical yarns and the resulting woven patch will be thick and unbalanced.
-
Too Far: The weave structure will be very loose with visible gaps.
-