Introdução
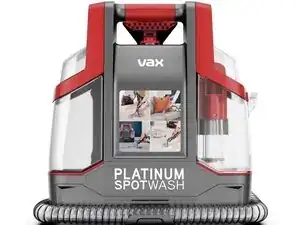
The Vax Platinum Spot Cleaner for carpet and upholstery, has dual water tanks, one for cleaning/rinsing water, the other collects the water that has been vacuum-cycled through your carpet. There is a spray-trigger at the head end of the hose and this trigger can commonly go faulty where it will trigger on, but the spring return is seemingly unable to return the trigger to the off position, leaving the spray running constantly. Grabbing the corner of the plastic trigger with your fingertip or fingernail, you may be able to pull it back away from the handle, closing the valve again.
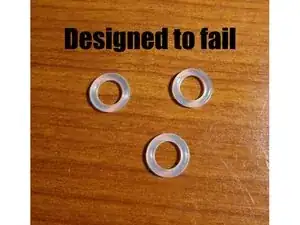
This inexpensive fix will make it better than new. It requires a screwdriver and 3 appropriately sized, common black nitrile, 70-Shore, o-rings. Sized at 7.5 - 7.52mm inner Diameter, with a cross section 1.8 - 2.0 mm
Ferramentas
Peças
-
-
Unclip and remove the head (not depicted). Take #2 Phillips-head screwdriver (+) and remove the two screws holding the cover on.
-
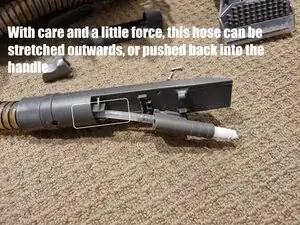
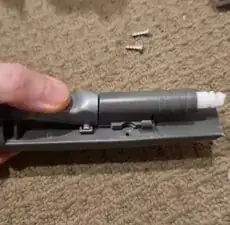
Wrestle the plastic off. Let the trigger fall out. Wiggle the valve mechanism away from the hose to free it from the assembly.
-
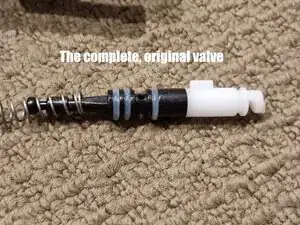
Pull out the plunger, and let the return spring and some water fall out.
-
Ignore any grease, remove the three clear silicone o-rings without scratching the plastic valve. Replace with the new black rubber o-rings.
-
-
-
Insert the return spring, the valve, reposition this into the assembly. If the water hose was stretched out from the large hose, you can push it back in with your fingers. Ensure the alignment here, as the screws will go through this semi-circle locking the valve into the assembly.
-
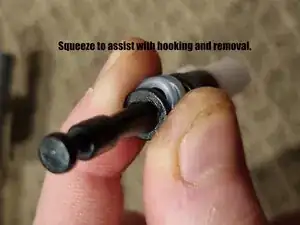
Hold the valve plunger in, hook the trigger over the lip. Keep it all together with one hand while you replace the plastic cover. With the cover on, slide it back and forth a little, while pressing it into the handle to ensure that the objects behind it are aligned. The cover should be flat with no obvious gap. Replace the screws.
-