Introdução
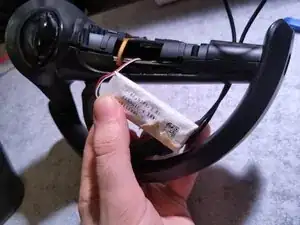
This guide will demonstrate one way to disassemble enough of a Valve Index controller to reach its defective battery and replace it with the closest known replacement battery.
This is a tricky part to get into, despite the small number of screws and reliance on clips. There are several ribbon cables in the way of the battery, as well as sharp corners around the housing, and the adhesive can make the removal a slow and dangerous process.
There's no way to fully disassemble the Index controller without prying off the cement holding the outer ring to the bottom of the main handle.
Take caution to not rip the cables or puncture the battery.
-
-
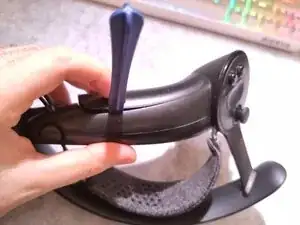
Use either a guitar pick or thin sheet of metal, pry open the grip sensing panel.
-
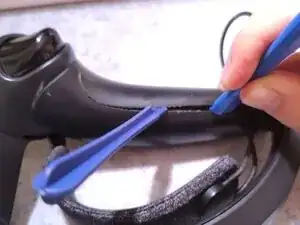
There are five plastic clips around and under the grip sensor. Use the tool to pry up around the sensor to lift it out of the handle.
-
Tuck in starting closer to the top of the controller, and apply force to lift the panel away. Move further around the sensor, using a second tool if needed to keep the grip sensor off of the handle.
-
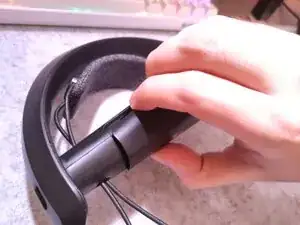
With gentle force, the propped grip can be removed from the main handle.
-
-
-
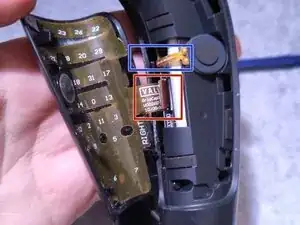
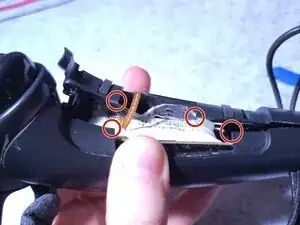
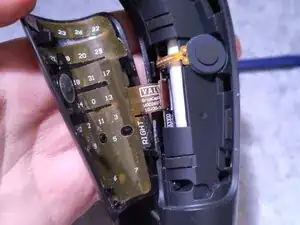
There are two ribbon cables in the way of the battery that must be removed.
-
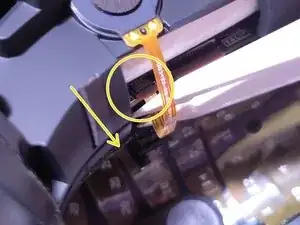
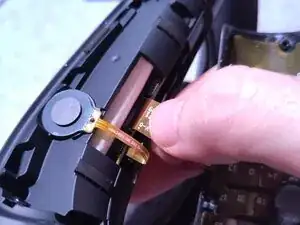
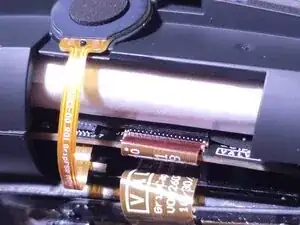
The smaller ribbon cable is wrapped around the top of the battery and inserted into the circuit board. Use tweezers to free the cable and detach it from the board.
-
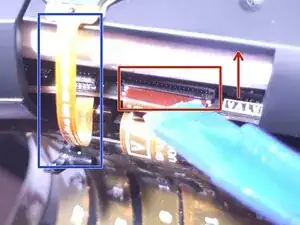
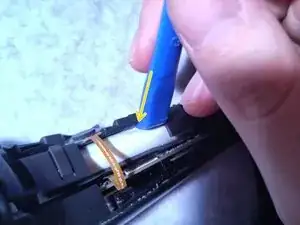
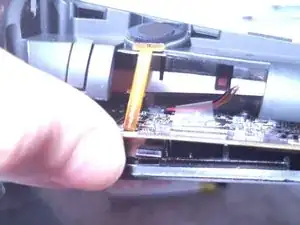
The larger ribbon cable is attached from the back of the grip panel to a wider connector on the circuit board, held down by a black connector lid.
-
Use a thin, flat spudger to lift the connector lid, then pull it out from the circuit board to disconnect the grip panel from the conntroller.
-
-
-
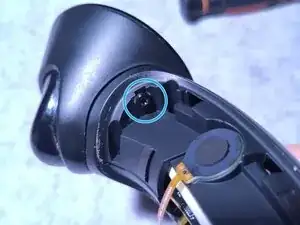
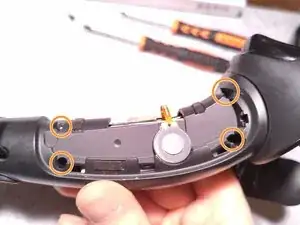
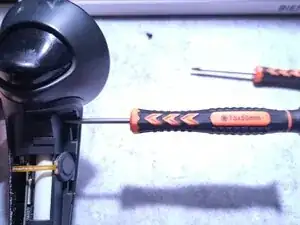
Unscrew one (1) Torx T9 screw on the side top.
-
Unscrew four (4) Torx T5 screws around the side of the housing.
-
After all five (5) screws are removed, use a rigid spudger to pry open the battery housing from the controller handle.
-
-
-
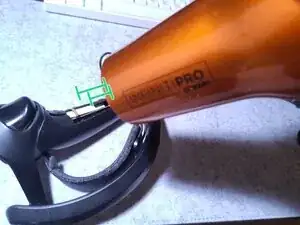
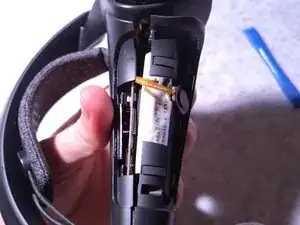
The battery is securely adhesed to the housing; use a hairdryer or hot air gun at moderate heat for 10 seconds to loosen the adhesive.
-
Use a plastic guitar pick or spudger to separate the adhesive from the plastic housing. There should be less resistance; if it's still not budging, re-warm the area and try again.
-
Once the adhesive is freed, separate the controller apart more to handle the battery, and remove it from the main handle.
-
-
-
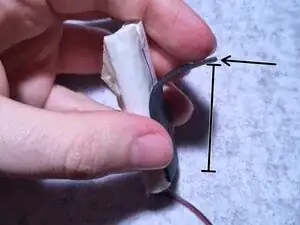
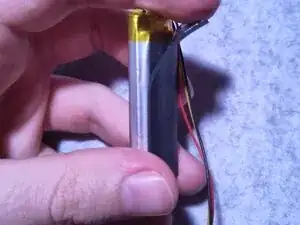
There is a rubber strip stuck on one side of the OEM battery, protecting the printed circuit board from the battery,.
-
Separate it from the white housing, and replace it onto the replacement battery.
-
Install the new battery, rubberized side facing the printed circuit board, and apply a replacement adhesive strip on the other side of the battery to keep it stuck on the outer frame.
-
When ready, unplug the old battery from the circuit board, and install the new battery's cable.
-
-
-
Insert the battery connector onto the connector on the printed circuit board, and press down onto the board.
-
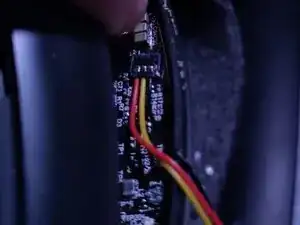
Bend the battery wires to arc the connection route better.
-
Now, test that the controller can be powered via USB for a couple minutes, then unplug and attempt to turn on the controller.
-
Once the connection is established, place thick double-sided adhesive onto the replacement battery opposite the rubberized part, and insert the battery into its chamber on the handle.
-
The battery wires should be nested on the side of the battery, not over, under, or in the way of the housing edges.
-
-
-
Start with the wider ribbon cable from the grip panel. Position the cable end properly by hand or with plastic, dull tweezers, then insert it into the connector under the open black lid.
-
Once the cable is inside the connector, pull down the black lid to close it. The cable should be securely in place.
-
Tuck in the excess of the ribbon cable underneath the printed circuit board, slightly rolling it into the pocket underneath.
-
Use tweezers to wrap the smaller ribbon cable around the battery, and insert it into its connector closer to the top of the printed circuit board.
-
Once the ribbon cables are reinserted, insert the 5 screws back into their holes, and clamp the controller together, ensuring the cables are away from any clips and creases.

6 comentários
The link for the battery part leads to a missing page as of 4/18/2025
Jevan -
Searching the part name seems to get results with the same model number, for instance : https://www.aliexpress.com/item/10050046...
I tried to change battery, but frankly it is a nightmare to do it. Just to remove one screw in the deep hole was a challenge and I had to use driller.
For second controller I bought the Mako iFixit set and was after some attempts successful. To remove battery I did not need the hot air, after 6 years the glue was not in good condition anymore. But the connector was glued very well and I broke it in both controllers, it is just too fragile.
The controllers are made to be not repaired. I found out, that they work even without battery, connected with USB cable, they are just getting warmer.
So I gave up and will use them wired, as I am not capable to solder the battery.
All right... Notes from having done this today:
1. I'd add that the controller's battery chamber doesn't fully separate from the main body during this operation - you're just spreading the two halves to get at the battery.
2. The black clip on the palm-sensor's ribbon connector is super-fragile and easy to permanently detach... if it does, you're going to need tape or hot glue to reattach the ribbon cable.
3. If your battery connector has hot glue on it, you're going to need isopropyl alcohol, tweezers, and patience to remove it before you can remove the connector from the board.
4. The replacement batteries... I purchased a couple of Cameron Sino batteries from Amazon. The leads connecting to the batteries are also fragile. I'd recommend taping over the leads and end of the battery to create some re-enforcement.
5. I'd test charging and powering up at several stages - first connection, part way through re-assembly, and again post re-assembly. It's easy to get an imperfect connection on the battery.
I'll add a note about point 1 to the end of Step 3. I've already mentioned that it's impossible to fully disassemble the controller without destroying it in the beginning, but it's worth reinforcing.
Damian -