Introdução
-
-
Desligue o seu iPhone antes de começar a desmontagem.
-
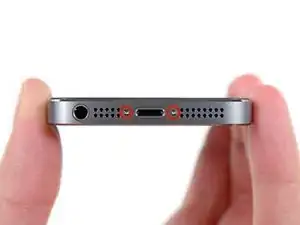
Remova os dois parafusos pentalobe de 3,9 mm de ambos os lados do conector Lightning.
-
-
-
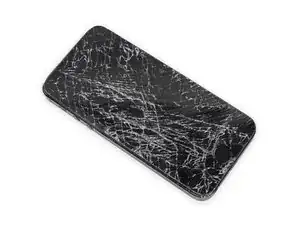
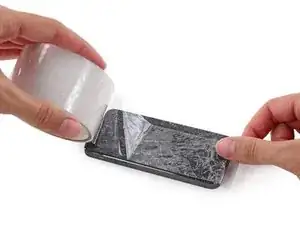
Se o vidro de seu visor estiver rachado, mantenha as rachaduras sob controle e evite danos corporais durante o reparo cobrindo o vidro com fita adesiva.
-
Coloque tiras sobrepostas de fita adesiva transparente sobre a tela do iPhone até que toda a superfície fique coberta.
-
-
-
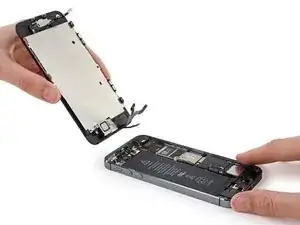
Independente da ferramenta que você use, você precisa puxar para cima com segurança o visor inteiro.
-
Se o vidro começar a se separar do plástico, como mostra a primeira figura, passe uma ferramenta de abertura de plástico por entre a moldura de plástico e o corpo metálico do fone para liberar os clipes metálicos da estrutura.
-
-
-
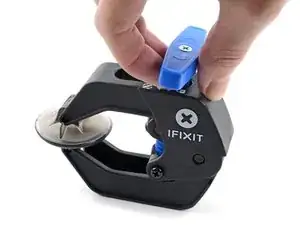
Puxe a pega azul para trás para destravar os braços do Anti-Clamp.
-
Deslize os braços pela borda esquerda ou direita do seu iPhone.
-
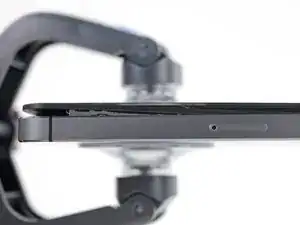
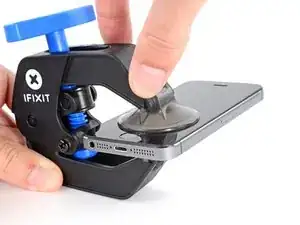
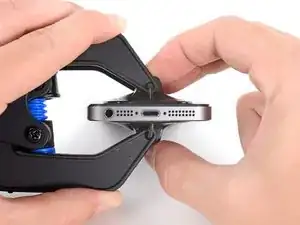
Posicione as ventosas próximo à borda inferior do iPhone, diretamente acima do botão home - uma pela dianteira e a outra pela traseira.
-
Aperte as ventosas uma contra a outra para aplicar sucção na área desejada.
-
-
-
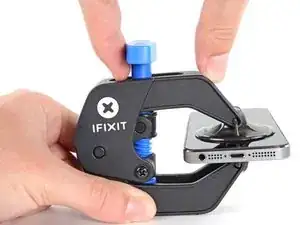
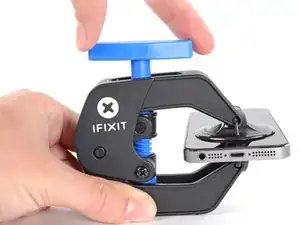
Puxe a pega azul para a frente para travar os braços.
-
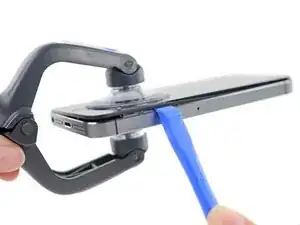
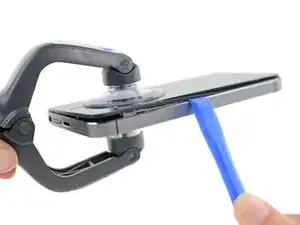
Gire a pega 360 graus no sentido horário até que as ventosas comecem a se esticar.
-
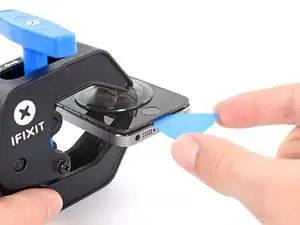
Insira uma palheta de abertura sob a tela quando o Anti-Clamp tiver formado um vão grande o suficiente.
-
Pule as próximas duas etapas.
-
-
-
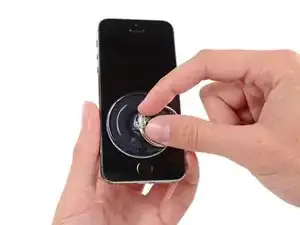
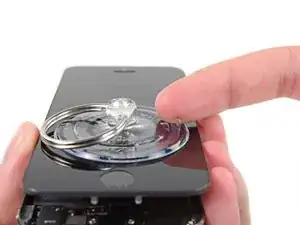
Se você não tiver um Anti-Clamp, use uma ventosa de sucção simples para erguer o painel dianteiro:
-
Pressione uma ventosa de sucção sobre a tela, imediatamente acima do botão home.
-
-
-
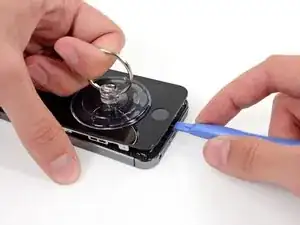
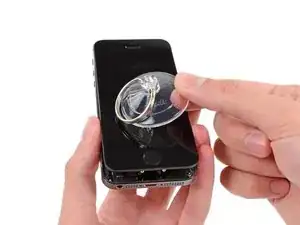
Enquanto segura o iPhone com uma mão, puxe para cima pela ventosa de sucção para separar ligeiramente a extremidade com o botão home do painel dianteiro da estrutura traseira.
-
Com uma ferramenta de abertura de plástico, comece a fazer alavanca para baixo nas bordas da estrutura traseira, afastando-as do conjunto do painel dianteiro, enquanto puxa para cima com a ventosa de sucção.
-
-
-
Puxe na lingueta de plástico para liberar o vácuo da ventosa de sucção.
-
Remova a ventosa de sucção da tela.
-
-
-
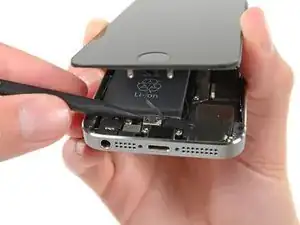
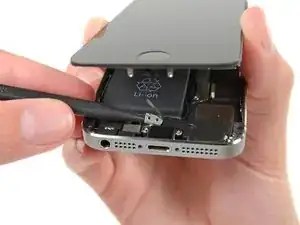
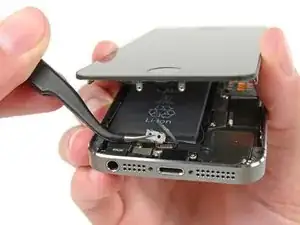
Abra o fone apenas o bastante para revelar o suporte metálico que cobre o cabo do botão home.
-
Somente o conjunto do botão home original poderá permitir o uso da funcionalidade da identificação por toque. Se você romper o cabo, a instalação de um novo botão home apenas restaurará as funções normais do botão home, mas não os recursos de identificação por toque.
-
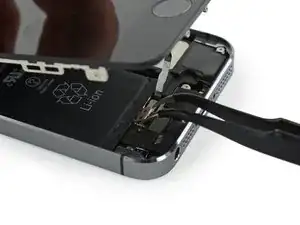
Com a ponta pontiaguda de uma espátula, empurre o suporte, liberando-o e remova-o com uma pinça.
-
-
-
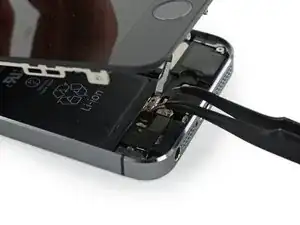
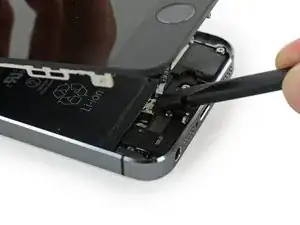
Use a ponta pontiaguda de uma espátula para fazer alavanca e separar o conector do cabo do botão home de seu soquete.
-
-
-
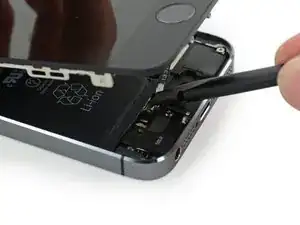
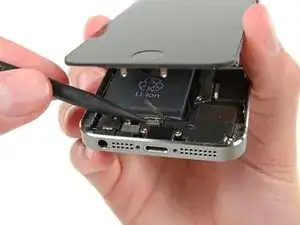
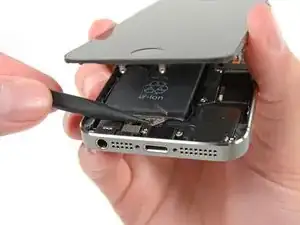
Uma vez solto o conector, puxe a ponta com o botão home do conjunto, afastando-o da estrutura traseira, usando a parte superior do fone como uma dobradiça.
-
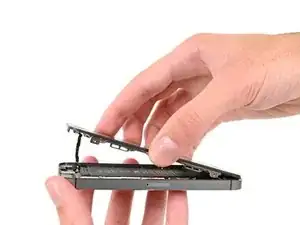
Abra o visor a um ângulo de 90º e apoie-o em algo para deixá-lo de pé enquanto você executa os trabalhos no fone.
-
Engate uma fita de borracha para manter o visor no lugar com segurança enquanto executa os trabalhos. Isso evita que os cabos do visor sejam submetidos a uma tensão imprópria.
-
-
-
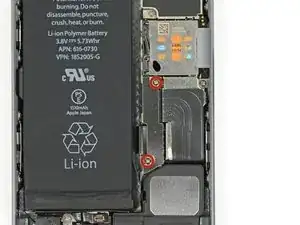
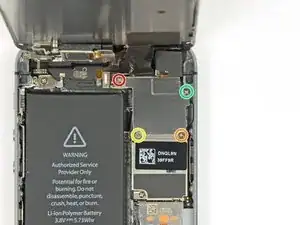
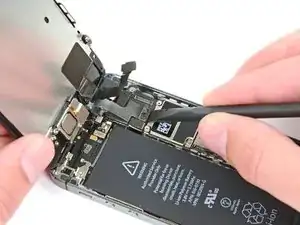
Remova os dois parafusos PH000 de 1,6 mm que fixam o suporte metálico do conector da bateria à placa lógica.
-
-
-
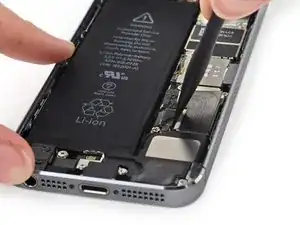
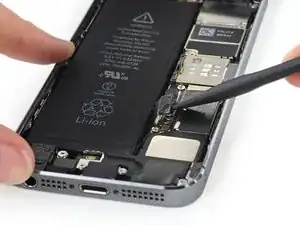
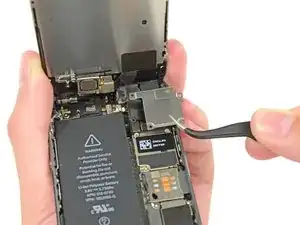
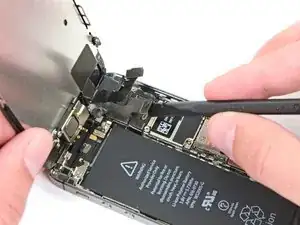
Com a ponta plana de uma espátula, erga com cuidado o conector da bateria de seu soquete na placa lógica.
-
-
-
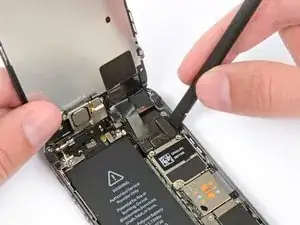
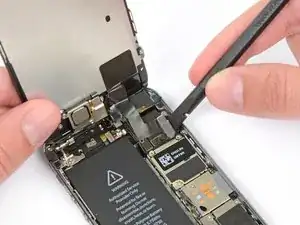
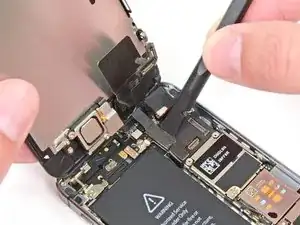
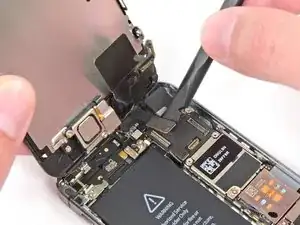
Remova os seguintes parafusos que fixam o suporte de cabos do conjunto do painel dianteiro na placa lógica.
-
um parafuso Phillips PH000 de 1,7 mm
-
um parafuso Phillips PH000 de 1,2 mm
-
um parafuso Phillips PH000 de 1,3 mm
-
mais um parafuso Phillips PH000 de 1,7 mm
-


Para a remontagem de seu dispositivo, siga essas instruções na ordem inversa.

3 comentários
Ich fand es einfach und sehr gut ausgezeichnet erklärt
I used a white terrycloth hand towel as my work surface and to position and retain all the screws and part in their relative positions, so I didn't mix things up. I also magnetized the screwdriver tips and that made it very easy to deal with these tiny, tiny screws.
Magnus Dalen -
For a secure working, put a small pot with lid on your workplace. When the battery starts burning, throw it in the pot, close it with the lid and get the pot safely out of the building, e.g. on the balcony or throw it out of the window. Do not try to extinct the battery with water, just let it burn out outside. This might take some hours.
Raymond Willems -
This is a really helpful one! My battery caught fire but luckily it was only one cell and not the entire battery. So it was done after a few seconds and I could go on with the replacement.
Matthias Blab -
Directions should say “use the P2 screwdriver head.”
William Kolb -
This step should have included that information. It was very helpful and important. Thank you very much.
Jeffery -
ifixit supplied a set of replacement philips screws (marked “Liberate!”). Thanks but I’m sticking with the pentalobe since they fit more securely than philips which have a chance of stripping if not held with the right amount of pressure.
Don Libes -
What are you supposed to do if the screws are stripped or won’t come out. No luck with the tweezers either.
ibrokeit -
Yep i‘ve had the same problem. One screw out, one that won‘t budge!!!
Stennett -
“cheater” reading glasses are a big help. Carolyn
Carolyn Green -
In this step, it is the P02 screwdriver from the kit (see that the nib has five sides , exactly for ‘pentalobe’ screws). All the other steps involving screws it was the Philips 000 (there was a third screwdriver Y 000 in the kit which I did not use). Did not have any problems at all removing and readding screws back through the process.
Andre Silva -
I'm trying to fix my 5s’s but one has some water damage, and impeccable screen but won't turn on,then I have another one that has no water damage, screens a bit busted but won't turn because of the screen. If I use the good screen from the water damaged phone would it work?
samuel.m.fudge -
After removing the phone from a very good plastic case and before I started the repair I cleaned the entire phone with a soft cloth misted with rubbing alcohol. That removes all the grunge which builds up in the seams of the phone and the small spaces inside the case. Having a clean phone to work on makes the job a lot easier and prevents grunge from falling into the phone.
David Park -
General comment about the screwdriver tips and reassembly: If you get a screw nicely set in place using tweezers and then use the screwdriver, the magnet will probably pull the screw out before you can tighten it. If this is a problem use just the tip (without the handle) to start the screw, then tighten using the handle.
Kevin Patfield -
DO NOT disconnect the screen.
Benjamin Piscopo -
Having two SE’s needing batteries, I ordered an extra battery. The extra battery did not come with the Phillips replacement screws. It would be helpful if every battery came with a set of case replacement screws.
Dorothy Campbell -
Upon reassembly I found it useful to squeeze the phone right above the screws so everything lines up nice. I noticed that when I didn’t do this the new Phillips screws were trying to go in crooked. So just holding the phone together helps.
Samara Sullivan -
hello i am replacing my iphone 5s battery but i am stucked because the adhesive broke whiles pulling it out
before i started i made sure my battery was 0% but i am afraid that when i mistakenly puncture it with the spudger it might catch fire
please is the battery capable of catching fire when it has no power (0%)?
please can someone give me the honest answers before i continue
thank you
George Rockson -
The screws in my iPhoneSE were not P2 (1,2mm) but P1 (0,8mm). I had to order an extra screwdriver which is not available at iFixit.
Tadeus Nawka -
Instructions were fine until removing the battery , No adhesive strip at the bottom of the battery . Unable to remove battery as the battery was stuck sold with adhesive but could not get at the adhesive strip to remove battery . seems whoever put the battery together did not put a strip across the bottom . Had the phone from new and this was the first time I tried to replace the battery . Now I need a new phone
J Caley -
Instructions fine until removing the battery . No strip at bottom of the battery hence impossible to get at the adhesive strips around the battery . This must have been done in the factory as I have had the phone from new and this was the first time the battery was being replaced . Cheesed off as I now need a new phone
J Caley -
30 minutes - to an hour? I gave up after removing the screws and spending an hour trying to lift the display with a suction pad.
harwood -
iPhone 5s maderbored
Rahan Ali -
I had a Pentalobe screw that wouldn't come out, just spinning freely, until I prised the display up a tad and the screw thread found something to work against, and came out fine.
sqeeezy -