Introdução

Guia tipo pré-requisito para remoção da tela.

  1. qvnTkhMj1Khcw1SW

    What’s the point of this? You run the wheel around the outside, and then you lay it down anyway to pull the glass and do the rest. The wedge is not needed.

    ebay -

    I have a story to tell about this teardown. It all went wonderfully well until after I completed the process and attempted to format my new SSD drive only to discovery that the capacity of the drive was 256GB… not the 2TB I was sure I had ordered. iFixit was very supportive and helpful in sending me a new set of sticky tape strips and and RMA to return the SSD and some of the other parts.

    I finally had received my new set of strips and the 2TB SSD…. I figured, piece of cake… I already know how to do this… but I watched the video again and started following the teardown…

    …apparently the new sticky tape strips was way more powerful that the original tape and while using the pizza cutter tool and not advancing much, I proceeded to use one of the iFixit credit card style wedges…. I now have 2 pretty severe cracks on the glass of my display, which as clearly explained by @mayer can only be replaced by an entire display… which runs at about $500. Cosmetically it looks horrible, but it works… for now.

    Erich Hentschel -

  2. KHov5rIJNDb1qRAi
    KHov5rIJNDb1qRAi
    WWstOTxbT6Mg4GMZ
    ea1NVoLORufoKsnn
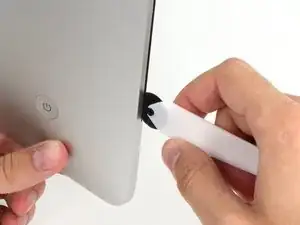
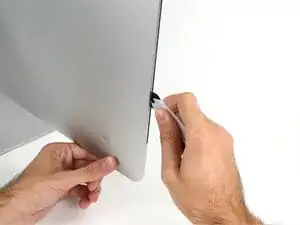
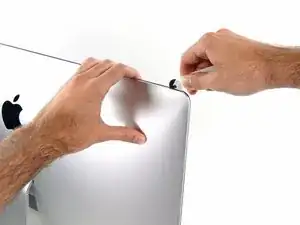
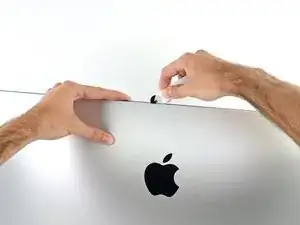
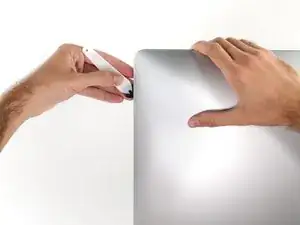
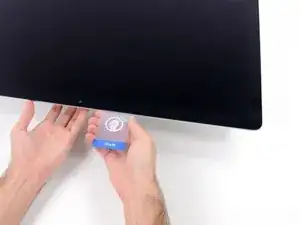
    • Começando pelo lado esquerdo da tela, próximo ao botão de liga/desliga, introduza a ferramenta de abertura para iMac no vão entre o painel de vidro e a estrutura traseira.

    • O eixo da ferramenta de abertura para iMac evita que você introduza muito para dentro a roda. Se estiver usando uma ferramenta diferente, não a introduza mais do que 9,5 mm dentro da tela. Você corre o risco de romper os cabos da antena e causar sérios danos se introduzir demais a ferramenta.

    Should you run a hair dryer along the edges first?

    Al Val -

  3. q3CZ1tidMXlcgoIQ
    q3CZ1tidMXlcgoIQ
    rHnjd1yBayLNqTtN
    KTtVR5DtVkPVYd4Y
    • Use a ferramenta como um cortador de pizza - empurre-a por toda a extensão do vão e ela cortará o ponto central do adesivo de espuma.

    • Lembre-se de empurrar constantemente o punho atrás da roda cortante. Se você puxar, a roda pode escapar do punho.

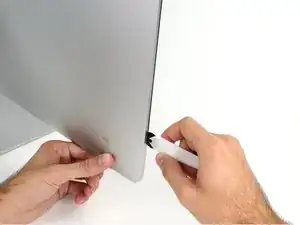
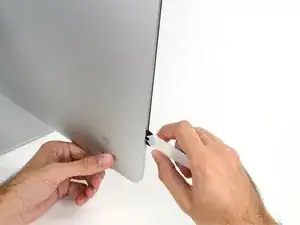
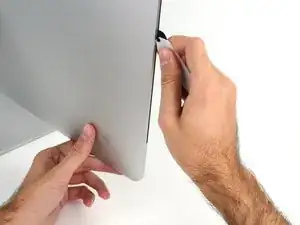
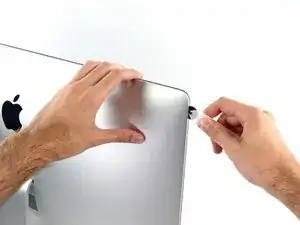
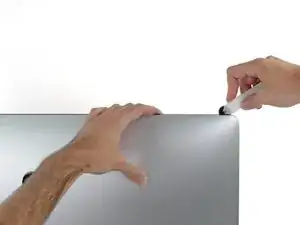
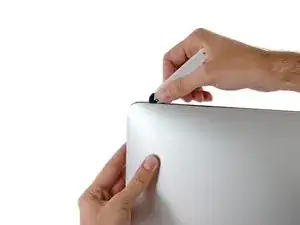
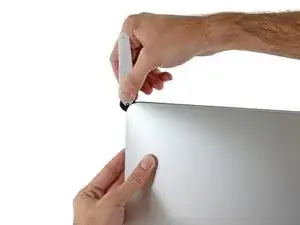
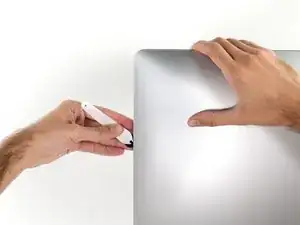
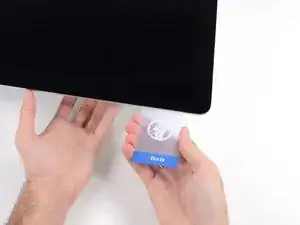
    • Passe a ferramenta por toda a extensão da lateral esquerda da tela.

  4. DL3Vsl22hJBiEQUC
    DL3Vsl22hJBiEQUC
    I1sSvQIKZKIxUJQP
    ZqrgUXS1FMYYPMSS
    • Continue rolando a ferramenta para cima, virando no canto esquerdo superior.

  5. uIQeQKO2wRSFOchP
    uIQeQKO2wRSFOchP
    gvmN6noZV1RF3Jja
    • Corte o adesivo da parte esquerda superior da tela.

  6. ZbtM1gnKNMLvApGO
    ZbtM1gnKNMLvApGO
    xGLHuViOG6iiZRHR
    • Continue na parte superior da tela.

    • Você precisa passar a ferramenta algumas vezes para trás e para a frente onde já cortou adesivo, para garantir que tenha soltado o máximo possível de adesivo.

  7. PsXMW5CoXDyhXHAM
    PsXMW5CoXDyhXHAM
    JAULK1Cx3kdL1sMN
    vXTTvMMJZXJmbkPC
    • Passe a ferramenta pelo canto superior direito da tela.

  8. HdQnP2Gt2blNM1Na
    HdQnP2Gt2blNM1Na
    HtXaMYaxdshMTDgI
    • Role a ferramenta para baixo, por toda a extensão da lateral direita da tela.

  9. kSSS26DZATfnLk3Q
    kSSS26DZATfnLk3Q
    SyVUroLGO1X5mAkC
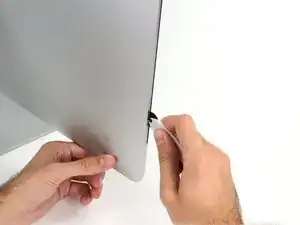
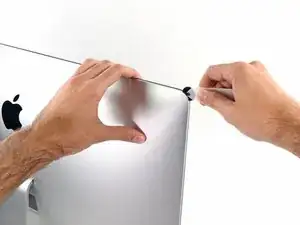
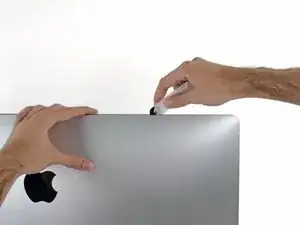
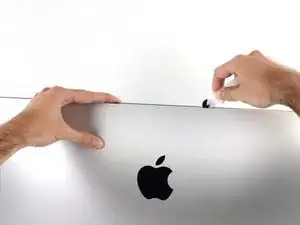
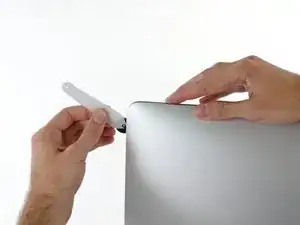
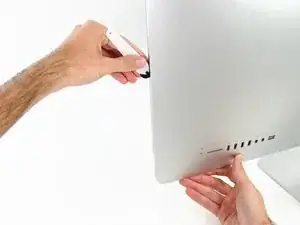
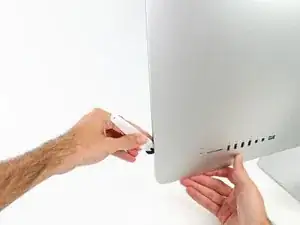
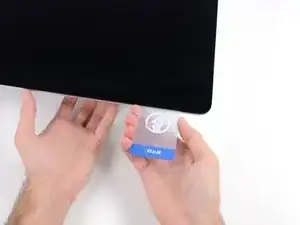
    • Finalize empurrando a ferramenta de abertura para a parte inferior na lateral direita da tela.

    • A esta altura, você pode passar a ferramenta por toda a tela, voltando no sentido inverso, para garantir que tenha cortado o máximo possível de adesivo.

  10. vGGIOBrvwJMnSBdS
    vGGIOBrvwJMnSBdS
    jobdKF3VfjwEEE6o
    kXQQFeUFGZvmMM5y
    • Ainda que a ferramenta de abertura já tenha feito a parte difícil do trabalho, a tela ainda estará levemente colada na estrutura. Será necessário usar um cartão de plástico para soltar o resto desse adesivo.

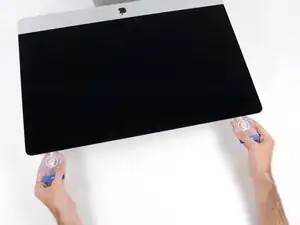
    • Coloque o iMac numa mesa com a tela virada para cima.

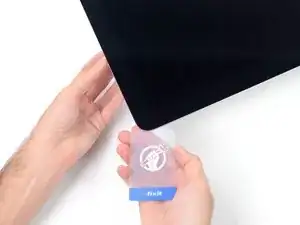
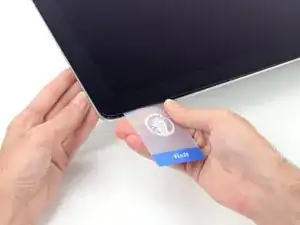
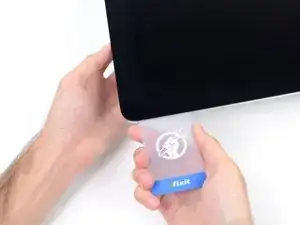
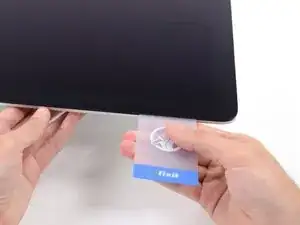
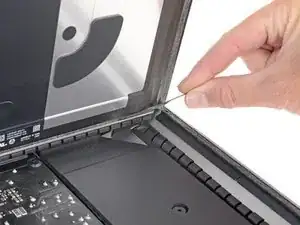
    • Começando pelo canto direito superior do iMac, introduza um cartão de plástico por entre a tela e a moldura.

    • Tenha cuidado para não introduzi-la mais do que 9,5 mm, caso contrário você danificará componentes internos.

  11. ut5JD6JtjXxJqQML
    ut5JD6JtjXxJqQML
    PAssQDYLvD2G5iO3
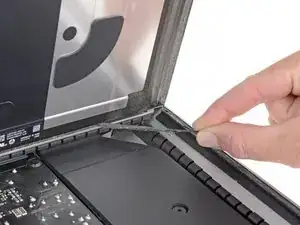
    • Vire o cartão de plástico cuidadosamente para abrir o espaço entre a tela e a moldura, e corte os adesivos resistentes próximos ao canto.

    • Se você usar muita força, irá quebrar o vidro. Trabalhe com cuidado e tente formar um vão que não seja maior do que 6 mm.

  12. NNcaKcnyNAISxxiX
    NNcaKcnyNAISxxiX
    j6rG1dfuABOu2dO1
    nJGOGJvmpMQJkiQj
    • Pare de cortar antes da câmera iSight neste passo, caso contrário você pode danificá-la.

    • Passe o cartão na direção do centro da tela para cortar os adesivos resistentes.

  13. YS6FqSpRAiDQG4GQ
    YS6FqSpRAiDQG4GQ
    WqsOKXvG5huAPhKo
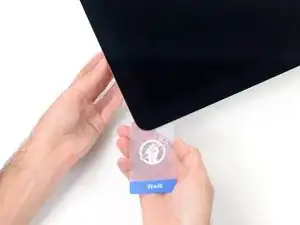
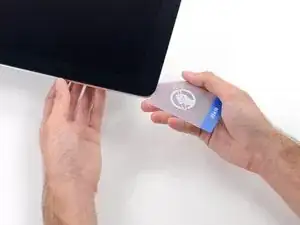
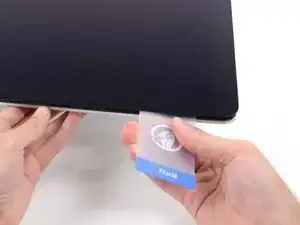
    • Introduza o cartão novamente no canto e deixe-o nessa posição para evitar que o adesivo cole novamente.

  14. 21PJZCMtdxPdvyWG
    21PJZCMtdxPdvyWG
    21su2lVZdmdMqNFj
    NVhkQUfEdwlSkUcY
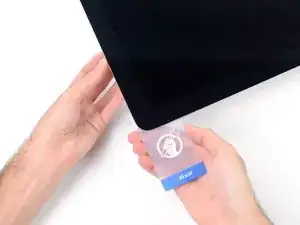
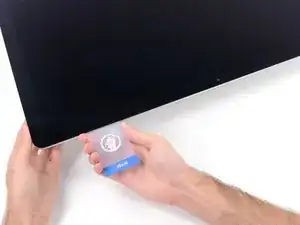
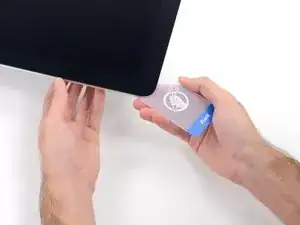
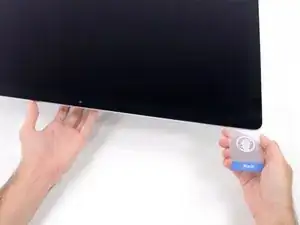
    • Introduza um segundo cartão no vão, por entre a tela e a moldura, no canto esquerdo superior.

  15. e3ydZGUAg4tGPxpq
    e3ydZGUAg4tGPxpq
    4asZcENj1YWTTAaQ
    • Vire gentilmente o cartão, aumentando ligeiramente o espaço entre a tela e a moldura.

    • Como na outra lateral, mova lentamente para permitir que o adesivo se rompa e tenha cuidado para não tensionar demais o vidro da tela.

  16. saNDXDREhnqVr5IH
    saNDXDREhnqVr5IH
    yUMykLfSY4dkyBvj
    35ISowkckhE1MThI
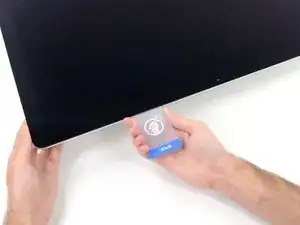
    • Passe o cartão de plástico na direção do centro, parando novamente um pouco antes da câmera iSight.

  17. Y1GSYcC32e6ll2cv
    Y1GSYcC32e6ll2cv
    swIMklGvuLiQZHEA
    • Introduza o cartão de volta no canto esquerdo superior.

  18. CTHcNsvR2JSpycOK
    CTHcNsvR2JSpycOK
    DkPAlq1IRaSXjP41
    2lBkebhXZXHQfJx5
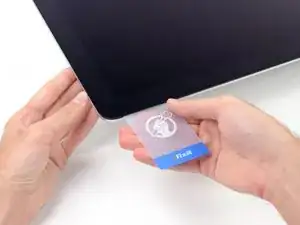
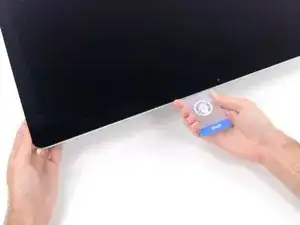
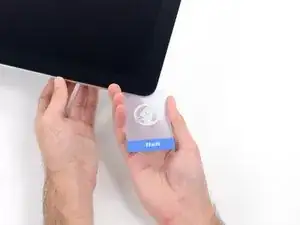
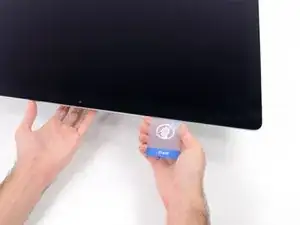
    • Com os cartões introduzidos próximo aos cantos, como mostra a figura, vire cuidadosamente os cartões para aumentar o vão entre a tela e a estrutura.

    • Se em algumas partes o adesivo ainda estiver colando e não puder ser separado, pare de fazer movimentos de vai-e-vem e use um dos cartões para cortar o adesivo nesta área.

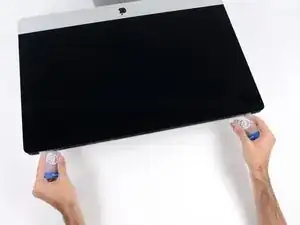
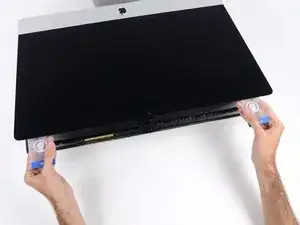
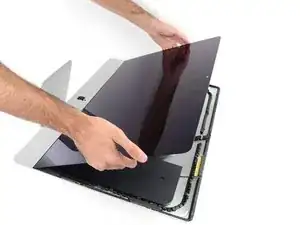
    • Comece a erguer a parte superior da tela para fora da moldura.

    • Erga a tela somente umas poucas polegadas - ela ainda está presa ao iMac pelos cabos de dados e de energia.

  19. Q2TfC5UwSkEOSikR
    Q2TfC5UwSkEOSikR
    MTrFTqNJOBVdqV4H
    • Enquanto segura a tela com uma mão, use a outra para desconectar o cabo de energia da tela.

    • Erga a tela o suficiente para facilitar o acesso às conexões, mas não tanto que os cabos fiquem estendidos e as suas conexões sejam danificadas (umas 8'').

    Der Stecker muss seitlich wie die meisten anderen Stecker in diesem Modell komprimiert werden, um ihn aus der Buchse auf dem Logicboard zu ziehen. Die Zugrichtung ist parallel zum Logicboard in Richtung Oberkante des iMac. Ziehen ohne seitliches Zusammendrücken der Backen am Stecker könnte den Stecker oder die Buchse beschädigen.

    Ernest Bumblebee -

    These instructions are unclear. They imply the cable can just be pulled out but this step had me stuck for a bit. Searching the webs, I discovered that there are little tabs on either side of the connector. I used my prod tool and poked one side and the connector came out a little. I poked the other side the connector came out without a fight.

    Peter Akey -

    The instruction for this step state this but I was still not expecting two cables. Finally figured out there is a Display Power and a separate Display Data cable.

    wsrb -

    As others have mentioned later on, it is not necessary to fully remove the screen or disconnect these cables. I managed with just the screen held wedged open with a small cardboard box.

    Jamie Bamborough -

    If you are replacing the SSD, then yes you do have to disconnect these cables and completely detach the display.

    Ray -

  20. PLwxTC26uh2GhoR5
    PLwxTC26uh2GhoR5
    jrJVRXjytJ522PLN
    r2qVa6WfDjnC3vLQ
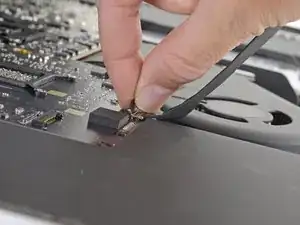
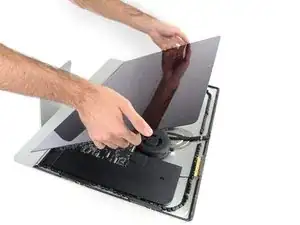
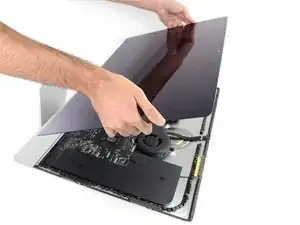
    • Vire para cima o suporte metálico com trava do cabo de dados da tela.

    • Desconecte o cabo de dados da tela.

    • Esta conexão é sensível e pode se romper facilmente. Certifique-se de puxar em linha reta o conector do cabo de dados da tela para fora do soquete, em direção à parte superior do iMac.

  21. OukCaMppueWJwd5o
    OukCaMppueWJwd5o
    EuGUiTLe2sAHCQxO
    • Erga a tela até ela quase alcançar uma posição vertical.

    • A esta altura, ainda há uma tira de adesivo na extensão da parte inferior da tela, que segurará a tela à moldura, fazendo as vezes de uma dobradiça. Você pode soltar este adesivo erguendo e baixando a tela por algumas vezes.

    After rocking the display back and forth a bit, I found it helpful to use my iMac opening tool to gently slide ever so slightly underneath the bottom of the glass to cut the adhesive. This was with the display lowered back into it its normal position. I just worked about 1 millimetre deep at a time and eventually cut through the ~8” adhesive strip at the bottom centre.

    Henry Rose -

    It's possible to skip this step and go to step 24, leaving the display attached. You'll want to open the display just enough to replace the drive, with the machine upright and supported so the display doesn't swivel (I fold up a small pillow and wedge it in there). This way you don't have to worry about damaging the display when removing it, or aligning it when replacing it (which can be difficult to do solo as it's big and heavy).

    Using a T8 with a short handle is helpful here, and make sure it's well magnetized so you don't drop the screws for the hard drive (just leave the other ones in the speakers).

    maccentric -

  22. ObipUvMrOdU6OUwe
    ObipUvMrOdU6OUwe
    dLOfRlONnG5YXXrL
    UjMBTMMcp2AMhUyw
    • Tenha muito cuidado para não tocar nos terminais do condensador ou nas juntas de solda expostas na parte traseira da fonte de alimentação (no quadrado vermelho).

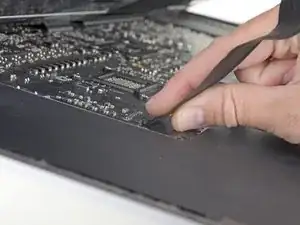
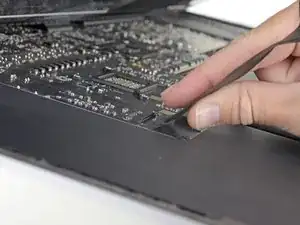
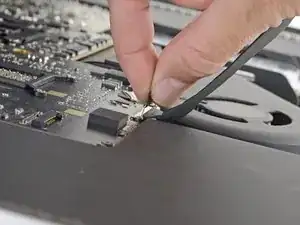
    • Agarre a pequena tira na extremidade de uma das fitas adesivas da tela na borda inferior e puxe o adesivo na direção da parte superior do iMac para removê-lo.

    • Repita esse passo com a outra faixa adesiva e remova-a.

    • Se uma das tiras adesivas se romper antes de ser removida, use um cartão plástico para cortar o adesivo restante.

  23. fTayOtWEDOrUUstD
    fTayOtWEDOrUUstD
    mU65ktCEPdrocgSE
    TAnlppXI4q4GQblK
    • Tenha muito cuidado ao manusear a tela, ela é grande, pesada e feita de vidro. A tela tem bordas frágeis. Evite erguer a tela pelos cantos.

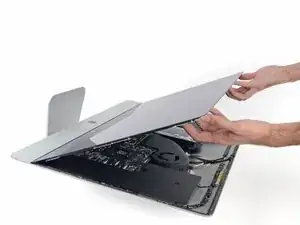
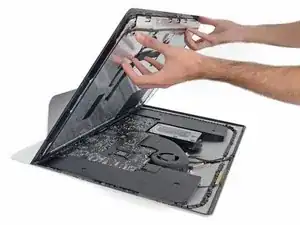
    • Erga a tela da moldura e remova-a do iMac. Deite a tela virada para baixo numa superfície plana e macia.

    • Pode ser que seja necessário erguê-la lentamente de um lado, para soltar o adesivo restante.

    • Depois de cortado o adesivo, ele não pode mais ser usado para vedar a tela. Vá para este guia quando o seu reparo tiver sido completado para repor as tiras de adesivo que seguram a tela no seu invólucro traseiro.

Adam O'Camb

Membro desde: 11/04/15

220314 Reputação

0 comentários