
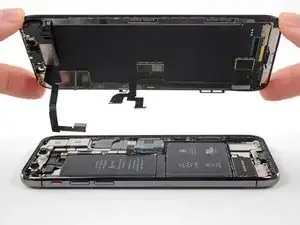
Introdução
Guia tipo pré-requisito exclusivo para a remoção do conjunto da tela.
-
-
Desligue o iPhone antes de iniciar a desmontagem.
-
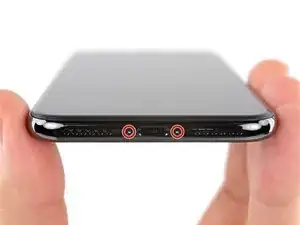
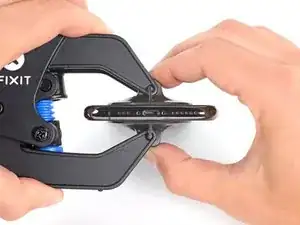
Remova os dois parafusos pentalobe de 6,9 mm na borda inferior do iPhone.
-
-
-
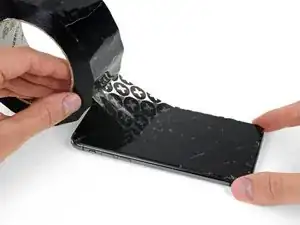
Coloque tiras sobrepostas de fita adesiva transparente sobre a tela do iPhone até que toda a superfície fique coberta.
-
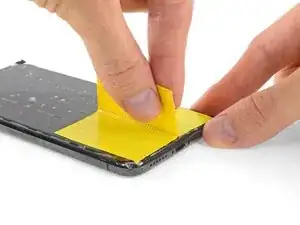
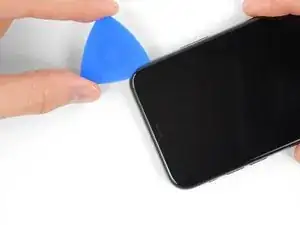
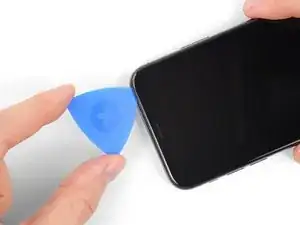
Se não conseguir fazer com que a ventosa grude nas próximas etapas, dobre um pedaço de fita adesiva resistente (como fita adesiva vedante) na forma de uma pega e levante a tela com ela.
-
-
-
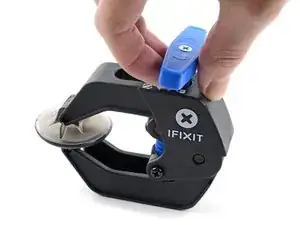
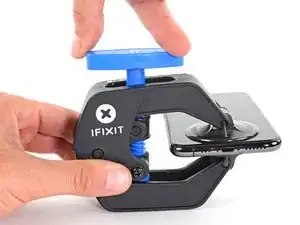
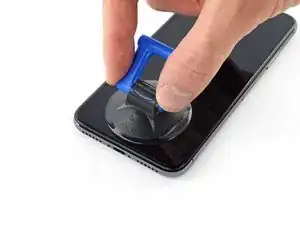
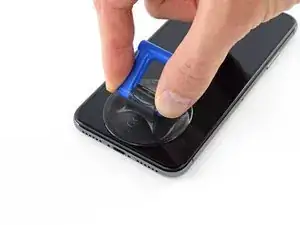
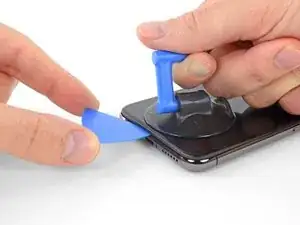
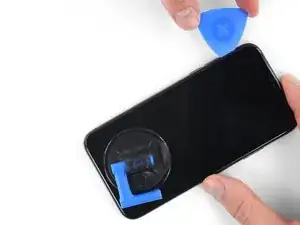
Puxe a pega azul para trás para destravar os braços do Anti-Clamp.
-
Deslize os braços pela borda esquerda ou direita do iPhone.
-
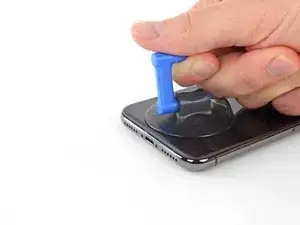
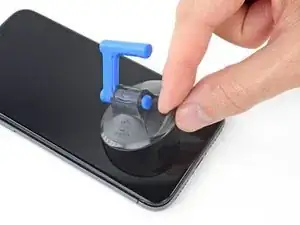
Posicione as ventosas próximo à borda inferior do iPhone - uma pela frente e a outra pela traseira.
-
Aperte as ventosas uma contra a outra para aplicar sucção na área desejada.
-
-
-
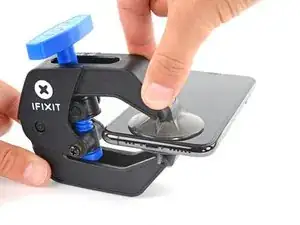
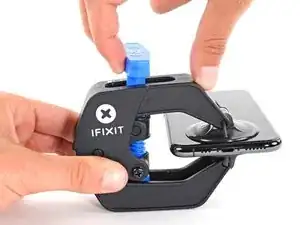
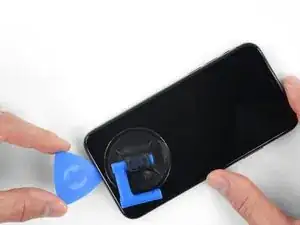
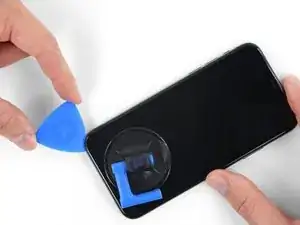
Puxe a pega azul para a frente para travar os braços.
-
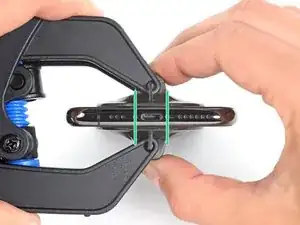
Gire a pega 360 graus no sentido horário ou até que as ventosas comecem a se esticar.
-
Certifique-se de que as ventosas permaneçam alinhadas uma com a outra. Se elas começarem a ficar desalinhadas, solte um pouco as ventosas e realinhe os braços.
-
-
-
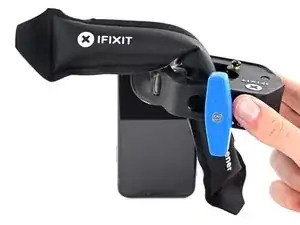
Aqueça uma bolsa térmica iOpener e passe-a pelos braços do Anti-Clamp.
-
Dobre a bolsa térmica iOpener de modo que ela fique sobre a borda inferior do iPhone.
-
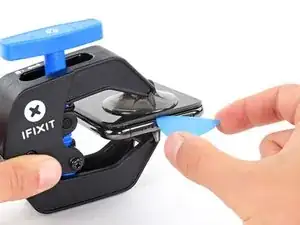
Aguarde um minuto para que o adesivo tenha a chance de se soltar e apresentar uma vão para a abertura.
-
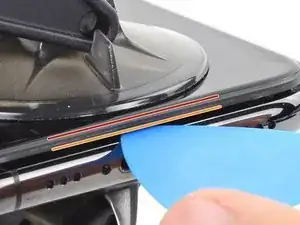
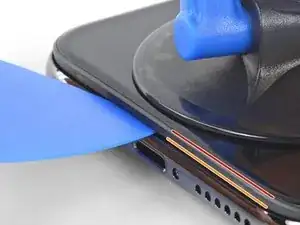
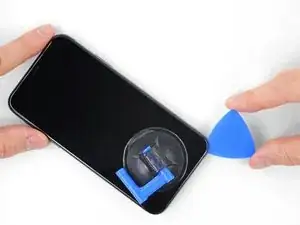
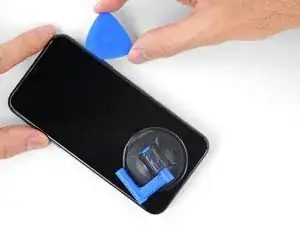
Insira uma palheta de abertura sob a tela e o painel de plástico, mas não abaixo da própria tela.
-
Pule as próximas três etapas.
-
-
-
Use um secador de cabelo, uma pistola de ar quente ou prepare uma bolsa térmica iOpener e aplique-o(a) na borda inferior do iPhone por cerca de um minuto para amolecer o adesivo que se encontra por baixo.
-
-
-
Se estiver usando uma ventosa de sucção única, aplique-a na borda inferior do telefone, evitando a parte curva do vidro.
-
-
-
Puxe a ventosa para cima com pressão firme e constante para criar um pequeno vão entre a tela e a estrutura.
-
Insira uma palheta de abertura no espaço sob a moldura de plástico da tela, mas não debaixo da própria tela.
-
-
-
Deslize a palheta de abertura pelo canto inferior esquerdo e pela borda esquerda do iPhone, cortando o adesivo que mantém a tela no lugar.
-
-
-
Insira novamente a palheta na borda inferior do iPhone e deslize-a para cima no lado direito para continuar separando o adesivo.
-
-
-
Deslize a palheta de abertura pelo canto superior da tela e, ao mesmo tempo, puxe ou movimente a tela com cuidado para baixo na direção do conector Lightning.
-
Deslize a palheta para o canto oposto e corte todo o adesivo restante que esteja prendendo a tela.
-
-
-
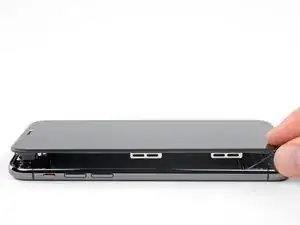
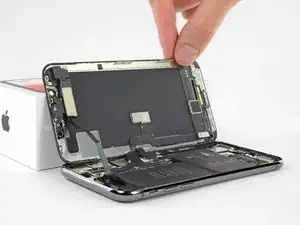
Abra o iPhone virando a tela para cima a partir do lado esquerdo, como se fosse a contracapa de um livro.
-
Encoste a tela em algo para mantê-la apoiada enquanto estiver trabalhando no telefone.
-
-
-
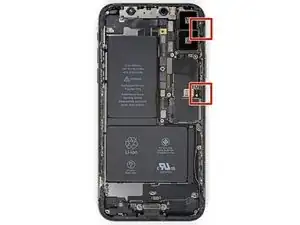
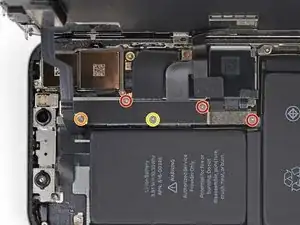
Remova os cinco parafusos Y000 que prendem o suporte do conector da placa lógica, com os seguintes comprimentos:
-
Três parafusos de 1,1 mm
-
Um parafuso de 3,1 mm
-
Um parafuso de 3,7 mm
-
-
-
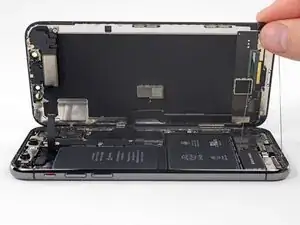
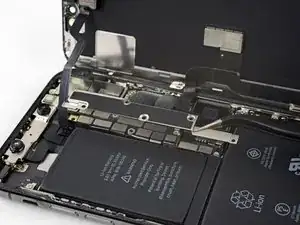
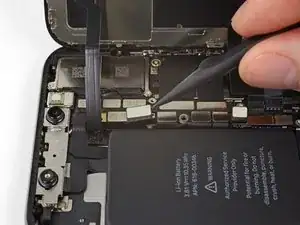
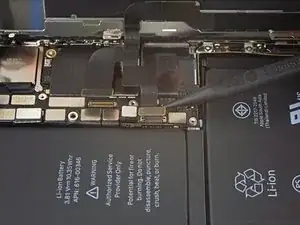
Com a ponta pontiaguda de uma espátula ou uma unha limpa, erga o conector da bateria de seu soquete na placa lógica.
-
Vire o conector ligeiramente para fora da placa lógica para evitar que ele entre acidentalmente em contato com o soquete e alimente o telefone com energia elétrica durante o reparo.
-
-
-
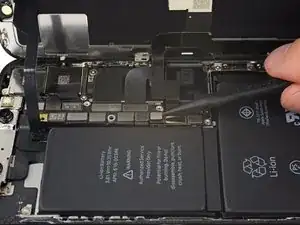
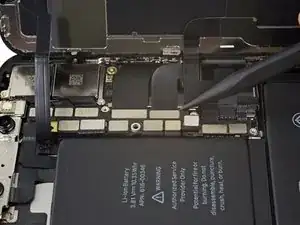
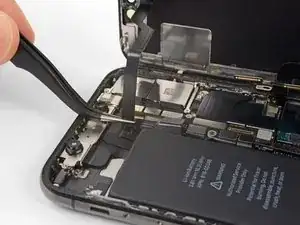
Com a ponta pontiaguda de uma espátula ou a unha, desconecte o conector do conjunto de sensores do painel frontal.
-
-
-
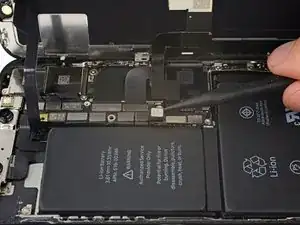
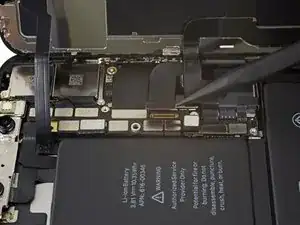
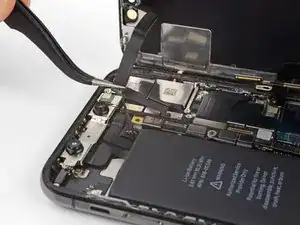
Com a ponta pontiaguda de uma espátula ou a unha, desconecte o conector do cabo do painel OLED.
-
-
-
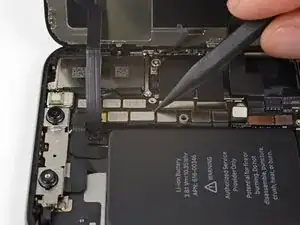
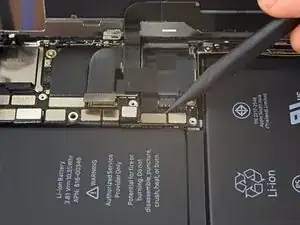
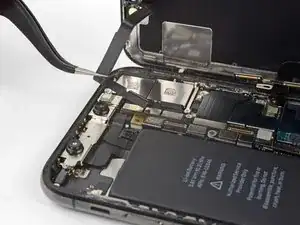
Com a ponta pontiaguda de uma espátula, retire o conector do cabo do digitalizador de seu soquete.
-


Para a remontagem de seu dispositivo, siga essas instruções na ordem inversa.

Um comentário
Meh, i had to Replace the sensors and camera unit thingy too, but i managed it without advice, the iPhone X is nicer to repair as any other iPhone.
Thanks for the detailed step by step description. :)
(the iphone 8 teardown for example lacks extremely much Details)
There are 6.81mm long screws!
Daniel -
One of the pentalobe screws is stripped :( - suggestions for how to get it out?
cgtyoder -
same situation here
kaunomarcius -
Same issue for me too, how do I get the stripped screw out?
patronics -
Update: I was able to get the “stripped” screw out using another Pentalobe-2 screwdriver bit from another company. It seems it wasn’t the screw, but the screw driver that was actually stripped. Hence why the other screwdriver kit I got came with 3 of this bit, I suppose.
patronics -
I ended up going to a jewelry store, and they drilled down into the screw, with of course an incredibly tiny bit. That allowed me to insert the P2 driver, and I was able to unscrew it at that point. Good luck!
cgtyoder -
Same issue with the stripping. The tip of the iFixit P2 head in my $70 kit just ground off on the first screw and that was that. Not much you can do.
Kyle Harris -
yes correct the same happened to me, the screws were perfect shaped never been open and as soon as i used the P2 it stripped the screws, seems like the P2 is slightly smaller but Dremel kit with a very small drill bits and precise knife tool is the way to go.
Dulce Vidal -
This step in automatically followed through, without any thought. Why remove these screws? Can anybody explain? The Screen is detachable all the same, with them well screwed in…
Uri -
These screws attach to a plate that’s part of the screen half of the phone. If you succeed in detaching the screen without removing those, it would seem reasonable that you will have damaged that plate or its ability to keep the two halves together.
Dan Long -
@Dan Long is right
Uri -
Clean out the pentalobe screw heads first so the tool goes all the way in. A small sewing needle works well to loosen any build up and then press some putty/chewing gum into the screw head and pull away quickly for a final clean out.
William Olstad -
The this kit should include screws because you’re going to strip them. Can’t even get past step one. Did anybody figure this out
justin -
Never opened my phone ever, when I went to look at the first step.. I noticed one of my screws was stripped. I thought it was impossible, but I removed the non stripped one, then once I got to the stripped one.. I learned my assumptions were correct. I bought this one straight from the apple site years ago ahaha Any tips to remove the stripped screw?
Clarence Williams -
William Olstad's tip about cleaning the screws with a needle and a bit of poster putty worked well for me. There was a lot of crud in there! The opening is shallow, so it's easy to see how the screwdriver wouldn't catch with even a bit of grit in the way, No problem getting the pentalobe screws out with the ifixit screwdriver.
punkinann -
If all else fails, very carefully cut a slot across the head of the screw with a Dremel tool using a diamond bit that dentist will gladly give you - I ask my dentist for used bits; and chuck them in a drill bit chuck designed for Dremel. The slot allows you to use a tiny, straight blade screwdriver. You can reuse the screw or replace it with a new pentalobe screw.
Dan Smith -