
Introdução
Ferramentas
-
-
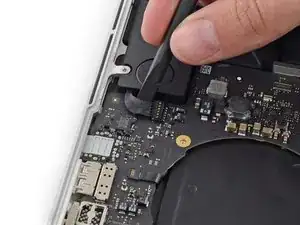
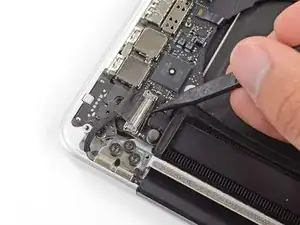
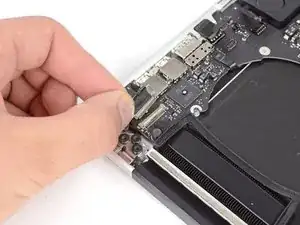
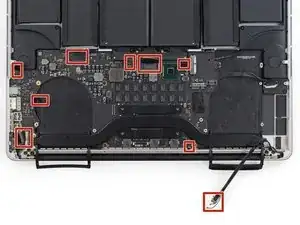
Com a ponta plana de uma espátula, erga o conector do alto-falante esquerdo e retire-o do soquete na placa lógica.
-
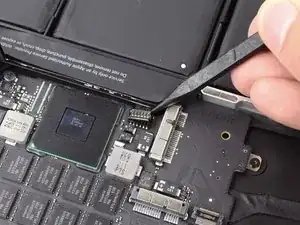
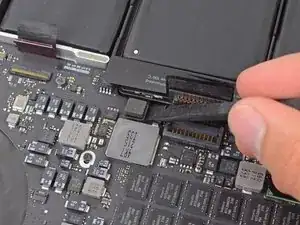
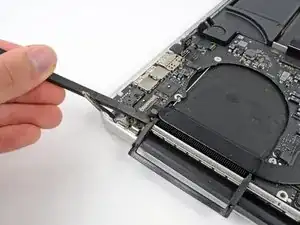
Use a ponta pontiaguda de uma espátula para erguer o conector do alto-falante direito e retirá-lo do soquete na placa lógica
-
-
-
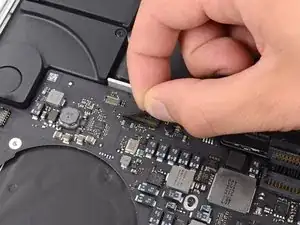
Descole a fita que cobre a parte superior do conector do cabo plano do teclado.
-
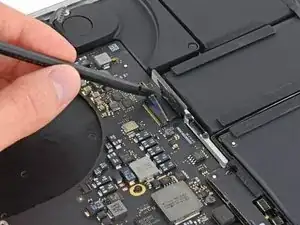
Com a ponta plana de uma espátula, levante a aba de retenção do soquete ZIF do cabo plano do teclado.
-
Com a ponta plana de uma espátula, empurre o cabo plano do teclado, afastando-o do soquete.
-
-
-
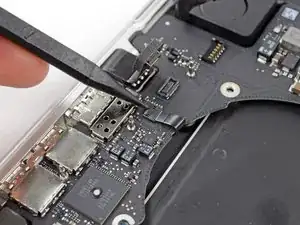
Com a ponta plana de uma espátula, erga o conector da retroiluminação do teclado de seu soquete na placa lógica.
-
-
-
Com a ponta pontiaguda de uma espátula ou a unha, levante a aba de retenção do soquete ZIF do cabo plano do microfone.
-
Puxe o cabo plano do microfone para fora do soquete.
-
-
-
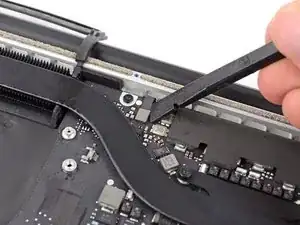
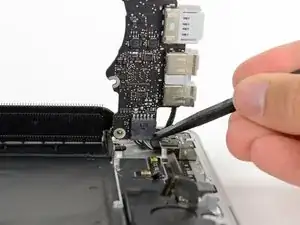
Com a ponta pontiaguda de uma espátula, levante a trava do cabo de dados do monitor e gire-a em direção ao lado da entrada CC do computador.
-
Puxe o cabo de dados do monitor em linha reta para fora de seu soquete na placa lógica.
-
-
-
Com a ponta plana de uma espátula, retire com cuidado a capa de borracha do parafuso de cabeça oval próxima ao conector MagSafe 2.
-
-
-
Remova os seis parafusos a seguir que prendem a placa lógica à estrutura superior:
-
Um parafuso Torx T5 de 3,1 mm
-
Um parafuso Torx T5 de 2,5 mm
-
Um parafuso Torx T5 prateado de cabeça oval de 5,5 mm
-
Dois parafusos Torx T5 de 5,7 mm
-
Um parafuso Torx T5 prateado de 3,8 mm
-
-
-
Levantando pelo lado mais próximo da bateria, gire a placa lógica em direção à parte superior do MacBook Pro.
-
Com a ponta plana de uma espátula, empurre cuidadosamente o conector MagSafe 2 para fora de seu soquete na parte inferior da placa lógica.
-
-
-
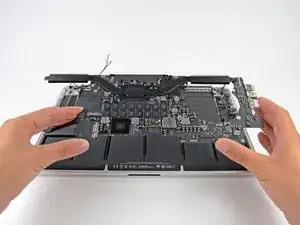
Remova o conjunto da placa lógica do MacBook Pro.
-
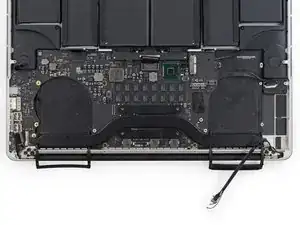
Segunda foto, em sentido horário, de cima para baixo: bateria, alto-falante direito, retroiluminação do teclado, AirPort/câmera, tela, microfone, alto-falante esquerdo, teclado e trackpad.
-


Para a remontagem de seu dispositivo, siga essas instruções na ordem inversa.

At this point, it should be noted that the author is using two different logic boards through the procedure. Here, for the first time is the difference between a 2.3 GHz board and the 2.6 GHz board. The audio out socket is integral to the 2.3 GHz board. The 2.6 GHz board has a discrete audio out jack that plugs into the logic board. As the disassembly proceeds, the 2.6 board’s audio outlet is unplugged (Step 26/27 pictures note this, but the author doesn’t. So, as I hoped, the 2.3 GHz board can be replaced by a 2.6 GHz board, IF you don’t want an audio out jack!
David White -
Correction. The two boards are NOT compatible. The battery connector and others do not align. A faulty 2.3 GHz logic board is no excuse to get a faster board.
David White -
Note that you should SLIDE not pull these out. Just broke one of them.
andershegelund -
On this model they should be pried straight up from the board as instructed. If your connector looks different from what’s shown in the photos, proceed with caution, verify your model number and make sure you’re following the corresponding guide.
Jeff Suovanen -
I totally missed the pry STRAIGHT UP instruction. I tried to slide one out and it sheared from the board, taking one copper trace with it. Poop!
Peter Kaczkowski -
On MID-2014 Retina, they definitely lift up and out.
MFMauceri -
On LATE-2013 Retina, they definitely lift up and out
KRIS -
This really was helpfully! Thanks!
Jan Dreyer -
VERY HELPFUL. Thank you.
Rafael Pérez -
Yes. This is tricky. Be VERY CAREFUL. I damaged it. I’m afraid this MacBook is RIP.
Richard Cacciato -
This was tricky. I pried up from where the cable enters the connector with a very small flat headed screwdriver - no spudgers to hand!
aaron.sarginson -
I can confirm. you LIFT UP on Mid-2014.
Costantino -
Yes, LIFT UP with 2,3GHz Late 2013
diplomat3000 -
As others have said, this was pretty nerve-wracking to release. I used the pointed end of a spudger and gently pried up on the plastic corner where the wires go into the connector. Not the wires themselves, but the plastic. I wasn’t sure it would work without breaking the connector until it precariously gave way from the board.
justinlyon -
Mid-2015 they lift up
Aaron -
What's the best way to reinsert the cable into the socket when re-installing?
footeking -