
Introdução
Use este guia para substituir a bateria de seu smartphone modelo Huawei P8.
-
-
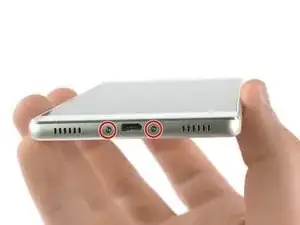
Remova os dois parafusos Torx T2 localizados na parte inferior, ao lado da porta Micro USB do dispositivo.
-
-
-
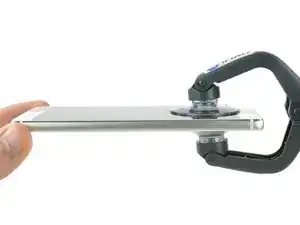
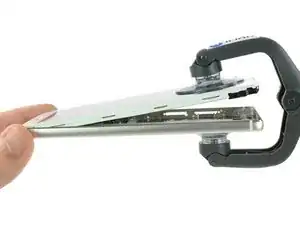
Utilize um iSclack ou um punho de sucção para separar a unidade de display e o painel traseiro.
-
-
-
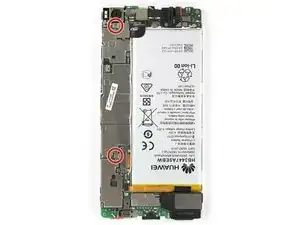
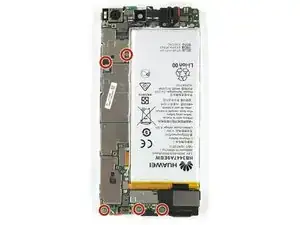
Remova os dois parafusos Phillips tamanho 00 que fixam os suportes do cabo conector da câmera frontal e do display/bateria
-
-
-
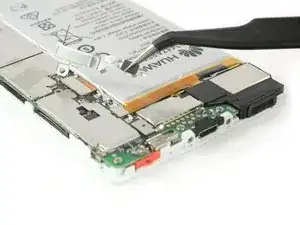
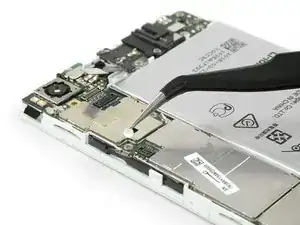
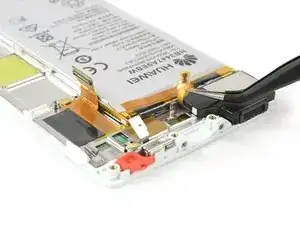
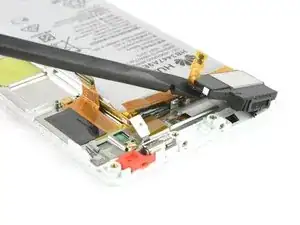
Use uma pinça para remover o suporte que cobre o cabo conector flex do display e da bateria.
-
Desplugue o cabo conector flex da bateria com uma espátula.
-
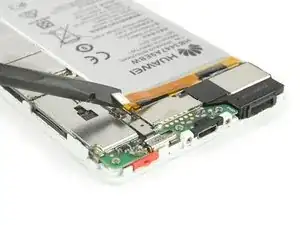
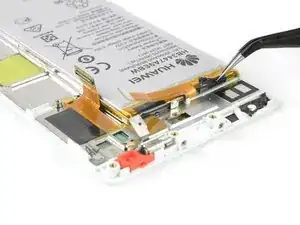
Remova o suporte que cobre o cabo conector flex da câmera frontal.
-
-
-
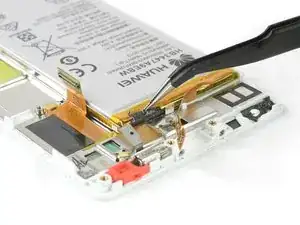
Desplugue os cabos conectores flex do conector do fone de ouvido e da câmera frontal.
-
Remova a câmera frontal.
-
-
-
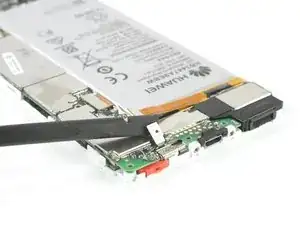
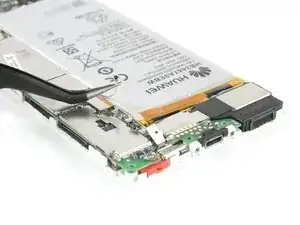
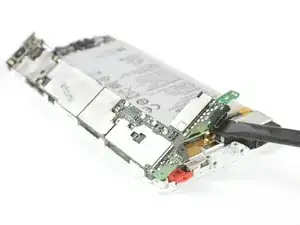
Use uma espátula para desconectar o cabo power/volume e afaste-o, virando-o de forma que ele não fique no caminho.
-
Remova o indicador de contato com água.
-
-
-
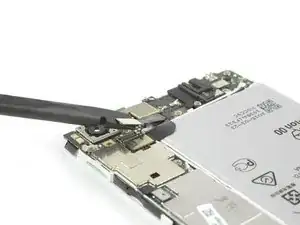
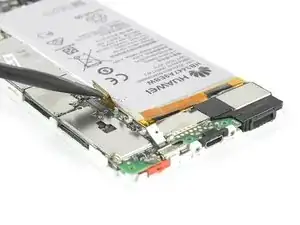
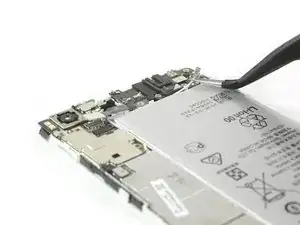
Desplugue o cabo conector flex do display da placa-mãe com uma espátula.
-
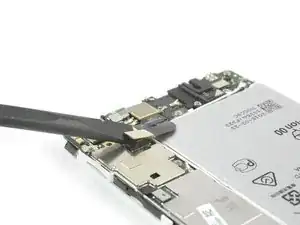
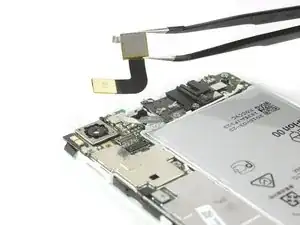
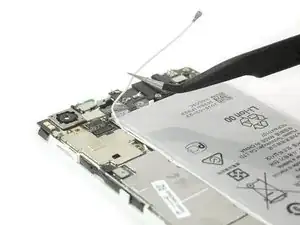
Desconecte e remova o cabo da antena com uma pinça.
-
-
-
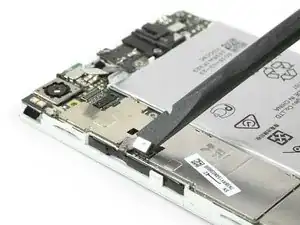
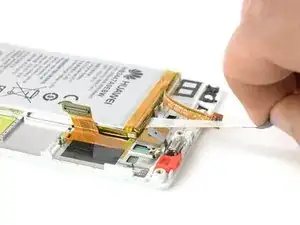
Libere a extremidade da primeira aba de puxar do adesivo, de forma a obter uma boa aderência para puxá-la.
-
Para liberar a bateria, puxe a aba do adesivo com um movimento constante e lento.
-
-
-
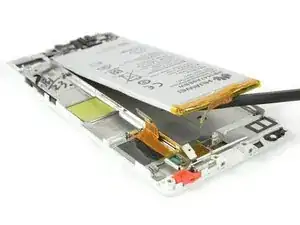
Libere a ponta da segunda aba do adesivo.
-
Puxe a aba do adesivo, com um movimento constante e lento.
-


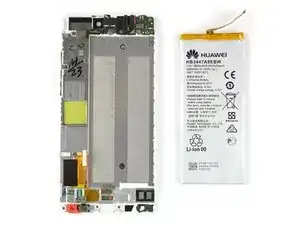
Para montar novamente seu dispositivo, siga as instruções na ordem inversa.

9 comentários
Really helpful guide. Only hiccup was that on my handset the screws holding the casing together (Step 2) were Torx 2 rather than pentalobe, possibly a regional variation. I opted not to remove the loudspeaker (Step 10) as the ribbon cable was firmly stuck down and I worried it would break. This meant I could only cleanly remove the adhesive pad in line with the charging port. I was able to prise out the battery using spudger and screwdriver to scrape the other pad from the phone body. All now reassembled and working properly!
Overall a very helpful guide . I also had torx screws in mine . The torx screws are tiny , so make sure you have the right screwdriver before starting . We didn’t bother removing the loudspeader assembly either (Step 10) . You can just prise up the ribbon cable (carefully) . Add heat if necessary . Now to the biggest problem . Removing the old battery from the phone . What a nightmare ! It’s really stuck down .We took our time using a hairdryer (no heat gun) , and a flat head screwdriver , and went from one end to the other prising it off gently . It still took about 20 minutes . Saying that . Don’t rush it , as it’s the final stage . Also . If you do use a flat head screwdriver then don’t twist it , as you might damage the casing . Just slide it underneath it applying heat . Total time to remove the old battery was 90 minutes , but about 50 of those were spent just getting the first 2 screws out . 20 minutes to put the new battery in and reassemble . Make sure all flex connectors are properly reseated .
Paul -
My P8 battery has completely died on me. I cannot believe that to replace a battery, we have to now go to these lengths to do it. There must be a mountain of mobile phones, where the only issue with them is a flat battery. Surely, this cannot be allowed to continue. I know why the manufacturers want to make it hard to simply replace a battery, because it sells more mobile phones. But think of all that wasted technology, where a phone may have lasted just over a 24 month contract before the battery is done.