Introdução

Se o seu Huawei P8 Lite não segura mais sua carga, você pode usar este guia para substituir a bateria gasta sem remover a placa-mãe inteira.

Antes de desmontar o seu smartphone, descarregue a bateria até abaixo de 25%. A bateria pode pegar fogo e/ou explodir se for acidentalmente furada, mas as chances de isso acontecer são muito menores com ela descarregada.

  1. kOX24a6hdlJsKSan
    kOX24a6hdlJsKSan
    bqZrFYapKqyV4Frt
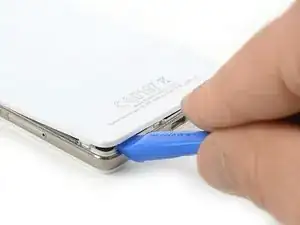
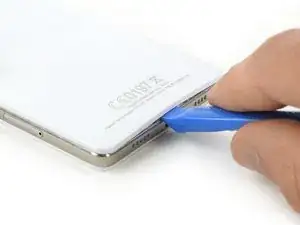
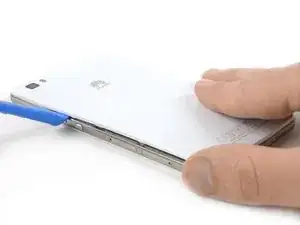
    • Use uma ferramenta de abertura e comece a abrir uma fresta na tampa traseira de seu Huawei P8 Lite pela parte inferior de seu smartphone.

    El celular no tiene ese tipo de tapa es como sellada, que debo hacer para saber si es por la pila que no agarra carga porxa

    maguada1106 -

    Wenn man langsam langsam arbeiten und vorsichtig ist, dann kein problem gibt es.Ich hätte keine Problemen zu öffnen.Das ist sehr leicht.

    Athanasios Georgopoulos -

  2. tajQ2CStittCCurI
    tajQ2CStittCCurI
    jcDXRoDsARYrqPyn
    5UMoZynGE4QjIAQe
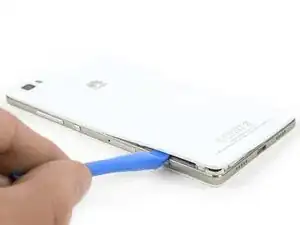
    • Existem clipes em todo o contorno da estrutura intermediária segurando a tampa traseira. Abra todos eles com a ferramenta de abertura.

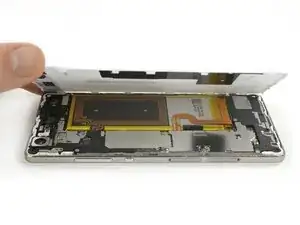
    • Quando todos os clipes estiverem abertos, remova a tampa traseira do resto do smartphone.

    • Se a tampa traseira não se deixar liberar, devem haver provavelmente alguns clipes a mais que precisam ser desconectados.

    The back panel is really really easy to brake, be careful :)

    romaingauthier -

    In my mobile phone the back panel was kept in place also from 2 strips of bi-adhesive tape. Pull gently to detach it to remove the panel.

    beppe modolo -

    right. it has 4 strips of adhesive tape

    Miguel Cretu -

    To facilitate the detachment of these double-sided tapes, I recommend heating with a hairdryer along the edges of the back cover, especially at the four corners.

    Nicola -

  3. 1WfLIMHLvgP2Zvrh
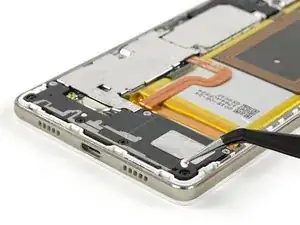
    • Use uma pinça para remover o adesivo de garantia que está sobre um parafuso, na parte inferior direita de seu smartphone.

    The 4 screws wich hold down the lower part of the loudspeaker are Torx screws for me. But it's a French Huawei, doin' nothing like the others :)

    Christopher Hourlier -

    Die Wasserschadenindikatoren sitzen unter dem Mainboard. Bei den Aufklebern auf den TORX handelt es sich um Garantiesiegel.

    Andre Richter -

    Danke für den Hinweis, wurde so übernommen.

    Dominik Schnabelrauch -

    pour dévisser les vis cruciformes, quel taille de tournevis faut il? svp

    blan -

    Bonjour, il vous faut un tournevis ou un embout cruciforme #00 pour dévisser une vis cruciforme #00. Bonne réparation !

    Claire Miesch -

  4. M5TsRwCPTTsV5tAw
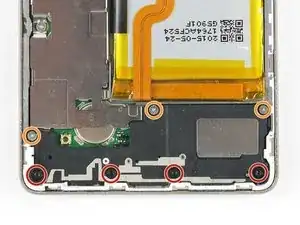
    • Remova os 4 parafusos Torx T5 pretos que seguram a parte inferior do alto-falante.

    • Remova os três parafusos Phillips tipo #00 prateados que seguram a parte de cima do alto-falante.

  5. WZh3tYfAKZpgBvKD
    • Remova cuidadosamente o alto-falante.

  6. 3cHSn4plrstfrlQ2
    3cHSn4plrstfrlQ2
    dYxAvojuhOVbuT5Z
    LlmFNp2CBokeEANW
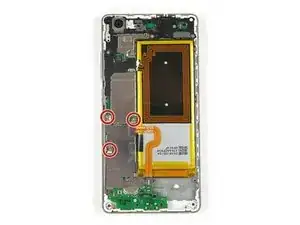
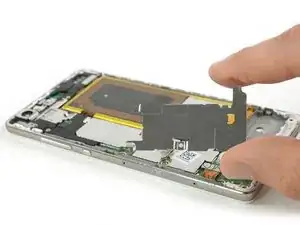
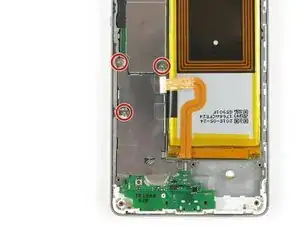
    • Remova os três parafusos Phillips tipo #00 que mantêm a placa metálica em posição.

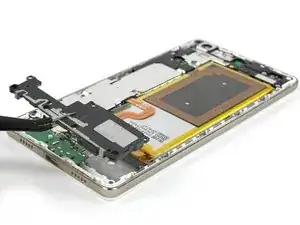
    • Remova a placa metálica com uma pinça.

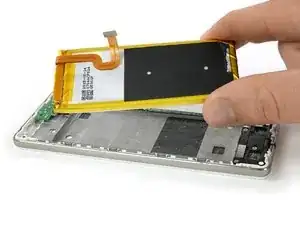
    • Desplugue o conector flex da bateria com uma espátula.

  7. ZaquZLHTi1AYoEQk
    ZaquZLHTi1AYoEQk
    eSvTQSvsgryxQiAB
    • Para proteger sua placa-mãe durante a remoção da bateria, você pode reinstalar a placa protetora, permitindo, assim, fazer alavanca com mais segurança.

    • Retorne e aperte os três parafusos Phillips tipo #00 no protetor da placa-mãe.

  8. RSbZTfOYoxYyle2o
    RSbZTfOYoxYyle2o
    Z5QCgJT2BBukYISi
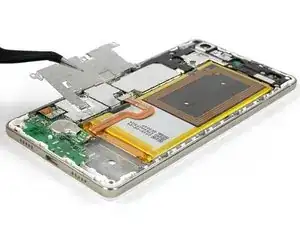
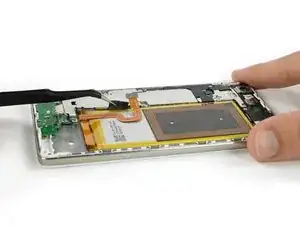
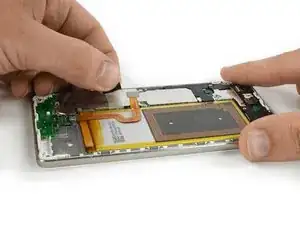
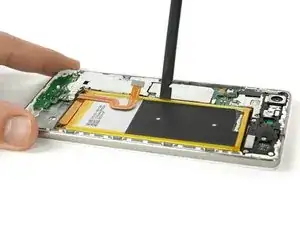
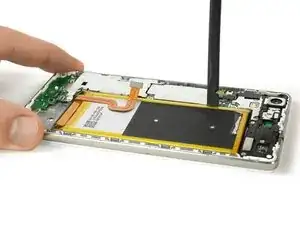
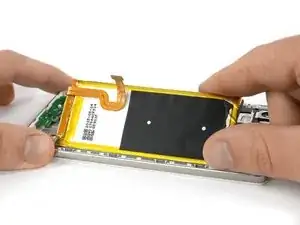
    • Use uma pinça para soltar a tira adesiva e levante-a para facilitar o trabalho.

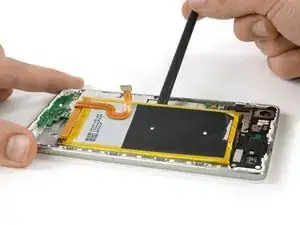
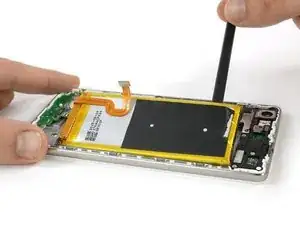
    • Cuidadosamente, puxe a tira adesiva para fora. Não a puxe rudemente, mas em um ângulo plano e com cautela. Ela pode facilmente se romper em dois pedaços.

    • Se o seu smartphone vier com uma antena de NFC, continue com o próximo passo para retirá-la. Pule o próximo passo se ele não tiver uma antena de NFC.

  9. YLBJSVlGcJPAXqSp
    YLBJSVlGcJPAXqSp
    3EIMYAiXwW5mmYgc
    ReTLZQFnHvmwAkCs
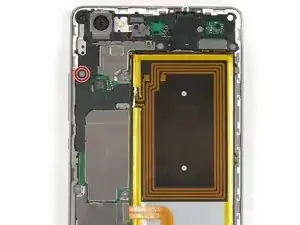
    • Remova o parafuso Phillips tipo #00.

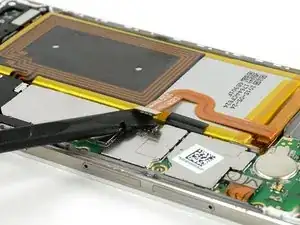
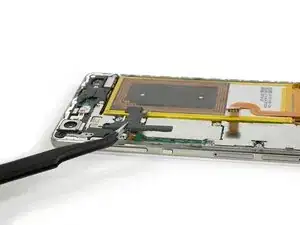
    • Use uma pinça para remover a peça de plástico, que serve de cobertura.

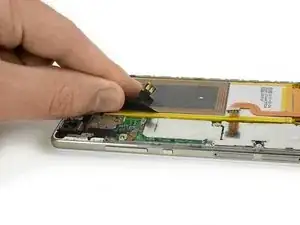
    • Com cuidado, levante a etiqueta NFC e remova-a.

    • Ao montar novamente, certifique-se de instalar a antena de NFC junto à bateria nova e fazer a conexão dela.

    In my case, in order to remove the NFC antenna i had to remove also the second screw on the metal pate. This allowed to lift just a little the plate and move out the NFC connector.

    Roberto -

    Auch bei mir ging es nicht wie in der Anleitung beschrieben, da die Antenne auf beiden Seiten eingefasst ist.

    Julian Riedel -

    In my case, the small black plastic cache, was glued with the nap of the buttons which is just under the cache. I totally screw the connector for the buttons, carefull removing this plastic cache !!

    Pour moi, le cache en plastique était collé avec la nappe des boutons physique qui est dessous, j’ai du coup complètement pété le connecteur de cette nappe… gaffe !

    yop -

    The small black cover of my phone was also attached with a double-sided adhesive. Therefore, be careful not to force and lift gently.

    Nicola -

    We can detach the NFC antenna from the old battery starting from one of its corners, first heating it a little with a hairdryer. Then we can apply it to the new battery.

    Nicola -

  10. HjMYAYhOQP2xFFT1
    HjMYAYhOQP2xFFT1
    MCedlBUiUojokOUU
    hX1eCltPDvD4oXlA
    • Há três tiras adesivas debaixo da bateria, que você vai precisar soltar. Uma debaixo das partes superior, intermediária e inferior da bateria.

    • Tenha muito cuidado para não fazer alavanca na placa-mãe, pois você pode danificar componentes do circuito impresso, causando a perda da funcionalidade.

    • Cuidadosamente, use uma espátula para dar início à remoção de sua bateria.

    Slip a stiff playing card(poker) into one corner of the battery and work your way through the bottom. I didn’t have the tools to remove the adhesive so this really helped. I’d tried brute-forcing my way through with the spudger and screwdrivers but that ended up almost causing an electrical fire

    Jithin Thomas -

    A playing card is a good idea that could work. But please, never ever use a screwdriver on a battery.

    Tobias Isakeit -

    To facilitate battery unstuck (which notice is attached tenaciously!), I advise you to proceed as follows. First of all, I found it easier to operate from the base of the battery (where the flexible cable connector starts) since there was a little more room to work than at other points. From here, patiently begin to perform these two actions alternately: heat inside with a hairdryer and gradually introduce a thin object (the one I used was plastic, longer than the battery and about 2 cm wide), also making movements side. If you have a contact cleaner or alcohol, you can spray some inside. You will see that little by little, with patience, you will come up above and the battery will come off!

    Nicola -

  11. UkOPSRQqBLqUb5Vw
    UkOPSRQqBLqUb5Vw
    y2cKwDEkJGuscUnJ
    WaJTtbsHpNvQ5hCX
    • Desfaça a união por adesivo debaixo da bateria com a espátula.

    • A maneira mais fácil de fazê-lo é com movimentos pequenos com a espátula, usando-a como uma alavanca.

  12. kRHNklcWClB3Q4IN
    • Remova a bateria.

    • Se você usou a placa metálica da placa-mãe para fazer alavanca, você vai precisar removê-la para fazer a conexão de sua bateria nova.

    • Ao montar novamente seu smartphone, reponha o adesivo antigo, substituindo-o por fita adesiva dupla face ou adesivo pré-cortado.

    Bei Schritt 9.2 (Kunststoffkappe vor NFC-Antenne hilft es, die Kreuzschraube links neben dem NFC-Anschluss zu lösen, dann lässt sich die Abdeckung einfacher entfernen. Ansonsten funktioniert die Anleitung sehr gut.

    Groej Htro -

Conclusão

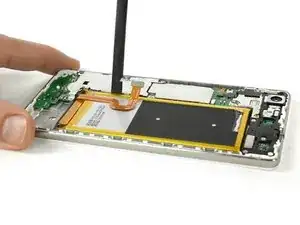
Para montar novamente seu dispositivo, siga essas instruções na ordem inversa e aplique novas faixas adesivas quando necessário.

Dominik Schnabelrauch

Membro desde: 23/11/16

252795 Reputação

11 comentários

Thanks for your sweet effort

Hussien -

Très bon tuto ! Merci beaucoup :-)

ps : j’ai galéré a décollé la batterie

Jérôme Blanchart -

Hat wunderbar funktioniert! Nun läuft mein P8 Lite wieder!

2711chrissi -

One thing to be careful of that I just did, and screwed up my nieces phone.

You see that black square hole in the aluminium chassis under the battery? Yeah be very very careful when sticking your prying tool under the battery. The LCD us right behind it. Try and stay very far away from those holes in the chassis when you do your prying.

Her screen now has Horizontal and vertical lines right across the centre of the screen.

Sigh.

Terrence Wilson -

Super Anleitung, Danke kann ich weiter empfehlen!

del Grosso -

Great tutorial. I applied it on my P8 lite 2017 PRA LX1 and it worked greatly. I adapted some step.

Main differences are:

Step 1&2: it’s very hard because P8 lite 2017 hasn’t clips, but only glue on the edge under the cover. It’s very difficult to insert the lever under the inner part of the cover.

Steps 3 to 5: it’s not necessary to release amplifier because it’s separated from the battery.

Steps 7 to 9: they doesn’t apply

Step 10: to release the battery you must be careful of 2 stripes of contacts under the battery. Scotch tape is all along the right side of the battery and on the left side in the upper left side and in the lower right side.

Battery inclines to bend and to warp while removing it.

THANK YOU VERY MUCH!

Pragmata Insightful Consulting -

salve,ho seguito alla lettera tutta la procedura ma il telefono non si accende più ne con la bat nuova e nemmeno con la sua originale,dove ho sbagliato,grazie x l’attenzione,saluti

andrea68 -

Ciao @andrea68 ,

Ci dispiace che il telefono non funzioni come prima. Magari puoi provare di spegnere e riaccendere il telefono e/o di fare un reset.

Se hai comprato la batteria su iFixit, rivolgiti al nostro dipartimento di supporto: eustore@ifixit.com (in caso di un acquisto sul sito europeo) o support@ifixit.com (in caso di un acquisto sul sito americano). Sarà un piacere aiutarti!

Cordiali saluti,

Claire

Claire Miesch -

Alright, so I just performed the “surgery” on mine. There’s a couple of things I would like to share: a) Be REALLY careful when taking the back cover as the plastic part around the camera breaks unbelievably easy. Just pry very slowly and patiently, don’t rush it. b) When prying the old battery, it’s necessary to pry back AND forth, millimeter by millimeter. It seems the tool doesn’t go the whole way in, thus why it’s needed to (very) slightly deform the battery’s edges. BE CAREFUL HERE. c) When assembling the phone again, during the re-installation of the NFC antenna, the black cover of the PCB where the antenna connector attaches, has two little flaps, it might need a very slight trimming with scissors if it doesn’t get back into the sockets where it latches. DO NOT FORCE IT IN, as this might damage your PCB and it’s better to damage one of the little flaps to damaging the PCB. All of that being said: Thanks so much for the guide!. Battery replaced, waiting for a full charge to start using!.

An G -

Très bien fait, Pédagogique, Bravo Dominik (de la part de Dominique)

Et très bon site IFIXIT, dans la démarche de faire par soi-même, en étant éco-responsable

Drouinot -

molte grazie , ben programmato il lavoro molto sodisfacente

Sebastiano Cirio -