Introdução

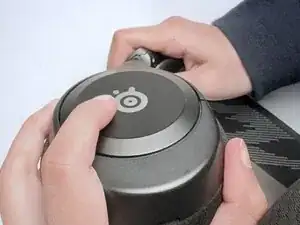
Use this guide to repair a loose or partially detached ear cup from a SteelSeries Arctis Nova 1 Wired Gaming Headset. The ear cup should still be held on by a wire.

Only beginner technical skills with a steady hand are required to successfully complete this repair.

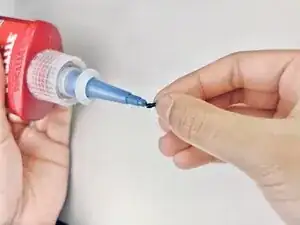
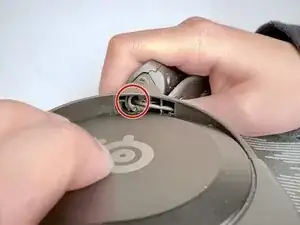
A detached or dangling ear cup often results from repeated rotation and daily adjustments, which cause the hinge screw to loosen over time. The medium strength LOCTITE® 243 glue prevents the screw from continuing to fall out of place.

LOCTITE® 243 is a skin irritant, so handle the glue-coated screw with the tweezers to avoid skin contact.

  1. wP6CbeCQgRNUQUNa
    wP6CbeCQgRNUQUNa
    XRMNJygmmqi1CBTp
    • Connect the loosely wired ear cup to the headband, leaving no gaps in between.

    • The ear cup may need to be slightly rotated or adjusted to achieve proper alignment while you push it to connect.

  2. xgldFVYOkQVeJiOQ
    xgldFVYOkQVeJiOQ
    plSAYrNgLo1IJIuq
    • Shorten the headband completely.

  3. fWxrXkf2ZWMVp1mv
    fWxrXkf2ZWMVp1mv
    EVXkqU3HKy1wQcue
    • Rotate the earcup of the wired headphones perpendicular to the headband.

  4. kQb1vfQpwNn3RHEJ
    kQb1vfQpwNn3RHEJ
    TyfC1UgHDUA3yTeF
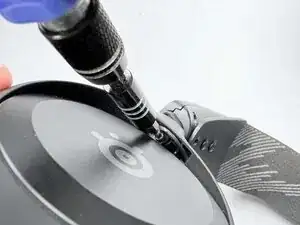
    • Apply a single drop of LOCTITE® 243 to the screw threads.

    • Only a small amount is required because the screw threads must be thoroughly coated.

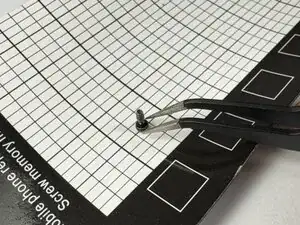
    • Set aside the screw nearby, ensure it's standing upright on the screwhead.

    • Use tweezers and gloves if needed.

    • Avoid as much contact as possible with LOCTITE® 243 to reduce the risk of skin irritation; if contact occurs, wash immediately. If the skin is glued together, soak it in soapy water or use skin-safe acetone; then, carefully separate the skin.

  5. NPxG2JOHMVvaLKVa
    NPxG2JOHMVvaLKVa
    ucAg2JDKSDvciRni
    ZCegmCARcMTE4iLg
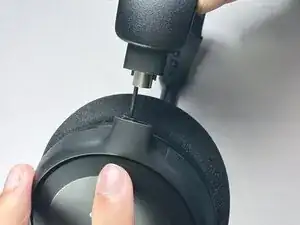
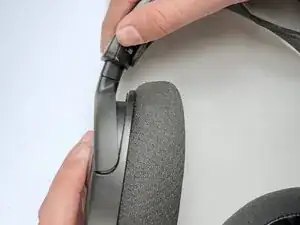
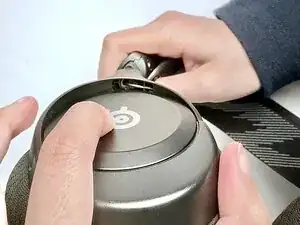
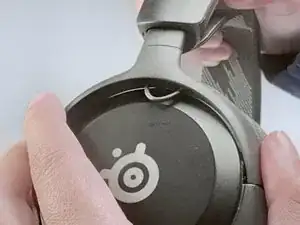
    • Angle the earcup inwards to reveal the screw hole.

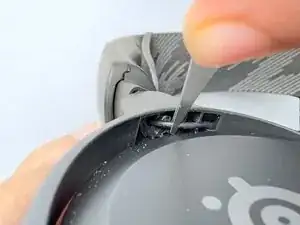
    • If the plastic dish is dislodged, reposition the plastic disc into the area.

  6. WjOYXKvTqXuBUvdE
    WjOYXKvTqXuBUvdE
    kCeU4PKLosB66vYY
    • Use the tweezers to lift and pull the wire outwards to reveal the screw hole.

    • If the wire is not moved to the side in this manner, it may block the screw hole when trying to insert the screw.

  7. trpHbj1ctPDGStC4
    trpHbj1ctPDGStC4
    kTtUAbcslBW2nDyR
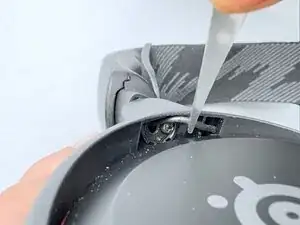
    • Use tweezers to pick up the screw and place it onto the screwdriver tip.

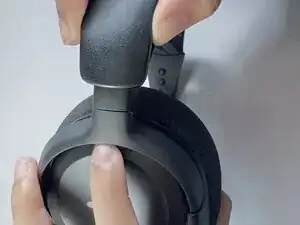
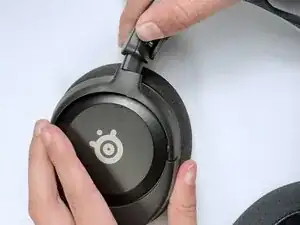
    • While angling the earcup inwards, insert the screw into the screw hole and tighten it.

    • Rotate the earcup and adjust the screw tightness to your liking. Too much tightness will disable the earcup rotation.

    • If you have difficulty inserting the screw while angling the ear cup inward, you may hold the headset close and perpendicular to your body to keep it upright.

    • If the plastic dish is dislodged, reposition the plastic disc into the area with tweezers. The plastic disc must be in the proper position for the screw insertion.

  8. frtvpTu1gyGnYM5d
    frtvpTu1gyGnYM5d
    4BKGTlgJ3bBrtXLU
    • Using tweezers or fingers, reinsert the lengthened wire into the headband.

Carmen Ma

Membro desde: 04/11/25

157 Reputação

0 comentários