
Introdução
The Star Trek: The Next Generation Bluetooth Comm Badge is a neat little gadget and fantastic cosplay accessory. Just one problem: They don't make new ones and the original battery is a little.. under powered. In this guide I'll show how to replace it with a newer and slightly higher capacity battery.
Ferramentas
Peças
-
-
The badge is pretty easy to open, but some care is needed. There are three alignment pins and a couple clips that while not vital, should be preserved for ease of reassembly. Without the clips glue would be needed which will complicate future repairs.
-
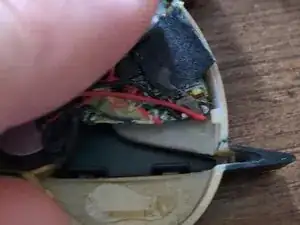
Flip the badge over, and get a thin pry tool to carefully open it up. I recommend starting from one of the points. Ease your way around it until there is a gap at all points and then from there it should be easy to lift off.
-
-
-
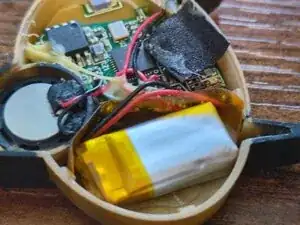
First, gently peel back the foam tape above the charging port. Right out in the open are the wires connecting to the stock battery. Carefully desolder these. A fine soldering tip is recommended. Once removed, apply some flux and clean any leftover solder off with equal care.
-
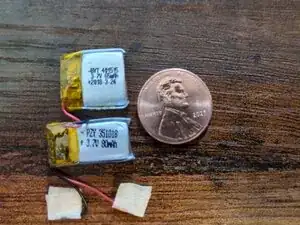
In the second picture you get a sense of the scale of these batteries. The top is the original while the bottom is the replacement I found that fits. The naming convention is simple to understand. Thickness/Width/Length, each is in a two number pair in millimeters with a decimal in some cases - 3.5MMx10MMx18MM
-
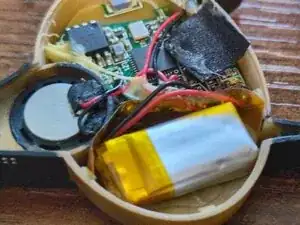
Attach the new battery wires with some fresh solder and flux - Red for positive, black for negative. This battery is a bit of a squeeze, but the foil wrapper is able to be deformed somewhat without issue. Just do your best to bend the part wrapped in yellow tape as little as possible, as that contains the battery management circuitry.
-
-
-
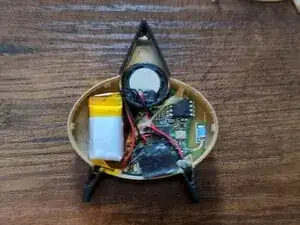
From here it's pretty easy to get it back together. I put some non-conductive tape between the soldered wires and the battery just for some extra protection.
-
I recommend charging and discharging fully one time before reattaching the rear cover, just to make sure the battery doesn't get too warm during use.
-
Once a full charge/discharge cycle is performed, put the rear cover back on and you're all set!
-

To reassemble your device, follow these instructions in reverse order.