Introdução
This guide only goes over battery replacement, the disassembly and reassembly are covered in this prerequisite GUIDE
Ferramentas
Peças
-
-
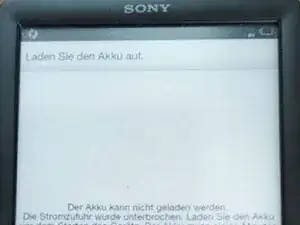
A message like this lets you know it doesn't even have the power to turn off the screen... and if charging it doesn't work despite the lovely LED saying, "yes, I'm getting power" and the lightning bolt through the battery. Probably you need this guide.
-
-
-
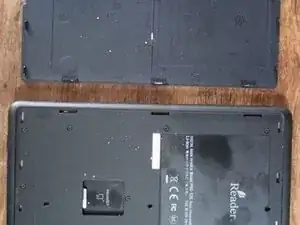
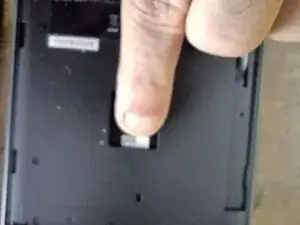
Slip a guitar pick , fingernail, or what-have-you into the opening at the lower edge of the back cover and pry it up. This is the same thing you do to install a μSD (micro SD) card. Easy. Work your way about util you can remove the back cover
-
-
-
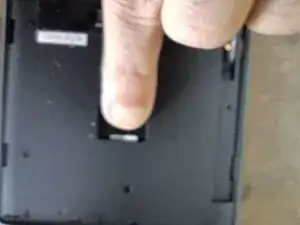
If you have a μSD card remove it, otherwise, skip this step.
-
Simply push the card deeper into the slot, it will pop-out enough for you to grasp and remove it.
-
-
-
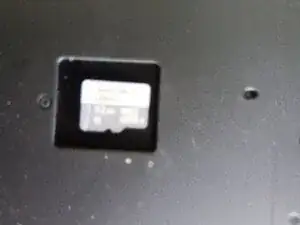
You need to slip a sharp blade under one corner of the label and lift it enough to get a grip on it...
-
Then just peel it up, it's not flimsy and will peel easily. Then set it aside for later replacement.
-
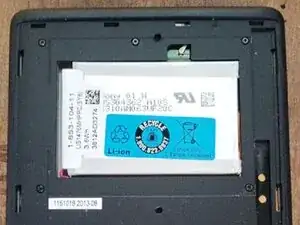
Once you've done that, You'll see the battery, but you can't change it yet!
-
-
-
-
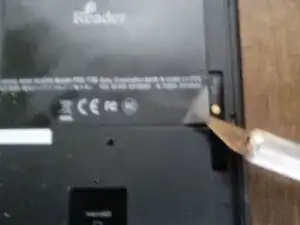
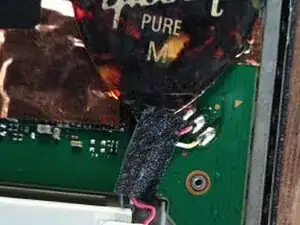
Once you get to the point where the back cover is removed and you can see the circuit board where the battery is connected, remove the black tape that's securing the wires and discard it (Doubtful it's capable of re-use)
-
(the masking tape is for holding down the new wires when we're done soldering the new battery in place)
-
-
-
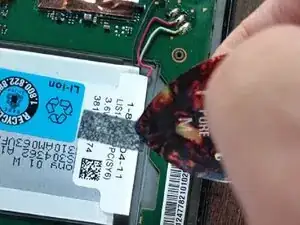
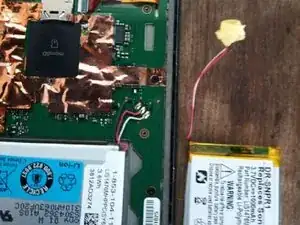
Using your trusty (hot) soldering iron carefully touch each connection of the battery one at a time and pull the old wires off when the solder melts
-
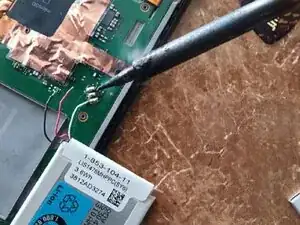
Use a bit of flux and solder to solder each lead of the new battery in the correct position. From the top, Black, Red and White, just like what you removed.
-
Use a small piece of that masking tape to hold the new wires down.
-
If you haven't already done it stick the new battery in place, if you need to use a fresh double-sided adhesive tape. I didn't need to it stuck fine.
-
That's it, turn it over and it has probably resumed working normally except you'll need to re-do the initial set-up.
-
Put everything back the way you found it using the prerequisite guide if you need to.
-
On the one I fixed the little magnets fell out, I've no idea their function, but if yours fall out they go on the opposite side from the wi-fi antenna and stick to a tiny metal bar.
-
Lastly, sorry about no photos of the actual soldering work but I was using both hands for that and it's pretty simple, make the joints good, don't overheat or short anything and it's a piece of cake.
-

To reassemble your device, follow these instructions in reverse order.
Um comentário
Thank you John