Introdução

Use this guide to replace the traverse assembly in your Sony DVP-FX97.

For your safety, discharge the battery before disassembling. This reduces the risk of a fire if the battery is accidentally damaged during the repair. If your battery is swollen, take appropriate precautions.

  1. dGGEgU6VHsVBKCCt
    • Set the DVP on a stable surface.

  2. kXMksoUiyeGNQU6N
    • Use a Phillips #00 screwdriver to remove the two black 5.8mm screws.

  3. TONnTaVZQmWfJD6q
    TONnTaVZQmWfJD6q
    kq11mLMGl2RDZyPT
    • Use the Phillips #00 screwdriver to remove the seven black 5.8mm screws.

  4. wDftMgC3PBQ2rWHH
    wDftMgC3PBQ2rWHH
    2TZ5owgPlDZTCBM6
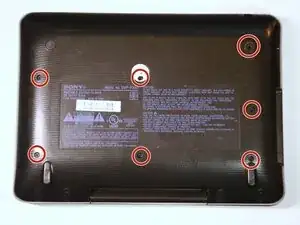
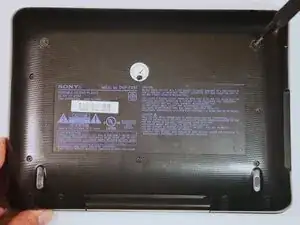
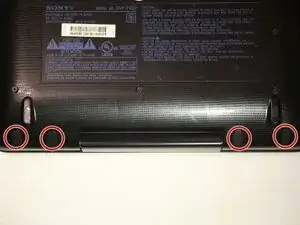
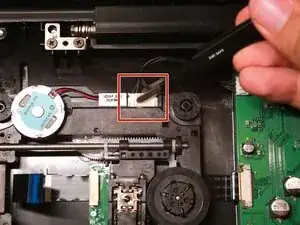
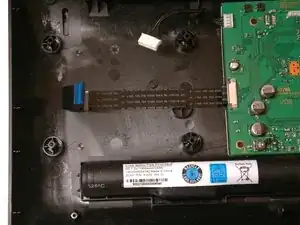
    • Remove the four black pads with a spudger.

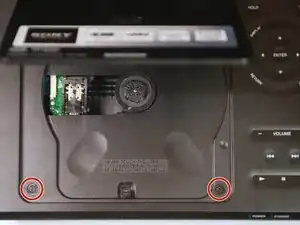
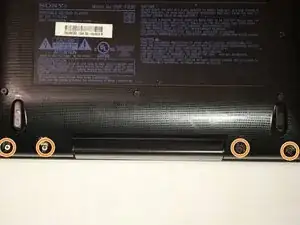
    • Use the Phillips #00 screwdriver to remove the four aluminum 2.8mm screws.

  5. mSYsiAdey5mHqIKa
    • When removing the top, be careful of the ribbon cable connecting the top and bottom.

    • Use a spudger to lift the top off.

  6. D1pkKXvv5vMfcn5s
    D1pkKXvv5vMfcn5s
    5v6WLrV6aQ5QWBbg
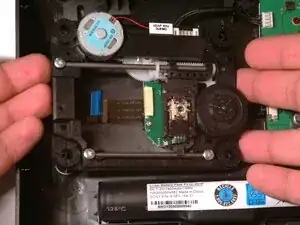
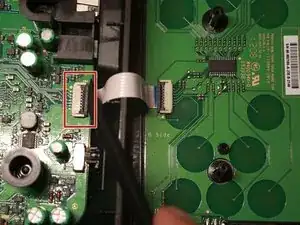
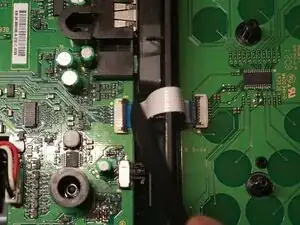
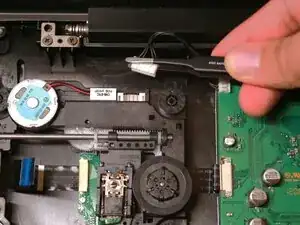
    • Use the spudger to flip the clip that holds down the ribbon cable and disconnect it from the motherboard.

  7. WND1inFI4YJqIMfW
    WND1inFI4YJqIMfW
    UCBZfeppd2UDgNWx
    • Use tweezers to disconnect the ribbon cable from the traverse assembly.

  8. yMaUvcMIpQPEYCpT
    yMaUvcMIpQPEYCpT
    ZolT1PWwImfkUNE2
    • Disconnect the pin-connector carefully from the traverse assembly.

  9. aaMgjmYHhpNl2bB2
    aaMgjmYHhpNl2bB2
    ZPCgJaIGHKqDibmL
    • Remove the traverse assembly by lifting.

Conclusão

To reassemble your device, follow these instructions in reverse order.

Paul Chapa

Membro desde: 24/09/25

169 Reputação

0 comentários