Introdução

This guide will walk you through the process of replacing the LCD screen for the Sony Cybershot DSC-S750. Replacing the LCD screen on a Sony Cybershot DSC-S750 is a common DIY repair, but it requires care due to delicate internal components. The specific steps may vary slightly, but the general process involves careful disassembly of the camera body.

  1. O1hARR4Gj1S4YnMe
    O1hARR4Gj1S4YnMe
    q5FlZ4yIWNhTbEDl
    SWxCFKJVjy66btVc
    • Remove all screws on the outer shell of the camera with a small Phillips head screwdriver.

  2. FqsdM5Q2ODEBrvnd
    FqsdM5Q2ODEBrvnd
    dMeXEttPOxfeNdBW
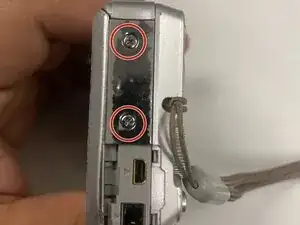
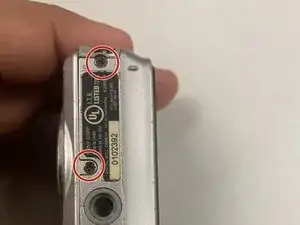
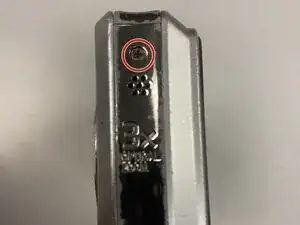
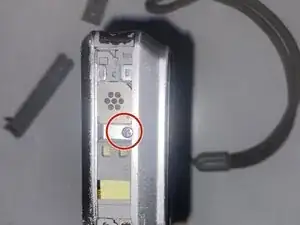
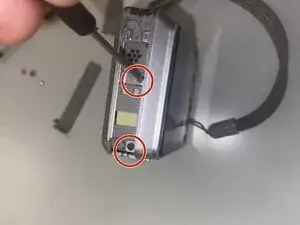
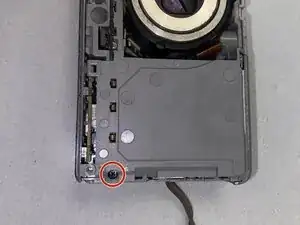
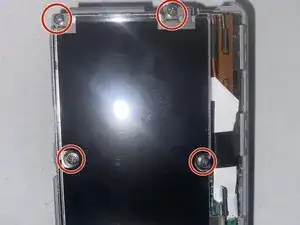
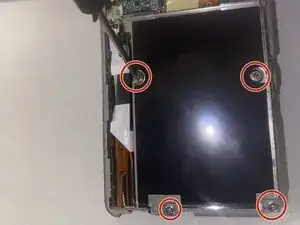
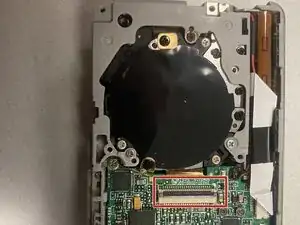
    • Now that the inner shell is exposed after unscrewing the outer shell, remove the screws from the inner shell of the camera.

  3. 5ZFqBBFSk1tm1uWj
    5ZFqBBFSk1tm1uWj
    jZwrMXx3nAZ5PPI3
    • Remove the screw from the battery housing.

    • This will allow you to remove the back of the camera which makes accessing the screen easier.

  4. PESSDyJusiwqrO6P
    PESSDyJusiwqrO6P
    6IE3qJMJYkZwrvrr
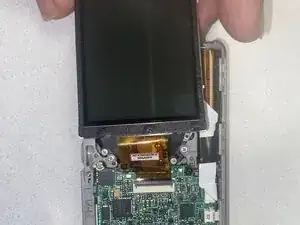
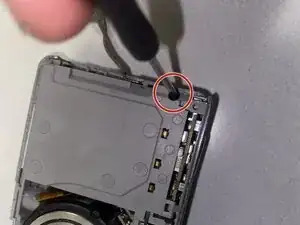
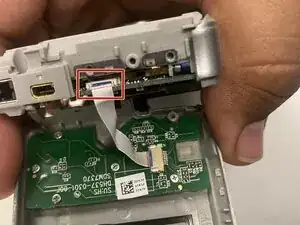
    • Remove the ribbon cable that connects the screen to the battery.

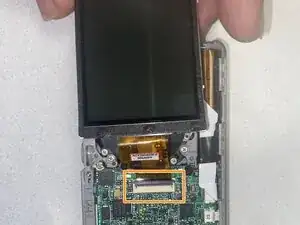
    • Remove the ribbon cable that is used to connect the LCD screen to the mother board.

    • To ensure no damage is done when disconnecting the ribbon cables, pull carefully on the white plastic portions using a pair of tweezers.

  5. 1dVkR6Dhdo22qhuK
    1dVkR6Dhdo22qhuK
    vWPEPK3figVsDscc
    • Remove all the screws from the screen housing.

  6. ddvo3F4A4cLbDxYk
    • Connect your new screen into the ribbon cable housing.

    • When plugging in the new screen ensure that the black portion of the cable is flush and inserted carefully otherwise the screen will not display.

Conclusão

To reassemble your device, follow these instructions in reverse order.

Frankye Perez

Membro desde: 28/08/25

139 Reputação

0 comentários