Introdução

  1. LB2YK4AbsgNGkdJn
    • Starting with the corners, gently pull the rubber cover off of the device.

  2. jVDJetEZVeyIYHNA
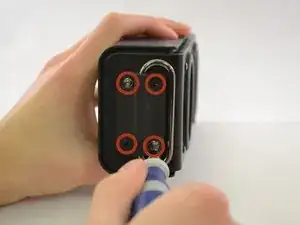
    • Using the T-6 hexagonal screwdriver, unscrew the four 10mm #6 hex screws on the right side of the device.

    • Remove the handle from the device.

  3. pDPnwiNLYTQCRoIK
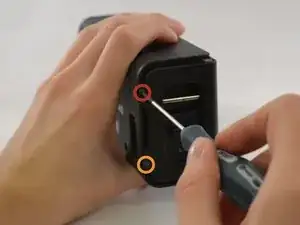
    • Unscrew the two screws on the left side of the device using the phillips #00 screwdriver.

    • One 5mm Phillips screw.

    • One 8mm Phillips screw.

  4. VbL3NTQQ6bEaJ3r6
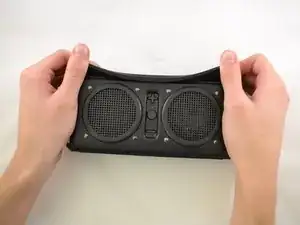
    • Gently pull the sides of the front plate outwards from the device.

    • Pull up on the front plate to remove it from the device.

  5. UqRIbB4QbTHDrRAN
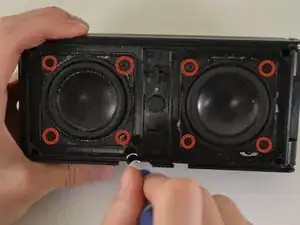
    • Using a #000 Philips Screwdriver, unscrew the four 8 mm Philips screws from each corner of both speakers (eight 8 mm Philips screws total).

  6. XYStDR3nVSW5BOSY
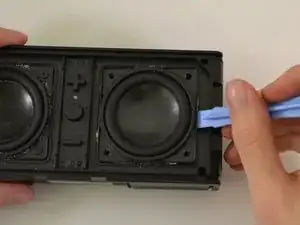
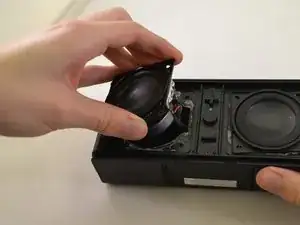
    • Using the plastic opening tool, pry around edges of the speaker to loosen glue contact with front plate.

    • If you are unable to loosen glue contact using the plastic opening tool, use a heat gun to assist in removal.

  7. ABGLQDiJFUPACV6r
    • Lift the speaker out of the device.

    • Be aware of the connection with the ribbon cable.

    • For reassembly, ensure proper orientation of the cable plug.

  8. Na1eOEMU1WtNQmXA
    • Firmly pull on the end of ribbon cable to disconnect the speaker from the motherboard.

  9. xN1uMjt1eRiqU2cD
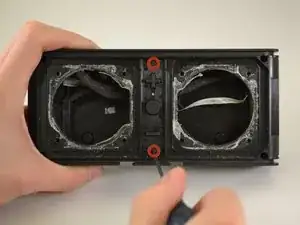
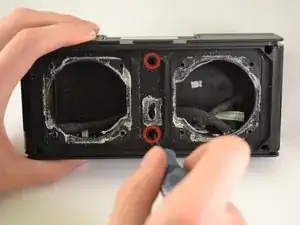
    • Using a Phillips #00 Precision Screwdriver, unscrew two 6 mm screws from the middle of the panel, above and below volume buttons.

  10. XhmqnZcrJGVKrv6N
    • Lift the button panel.

  11. xkWlKf6p5KTaOXBC
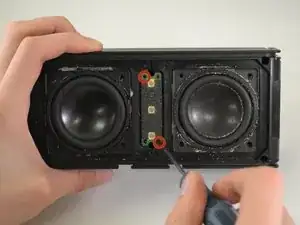
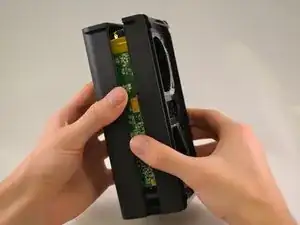
    • Using a Phillips #00 Precision Screwdriver, unscrew two 6 mm screws from the button motherboard.

  12. 4Rx3u5FRcp1a1vDu
    • Using a plastic opening tool, pry the button motherboard to detach it from the device.

    • The button motherboard is connected to a ribbon cable inside the device.

  13. mWP4slZOQinAbRMy
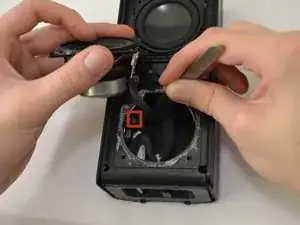
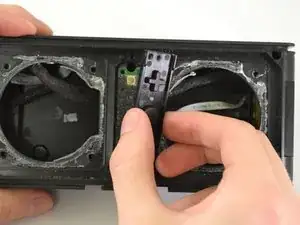
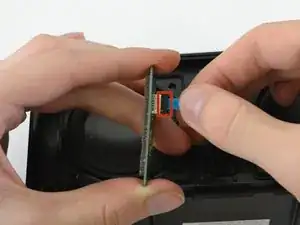
    • Pull the black ribbon cord attachment away from the motherboard.

    • Pull on the cable until it releases from the back of the motherboard.

    • The black attachment is part of the connector, not the blue ribbon cable, so it will not disconnect from the motherboard.

    No need to disconnect the ribbon cable just pull the board away to access the 2 screws behind it.

    vcdb -

  14. QMAsyPKsLVWKQe5y
    QMAsyPKsLVWKQe5y
    pDGEVxQoRv4uAIuH
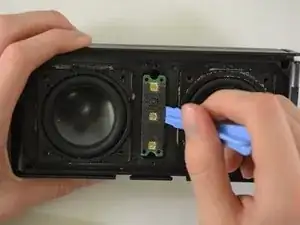
    • Using a Phillips #00 Precision Screwdriver, unscrew two 8 mm screws.

    • Lift off the back panel.

    How do you pull off the back panel? Those two parts are really stuck to each other.

    Brandon De La Rosa -

    There's four additional screws in the corners! How did you miss that?

    David Lassabe -

    Might want to update the four corner screws as you can't see it unless you open this comment page.

    vcdb -

Conclusão

To reassemble your device, follow these instructions in reverse order.

Kristin

Membro desde: 14/01/15

495 Reputação

0 comentários