Introdução

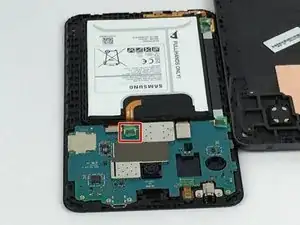
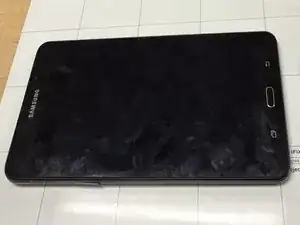
This is a screen replacement guide for a Samsung Galaxy tablet A 7.0. During all steps, handle every component with care as they are very delicate electronic parts. Ensure to keep wary of the screen panels one wrong movement can cause serious damage to the display when put back together.

  1. U6S4BWnXRaBXPdch
    U6S4BWnXRaBXPdch
    feXPLbAbXeUPvy2w
    FxEo4PLDMm1NeV3f
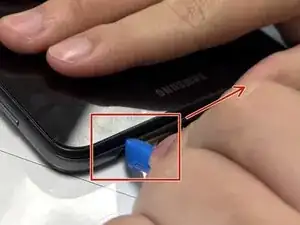
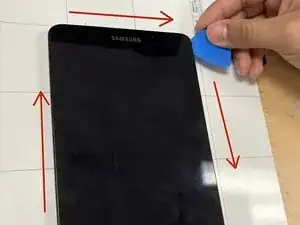
    • Insert the plastic opening tool into the seam between the back and front covers, starting at a corner of the tablet to create a gap.

    • Slide an opening pick along the edge of the rear cover to release the clips.

    • If the top and bottom covers don’t stay separated, insert a pick in several places around the device to hold it open.

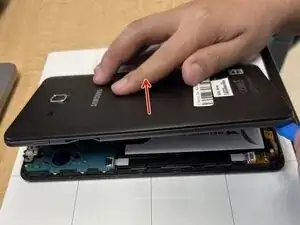
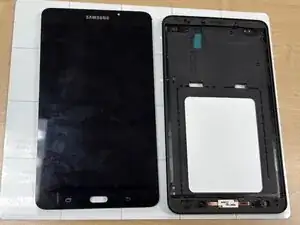
    • Carefully separate the back and front panel.

  2. XOcgBXktdJZYTUYL
    XOcgBXktdJZYTUYL
    FJfDnouc3t24eXWS
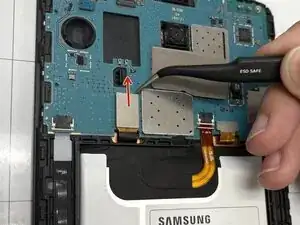
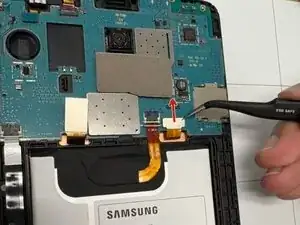
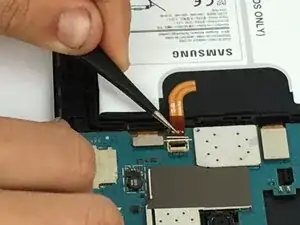
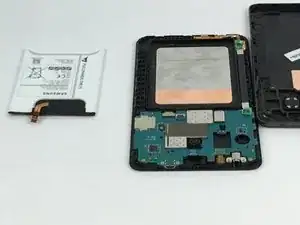
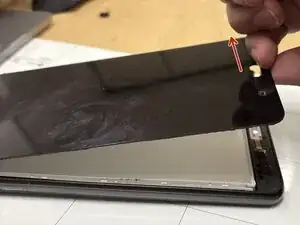
    • Place a spudger or an opening tool under the press connector edge and pry straight up to disconnect it.

    • Disconnect the smaller press connector.

    • Make sure to pry under the edge of the connector itself, and not under the socket on the board. Otherwise, you risk permanently damaging the socket.

    • To reconnect, align the connector carefully over its socket and press down with your fingertip—first on one of the short sides, then the other—until it clicks into place. Don't try to force the connector into place. If you're having trouble, reposition it and try again.

  3. XwsHukBfmIpuUXlY
    XwsHukBfmIpuUXlY
    SRfmXiUDomvknB53
    JRwyNwh1vtlH3lQP
    • Using tweezers, gently lift the black tab locking the ribbon cable connecting the battery to the motherboard.

    • Use tweezers or your fingers to gently pull the cable out of its socket.

  4. A1yFx6RSUoHZOcBX
    A1yFx6RSUoHZOcBX
    HrnwQY6YXAio4qdS
    • Remove the battery from the tablet.

    • If you need help gripping the battery edge, use an opening tool or spudger to lift it a few millimeters, then use your fingers to remove it.

    • Avoid prying or bending the battery—damaged Li-ion batteries can catch fire.

  5. evKeELTLnBMc3fv3
    evKeELTLnBMc3fv3
    JXLXXLgELHjYKSWx
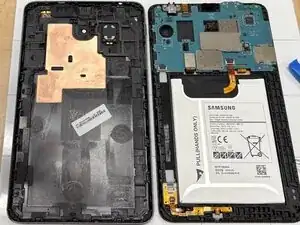
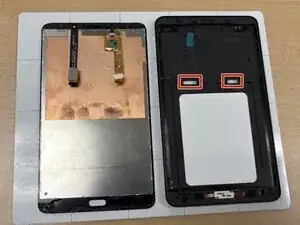
    • Flip the top cover over so the screen is facing up.

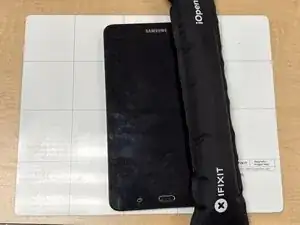
    • Use an iOpener to soften the adhesive around the tablet’s edges. Follow this guide for instructions on how to use the iOpener.

    • Overheating may cause the iOpener to burst. Do not attempt to heat over 100˚C (212˚F).

    • Never touch the iOpener if it appears swollen.

    • Place it on all 4 sides of the screen to loosen the adhesive assuring the iOpener and the screen get 20 seconds of contact with all 4 sides of the screen.

  6. J6w2rkxwfpBlblv6
    J6w2rkxwfpBlblv6
    kpkjtwcFa2thVwRF
    • After the adhesive has loosened, insert an opening pick between the top cover and screen.

    • Slide the pick around all 4 sides of the screen.

    • Use your fingers to gently lift the screen from the frame.

  7. w6LyNJPAPKUHoJpu
    w6LyNJPAPKUHoJpu
    P2kEWs6SlivOSTB1
    • Before you completely separate the screen, slide the two cables through the mid-frame to release them.

    • The cables are attached to the screen and could be damaged if not released from the midframe.

Conclusão

To reassemble your device, follow these instructions in reverse order. Take your e-waste to an R2 or e-Stewards certified recycler.

Eduardo Gallegos

Membro desde: 23/09/25

145 Reputação

0 comentários