Introdução

If your Samsung Galaxy Chromebook Go 14 is experiencing weak Wi-Fi signals, frequent disconnects, or complete loss of wireless connectivity, the internal Wi-Fi card may be failing. Luckily, the Wi-Fi card in the XE345XDA is a replaceable module, making it possible to restore your wireless performance without replacing the entire device.

Before you begin the repair, power off the laptop and disconnect the charging adaptor and any peripheral devices.

  1. ygBGlSoqxYNaPHCf
    ygBGlSoqxYNaPHCf
    mTZ4Li2Pvan6hlSc
    • Use a spudger to pry off the rubber feet on the corners of the bottom of the Chromebook.

  2. B2QSLwI2mCGZJgWP
    • Use the Phillips #00 Screwdriver to remove the 4.32 mm screws underneath each rubber sole.

  3. ZNMYNXRTqGhrfUeX
    ZNMYNXRTqGhrfUeX
    DNcIqnoYFVZDBpqr
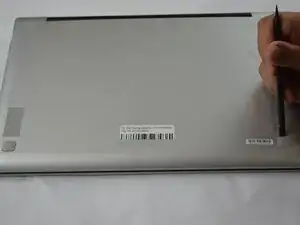
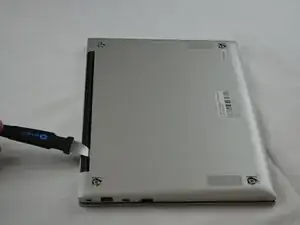
    • Insert an opening tool into the space between the bottom and top cover.

    • Slide the opening tool around the perimeter of the device to release the clips securing the bottom cover.

    • Pry off the bottom of your Chromebook.

    • You may hear some cracking or popping as the clips are released and the bottom cover is being removed.

  4. IwWtf5BLIYbKo4Uw
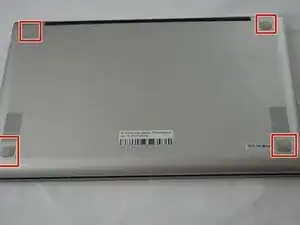
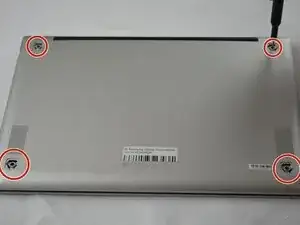
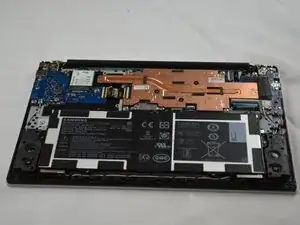
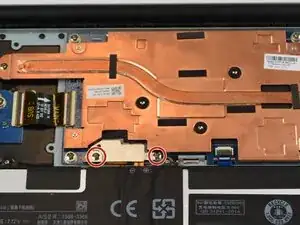
    • Remove the two 3.53 mm PH00 screws holding down the silver metal cover.

    • Remove the silver cover from the battery connector.

  5. skrtIiecKSmuTwkL
    skrtIiecKSmuTwkL
    kBYVunnSK3SGDmom
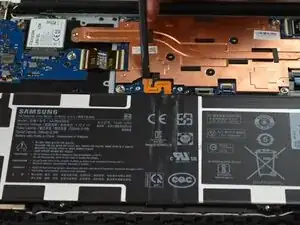
    • Place a spudger or an opening tool under the edge of the battery connector and pry straight up to disconnect it.

    • Make sure to pry under the edge of the connector itself, and not under the socket on the board. Otherwise, you risk permanently damaging the socket.

    • Work carefully: don't pry on or accidentally scrape any small, surface-mounted components on the board.

  6. LlhYcuYAd2SOJwXq
    LlhYcuYAd2SOJwXq
    ibExylDek2GeRJMq
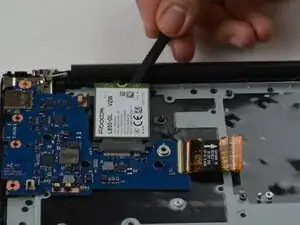
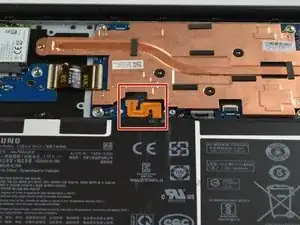
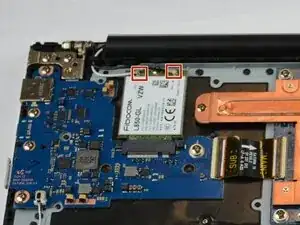
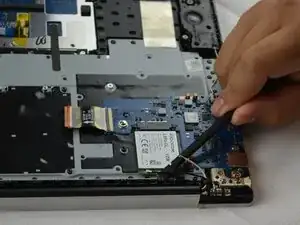
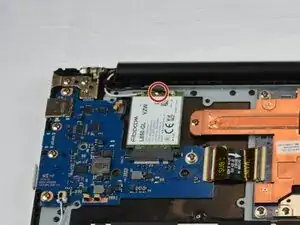
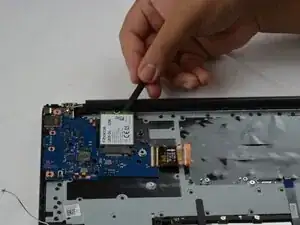
    • Slide a thin, ESD-safe pry tool or angled tweezers under the metal neck of the coaxial connector on the Wi-Fi card (as close to the head as possible) and lift straight up from the board.

    • When working with these connectors, it's key to always lift the head straight up. If pried on at an odd angle, you risk breaking the socket off of the board underneath.

  7. SGUMkwrLNJ5Twnui
    • Use the Phillips #00 screwdriver to remove the 3.53 mm screw securing the Wi-Fi card.

  8. HjfDOo3CpfSEsq2P
    • Slide the Wi-Fi card out of the socket on the board.

Conclusão

To reassemble your device, follow these instructions in reverse order. Take your e-waste to an R2 or e-Stewards certified recycler.

Keegan Gilbreath

Membro desde: 25/09/25

685 Reputação

0 comentários