Introdução
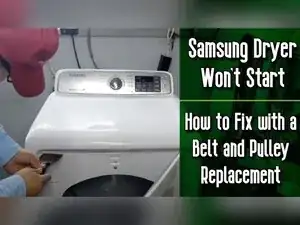
If your Samsung console-top dryer won’t start, won’t spin, or turns on but you don’t hear anything running, a failed idler pulley and a broken or slipped belt are common causes. This guide shows how to open the cabinet, replace the belt and idler pulley, and reassemble the dryer. The disassembly is almost exactly the same on some LG and Kenmore Elite dryers that look similar, but always verify parts with a proper model-specific part lookup.
Ferramentas
Peças
-
-
Use this repair when the dryer won’t start, won’t spin, or turns on but doesn’t progress into spinning and you don’t hear it running.
-
-
-
Try releasing the top by sliding a putty knife under the front edge and depressing the two tabs.
-
If the clips are too stiff or there isn’t enough space, remove the two screws on the back of the dryer that hold the top on.
-
Push the top panel forward, and lift it up.
-
-
-
Use a Phillips screwdriver to remove the four screws along the top area under the open top panel.
-
Use a Phillips screwdriver to remove the two screws at the lint filter.
-
Use a Phillips screwdriver to remove the screw by the door switch.
-
-
-
Depress the two metal tabs that help retain the door, and pull the door slightly away from the cabinet.
-
Try disconnecting the door switch wire harness with the door partially removed.
-
Set the door on top of the dryer to create space, and disconnect the door switch harness.
-
-
-
Use a Phillips screwdriver to remove the six screws holding the bulkhead in place.
-
Remove the moisture sensor near the heating element in the lower right corner of the dryer.
-
Lift the bulkhead up and remove it.
-
-
-
Reach into the cabinet and locate the single Phillips screw that holds the idler arm in place.
-
Remove the Phillips screw, and pull the idler arm out of the cabinet.
-
Remove the drum using the cabinet cutouts on each side.
-
-
-
Inspect the idler pulley on the idler arm for obvious damage, such as a missing or destroyed wheel.
-
Replace the idler pulley if it’s damaged, because a failed pulley can trigger the belt switch and prevent the dryer from turning on.
-
-
-
Locate the idler arm spring and position it so it can be inserted into both spring holes properly.
-
Use needle-nose pliers if needed to thread the spring ends into place.
-
-
-
Thread the belt onto the motor, and push the idler pulley to let the belt rest on the idler pulley.
-
Create a smooth belt path, and make sure the belt lines up properly with the motor pulley.
-
-
-
Slot the bottom of the door onto the metal hinges at the bottom of the opening.
-
Position the metal retention clips so they line up correctly.
-
Reinstall the seven Phillips screws that hold the door to the bulkhead and the cabinet.
-
-
-
Lower the top panel and make sure it sits properly on the plastic posts so it locks into place.
-
Plug the dryer back in, and verify it turns on and runs.
-
-
-
If the dryer still won’t turn on, consider a control board issue or a bad motor.
-
Check for a motor that overheated to the point it won’t turn on.
-
Confirm the dryer starts and spins normally after the repair. If you’re working on a similar-looking LG or Kenmore Elite dryer, the take-apart procedure may match, but always verify the correct belt and idler pulley by model. If the dryer broke down due to a dirty or restricted vent, clean the entire vent system to help prevent repeat failures.
