Introdução
If your Ricoh Shotmaster 130Z (also known as the Shotmaster Zoom series) has a zoom lens that’s stuck, cracked, or won’t focus, this guide will show you how to replace it. You’ll learn how to remove the damaged lens and install a new one using basic tools.
The zoom lens is the part that controls focusing and magnifying your shots. When it fails, the camera may show symptoms like a lens that won’t extend, blurry photos, or grinding noises. If you’re not sure the lens is the issue, check the Lens Problems section in your troubleshooting page.
Before you start, take out the camera batteries and be careful when handling the lens assembly since the ribbon cables are thin and easy to tear. Avoid static electricity and do not force anything if it feels stuck.
For extra help and general info about this camera series, you can visit the Ricoh Shotmaster page.
-
-
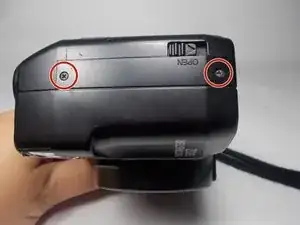
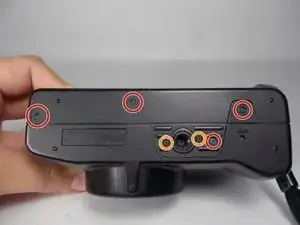
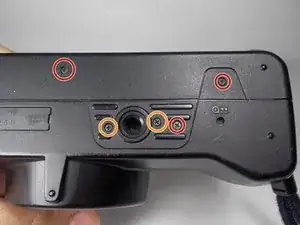
Remove the 5mm JIS #00 screws from the bottom of the camera.
-
Pay attention to the 6mm screws on the sides of the tripod slot, as they are a slightly different size from the rest of the screws. However, you still may use a J00 screwdriver to remove them.
-
-
-
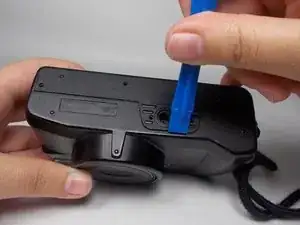
Using an opening tool, lift the case of the tripod slot (on the bottom) until the back portion of the case is released.
-
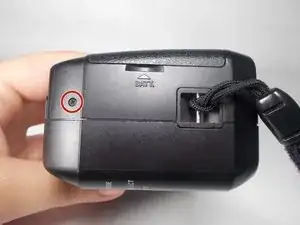
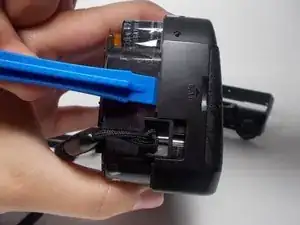
Continue to use the the opening tool to insert it and lift right next to the strap of the camera.
-
-
-
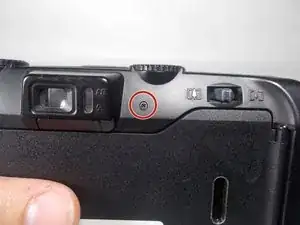
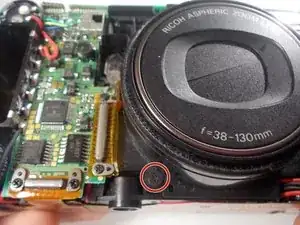
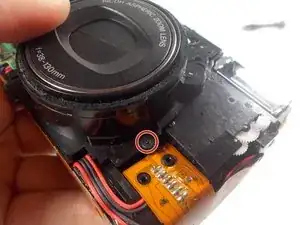
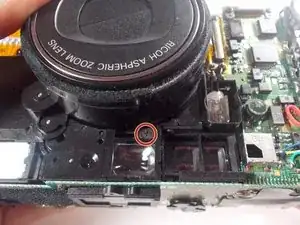
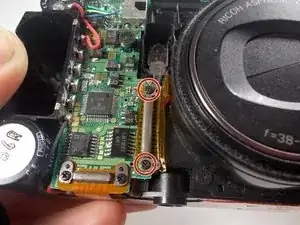
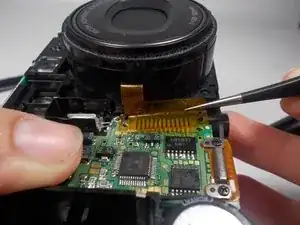
Use a JIS #0 screwdriver to remove the three marked screws found around the perimeter of the lens.
-
To reassemble your device, follow these instructions in reverse order.
