Introdução
Replace the left speaker on your Retina MacBook 2016. Part of the wireless antenna is also integrated into the speaker. Use this guide to replace both the speaker and antenna as a single unit.
-
-
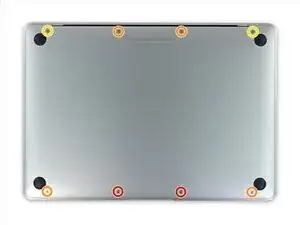
Remove the following eight screws securing the lower case:
-
Two 1.8 mm P5 Pentalobe screws
-
Four 2.9 mm P5 Pentalobe screws
-
Two 6.1 mm P5 Pentalobe screws
-
-
-
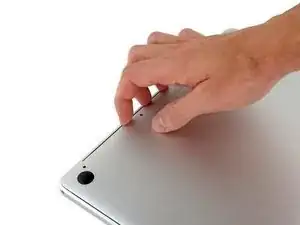
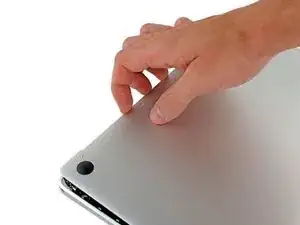
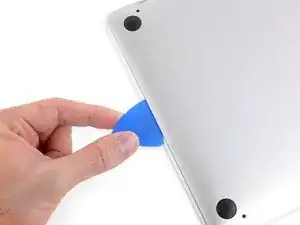
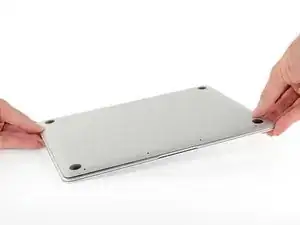
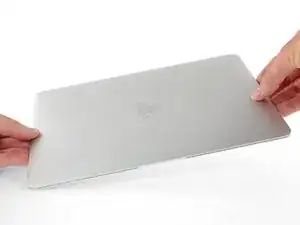
Wedge your fingers between the upper case and the lower case, starting from the rear of the MacBook between the hinges.
-
Keeping a firm grip, lift steadily until the lower case separates slightly from the upper case.
-
-
-
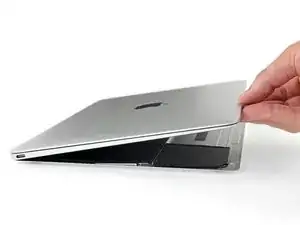
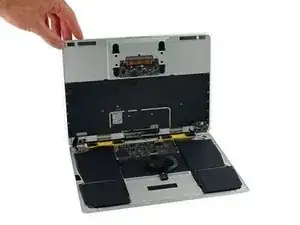
While holding the lower case in place, carefully flip the MacBook over so the Apple logo faces up.
-
-
-
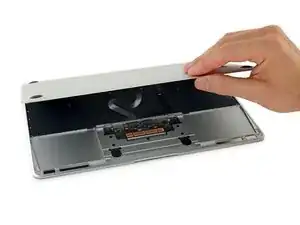
Lift the upper case and display together from the front edge and raise it to about a 45˚ angle.
-
-
-
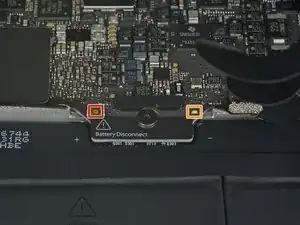
Use the flat end of a spudger to press and hold the small gold 'battery disconnect' button.
-
If the power LED is lit up, continue holding the button until the LED goes dark, and then release. This may take up to 10 seconds.
-
If the LED does not light, release the button after 5-10 seconds. Press and hold it again for 5-10 seconds, and release. Finally, press and hold it a third time for 5-10 seconds, and release.
-
-
-
Disconnect the trackpad ribbon cable from the trackpad by pulling it gently through its slot in the frame.
-
-
-
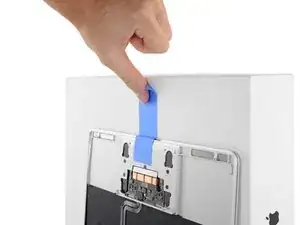
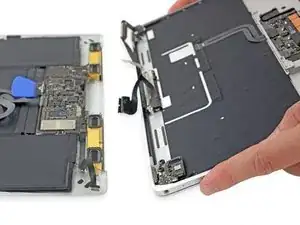
Carefully close the MacBook and flip it over once again, so that the Apple logo faces up.
-
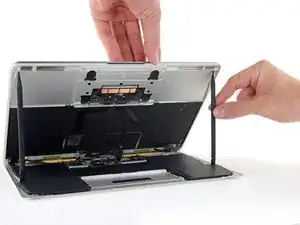
Lifting from the front edge, raise the upper case/display assembly to about a 90° angle, and prop it up against something sturdy so you don't have to hold it.
-
Add a piece of tape near the track pad to secure the upper case and prevent accidental movement.
-
-
-
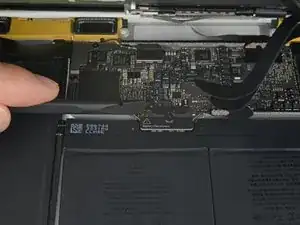
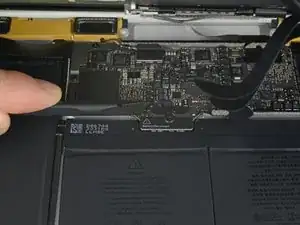
As an added precaution, you may physically disconnect the battery by inserting a battery isolation pick between the logic board and the battery connector.
-
-
-
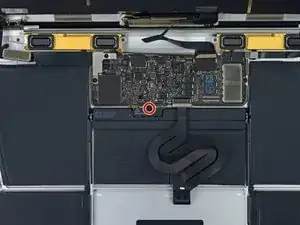
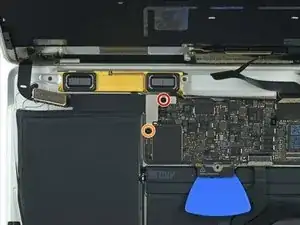
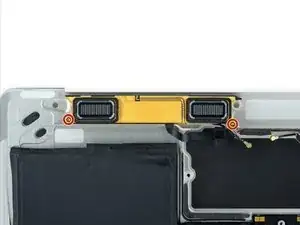
Remove the two screws securing the USB-C port cable bracket:
-
1.1 mm Phillips #00 screw
-
3.5 mm T5 Torx screw
-
-
-
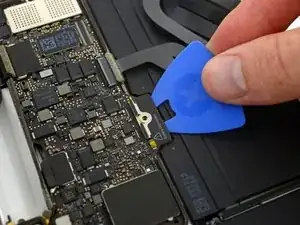
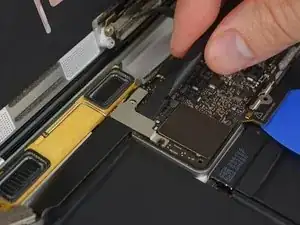
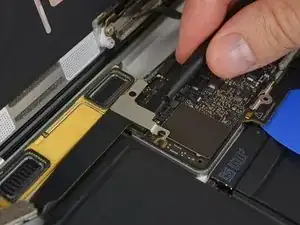
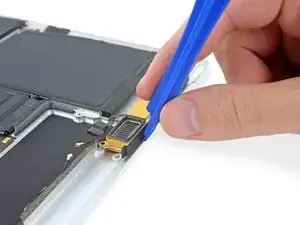
Use the flat end of a spudger to disconnect the USB-C port cable bracket by prying it straight up from the logic board.
-
-
-
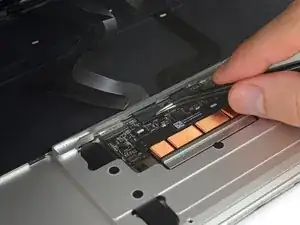
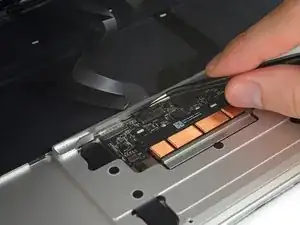
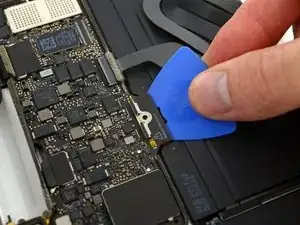
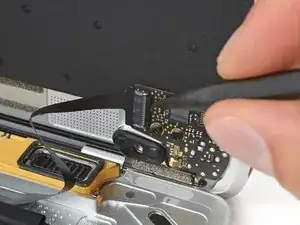
Disconnect the audio jack board ribbon cable by pulling it straight back out of the ZIF connector.
-
-
-
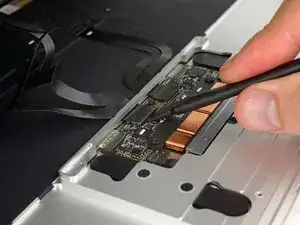
If so, use the flat end of a spudger to hold down the retaining flap while peeling the tape away with the tweezers.
-
-
-
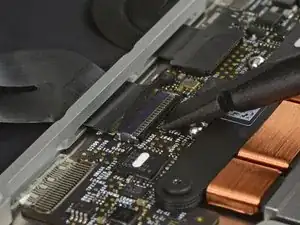
Use the flat end of a spudger to flip open the retaining flap on the display cable connector.
-
Try to keep it clear of the tape, or it may re-adhere and make cable removal difficult.
-
-
-
Carefully slide the flat end of a spudger underneath the display cable to separate the adhesive holding it to the lower case.
-
-
-
Hold the retaining flap open.
-
Disconnect the display cable by gently pulling it straight out of its connector.
-
-
-
Carefully pull straight back on the two pieces of tape you just peeled up to disconnect the two ribbon cables.
-
-
-
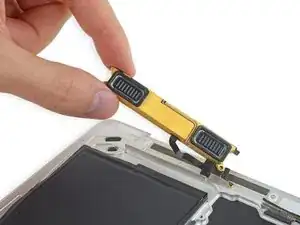
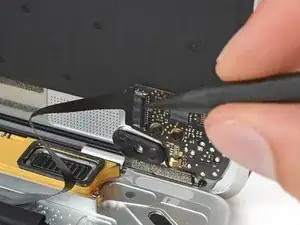
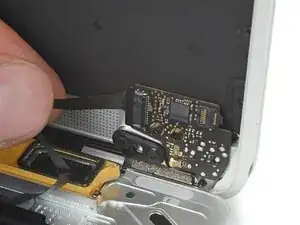
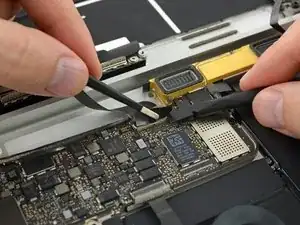
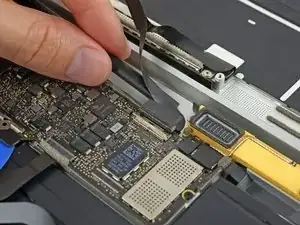
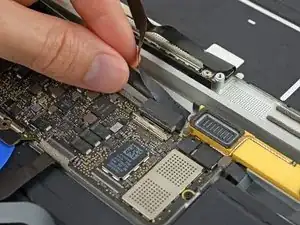
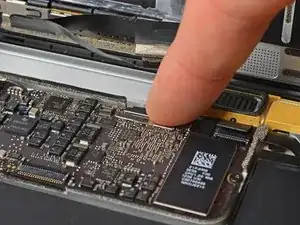
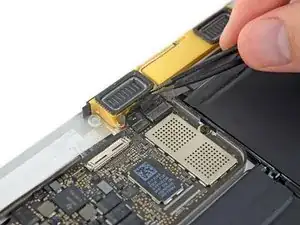
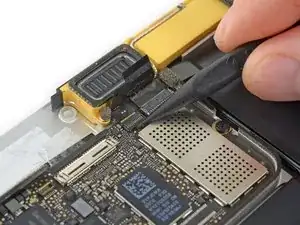
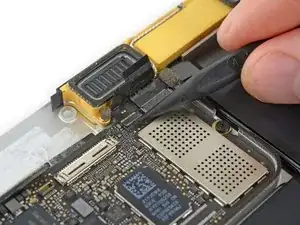
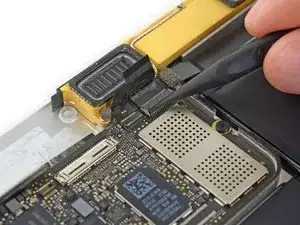
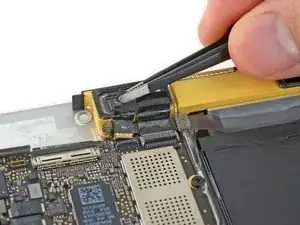
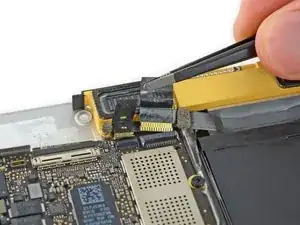
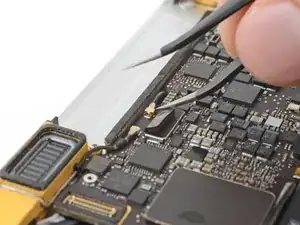
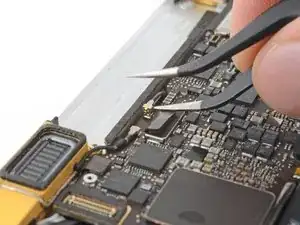
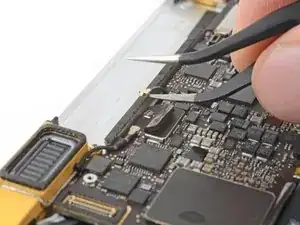
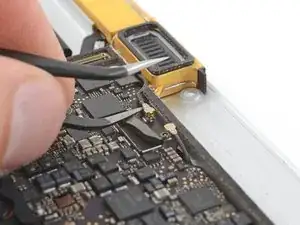
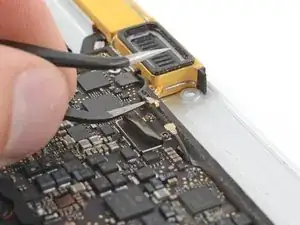
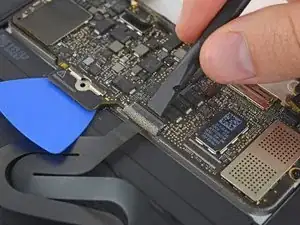
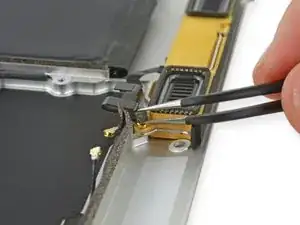
Insert one arm of your angled tweezers under the metal neck of the first antenna connector and pry up to disconnect it.
-
-
-
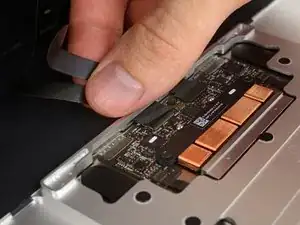
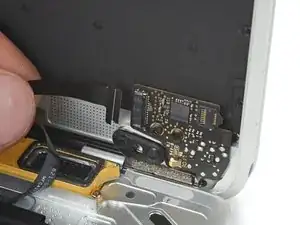
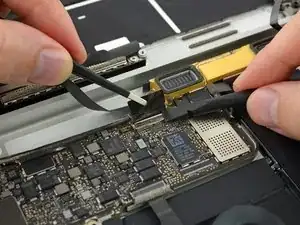
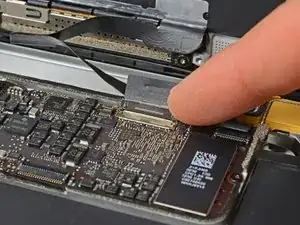
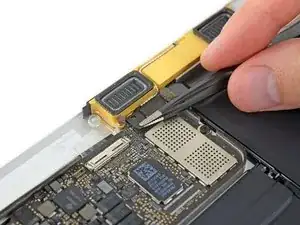
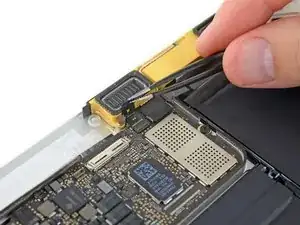
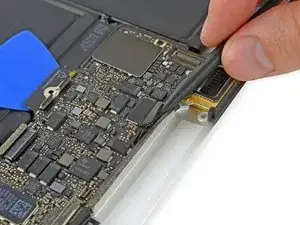
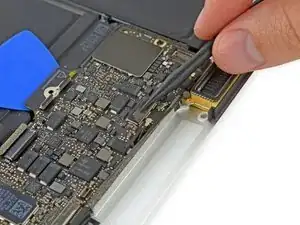
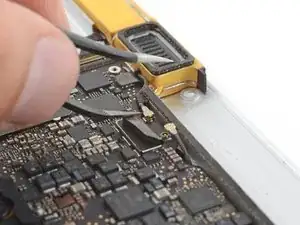
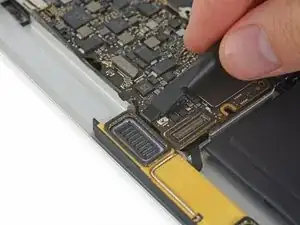
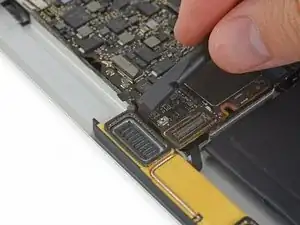
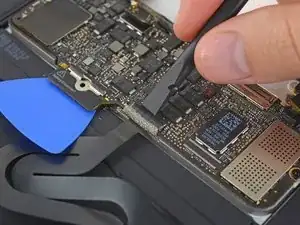
Use a spudger to disconnect the left speaker cable connector by prying it straight up from the logic board.
-
-
-
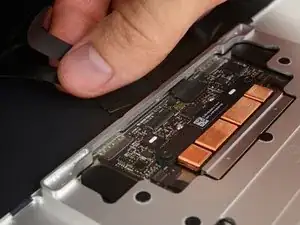
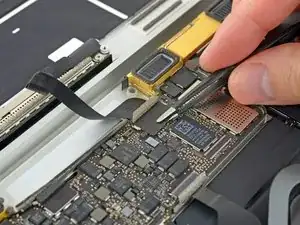
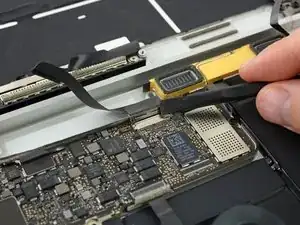
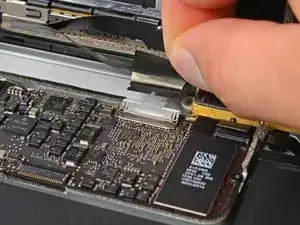
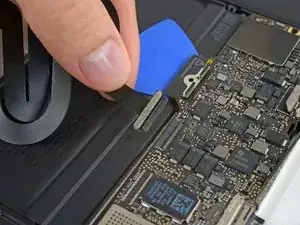
Disconnect the trackpad cable from the logic board by gently pulling it straight out of its connector.
-
-
-
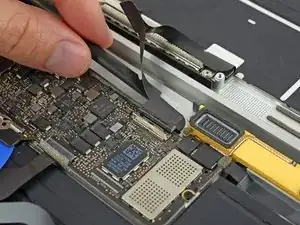
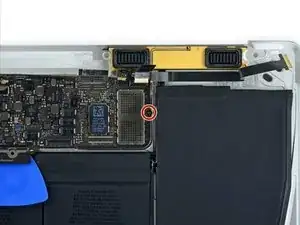
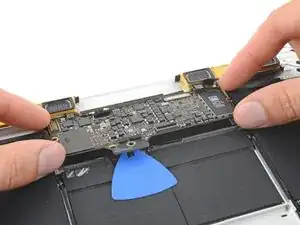
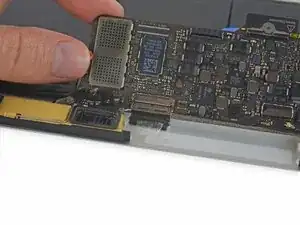
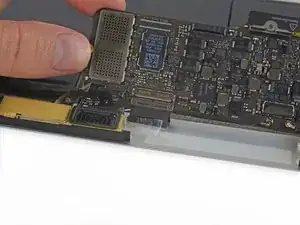
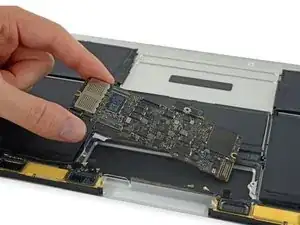
Flip up the front edge of the logic board.
-
Lift and detach the EMI tape securing the logic board to the lower case.
-
-
-
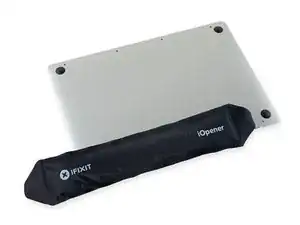
Prepare an iOpener and heat the lower case directly beneath the left speaker, in order to soften up the adhesive securing the speaker.
-
-
-
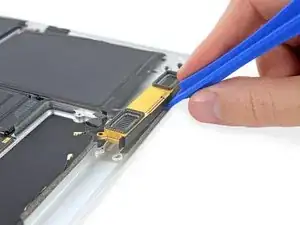
Use a plastic opening tool to pry under the top edge of the left speaker, and separate it from the lower case.
-


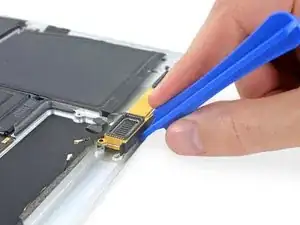
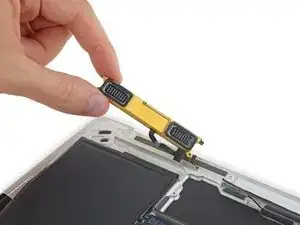
To reassemble your device, follow these instructions in reverse order.

IMPORTANT. You’re not removing the bottom, yet. This step is solely to separate the panel from its clips, permitting inside access.
Chris Leeds -
The screws go in tangent to the curve of the case. If you aren’t used to handling small hardware try turning the screw counterclockwise while you feel for the hole until you feel it drop, that means the threads have aligned. It takes only light finger torque when they are threaded correctly
abscate -
Can you please show a picture of all the screws, and where they go? My table got bumped and all the screws stuck to the lid magnet on the MacBook. Gaaaah! Thank you!
TwiddledUp -
A few comments before you start, from me just after I finished.
1. The "adhesive remover" is acetone. Handle it as you would acetone. I'm somewhat annoyed at iFixit that they treat us like kids. Tell us what things are and why they are dangerous.
2. There are two ways to do this removal. One where you remove the logic board, and one where you don't. The instructions here are for removing the board. If you don't remove it, I think the danger is that you damage it while removing the battery, either because of force involved, or that you platter some of the acetone on it. The danger if you do remove it is that it involves removing many very fragile cables. You will surely damage some, the question is only if you damage something important. So take a choice, neither is very good.
(i'll continue below)
Michael Lachmann Tamarlin -
3. When you get to the battery removal step, you are supposed to just put "a few drops of ACETONE", and let them act for 2-3 minutes. That did nothing in my case. I can't give you very good advice on how to do it well, since I didn't. But I drowned it in acetone, and let it act for much longer, and it still was very hard to remove. I think I damaged a battery. Lucky that it was totally empty. I would also prepare another pair of gloves -- they get covered in disolved glue, which the becomes sticky again.
4. When inserting the battery, take especially care to align the hole in the board of the battery with the round screw hole. If these don't align, you won't be able to close the computer.
5. I wish they did more explicit reverse instructions, especially on some of the steps, since some don't reverse very cleanly. Check this video for some of those: https://www.youtube.com/watch?v=FKbb_el6....
6. You don't need to reverse the step of pressing the gold button! After installing the battery, it should work.
Michael Lachmann Tamarlin -
Is it necessary to REMOVE the battery if I’m just replacing the screen?
Jeff Rutkowski -