Introdução

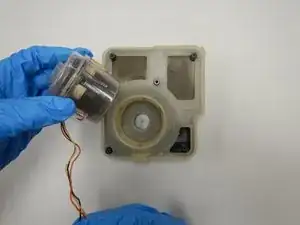
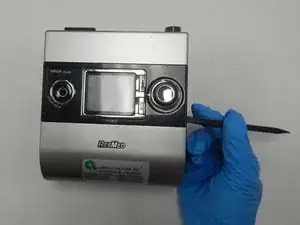
The ResMed S9 VPAP Auto is a medical ventilator, commonly referred to as a VPAP (variable positive airway pressure machine). This guide will direct you to access and replace the blower within the device. The blower is used to cycle air through the device, circulating air through the filters and blowing the air through the hose and to the user of the device. When the blower malfunctions, the device will not be working. There will be no circulation through the filters and through the device. Replacing the blower with a new or functioning one will completely fix the problem. For more information on the device, go to the manufacturer’s home page.

While removing the top panel to access the motherboard, be careful not the apply pressure to the side of the control knob. It has been known so snap off due to an impact or to pressure.

  1. bhEdTknQqT4TBOAG
    bhEdTknQqT4TBOAG
    oYUVDGKijp5S2ZEt
    • Flip the device upside down.

    • Use a T3 Torx screwdriver to remove the screw in the corner.

    • Each screw in this guide is a 1.2 mm Torx T3.

    My S9 (serial # 23121958241 REF 36005A LOT 440622) has t10 torx screws everywhere the guide calls out t3. So steps 1, 4, and 6, referencing t3 is wrong for my device and the info note that all screws are t3 is also wrong. If I had known, I would not have bought a t3 screwdriver.

    Alex Kirkpatrick -

  2. XCs22GUTR1wPFBof
    XCs22GUTR1wPFBof
    yi6iSBSKB3thfNOx
    • Use a spudger to pry off the back panel.

    Some more clarity on how to do this would help. I'm afraid of breaking plastic by prying the wrong direction or the wrong location.

    Bernie Pringle -

  3. jmh1ioAHruPkFdCV
    jmh1ioAHruPkFdCV
    DNmEmZZd2nGTPVC5
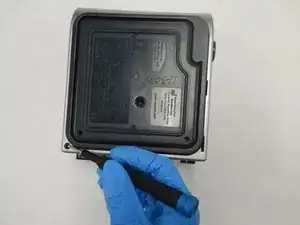
    • Use the spudger to pry off the front panel.

    • If you are having difficulty, press the two hooks to open that side of the device.

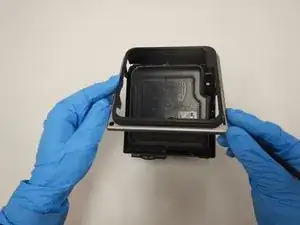
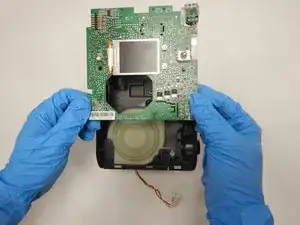
    • Remove the front panel to expose the internal components.

    Before popping off the top panel, gently pull the control knob up and off the rotating control switch stem to avoid breaking this switch. If the shells are being stubborn, look for little rectangular holes on the top back of the machine; the clips for the top panel can be detached by pushing through these holes. On Step 4 below, you can see the two rectangular cutouts in the circuit board top edge where these clips slide through and snap into the back shell of the machine.

    Joe B -

  4. h5VW3WXWpAtTQBJv
    • Remove the two screws on the circuit board with a T3 Torx screwdriver.

  5. 1YdyGyYRcJMKuFOi
    1YdyGyYRcJMKuFOi
    DxuWkHGmbYVVCnQV
    fEGy24NFBiL1EYlV
    • Remove the plug connecting the red, orange, and black wires to the control board.

    • The plug in the top right corner is accessed through the bottom of the device.

    • Flip the device upside down and use the tweezers to squeeze the plastic release for the remaining cable.

    • The control board will then lift right off, exposing the interior of the machine.

    If you look at the back plate immediately below the barrel power connector socket (and the blue and white international symbol for RTFM) there are two small rectangular holes that give direct access to the clear plastic tabs you need to release that part of the pc board. It takes a very narrow pair of tweezers to fit, but it is a lot easier to see, find and reach than going in from the bottom.

    Alex Kirkpatrick -

  6. GpmKUWEUPifdPBBO
    GpmKUWEUPifdPBBO
    qSxfWBV6MYkMfpCu
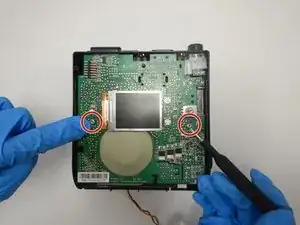
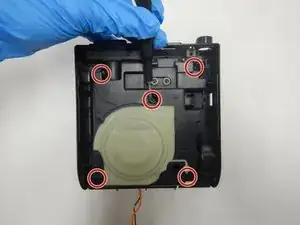
    • Remove the five screws from the frame using a T3 Torx screwdriver.

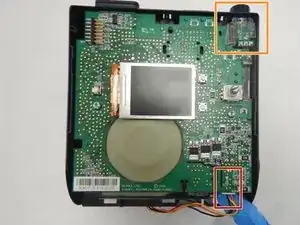
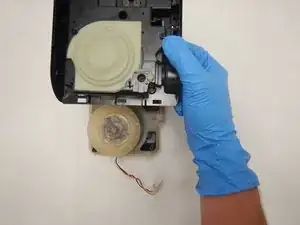
    • Lift off the plastic frame to expose the blower housing.

  7. DlI6lJpbivR1sQv4
    DlI6lJpbivR1sQv4
    cgP3SUWpoB4CXXEM
    • Remove the silicon ring around the blower.

    • Lift the blower out of the blower housing.

    Do you know the part number of the blower?

    wookiegroomer -

    Where can I buy the Resmed S9 replacement motor once we can’t open it to clean?

    luli_al -

    Actually- the motor in your picture is the wrong way! It is upside down! It only seals the correct (opposite) way.. !

    don lewis -

    What Don Lewis said. I put the blower in backward and the feeling of the reassembled cpap trying to pull the air out of my nose was a bit disturbing.

    Alex Kirkpatrick -

Conclusão

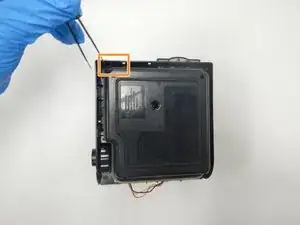
To reassemble your device, follow these instructions in reverse order.

Jesse Quimby

Membro desde: 21/09/20

399 Reputação

8 comentários

I didn’t see a link to the manual on this guide. It would be helpful as would the part number for the blower. Thanks!

Paul Streffon -

Where to buy the part?

Don Cislo -

1) Where to buy the replacement blower.

2) How to reset the blower hours counter so the “blower motor useful life” error goes away.

Please reply to qazii@yahoo.com with your advice. Thanks & God bless you.

Isf Qazi -

https://www.advanscpap.com/resmed-s9-cpa...

will sell you a new blower motor for U$185. Will even fit it for that price.

Dr Dalek -

I just completed this repair with a new blower motor from www.advanscpap.com and was very easy. They actually sent the complete lower housing with the blower motor which makes install simpler. Didn't need the last two steps of this tutorial. Also, a slight correction to this tutorial; the driver needed was a T10 and not a T3.

David Williams -

www.aliexpress.com

Larry Mantyka -

How do you reset the message "Motor Life Exceeded" after replacing the motor?

Jeff -

How to remove the warning note after replacing motor?

George lerning -